• Hi Guest !

    Welcome to the 500Eboard forum.

    Since its founding in late 2008, 500Eboard has become the leading resource on the Internet for all things related to the Mercedes-Benz 500E and E500. In recent years, we have also expanded to include the 400E and E420 models, which are directly related to the 500E/E500.

    We invite you to browse and take advantage of the information and resources here on the site. If you find helpful information, please register for full membership, and you'll find even more resources available. Feel free to ask questions, and make liberal use of the "Search" function to find answers.

    We hope you will become an active contributor to the community!

    Sincerely,
    500Eboard Management

New owner introduction and restoration project 500E

Good job Raikku! That´s Juho´s old car?
Why did you buy 500E badge? Car is facelifted and look like E500.

Yes,it is Juho's old car.
Do you know the car?

I bought a bunch of parts to have them if I ever consider to build it back to pre-facelift.
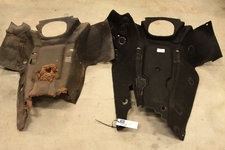
Bonnet and trunk lid for pre-facelift go same time painting with the rest of the car.

I just like to have this option in the future to return it back to original.
So I buy these parts like trunk badge as long as they are available and cheap.

The AMG back box came with the car.
The tips were polished and the rest got fresh paint.
Not sure if I like the look of it installed with the edgy tips...
Might end up selling it if I do not like the noise/look of it..

Off to finish the seat now... :)
 
Wow! Where did you score that AMG muffler?

:woot: :apl:

I figured you would recognize it, its the OEM muffler that AMG of Japan modified with the AMG tips and then they added the HWA part number. The other JDM 500e muffler has the part number hwa1244901721.

My understand is its a OE 500e muffler modified by adding the tips. Both part numbers were never in the EPC and there is no AMG 500e/e60 muffler in the EPC at all.

If you run the part numbers in the EPC without HW in front of the A, the first is a 230e muffler and the 2nd is a 260e muffler. Weird coincidence?
 
The only part of the 500E I don't like is the tacky exhaust pipes. I would like to find something that looks a little more sporty.
 
The only part of the 500E I don't like is the tacky exhaust pipes. I would like to find something that looks a little more sporty.

Supersprint offers for 400E/E420 models a back box.

I am very tempted to get this one,but with single wall round tips instead of the rolled tips..
 
What ever came of the idea (on page 1) for using the closed deck 4.2 block as a foundation for building a 6.0 M119? This is an idea that I proposed back in the old 500Ecstasy days but the idea was summarily shot down. It still seems like a viable idea to me since closed deck 5.0 blocks are relatively scarce while closed deck 4.2 blocks are by comparison a little more common. And it seems to me that a closed deck 4.2 block would still form a better, stronger foundation than an open deck 5.0 block would. I am sure that the water jacket structure is the same between both the closed deck 4.2 blocks and the closed deck 5.0 blocks so why not? I mean seriously, why would MB spend the extra money to create two different castings with two different water jacket structures when they had just gone through all the trouble of putting the 4.2 and 5.0 on the same block? (When they brought out the new short deck 4.2 based 5.0 M119.)

I would assume that with all of the equipment that you have access to, a sonic tester is there somewhere? So you can verify the cylinder wall thicknesses of both blocks?

I still think the best candidate of all for a 6.0 build is an older tall deck 5.0 and then you can use BOTH the crank AND rods from the 5.5/5.6 for a better rod length to stroke ratio! That's just me though as many folks don't seem to care about R/S ratios!
 
Last edited:
Hi,
* I still think the best candidate of all for a 6.0 build is an older tall deck 5.0 and then you can use BOTH the crank AND rods from the 5.5/5.6 for a better rod length to stroke ratio! That's just me though as many folks don't seem to care about R/S ratios!*

I did also, back in the "good old days" but now I know better, the 119 960's are more ancient compared to the short 400/500 119 97# 98#
than you would think, meaning MB did an almost new motor resembling the old one but sharing a very few parts.

Offcourse you have to belive the 400/500 block were same same, one bored to 92mm the other 96mm, thats a 2mm differance in wall thickness.
The crank only differs 2.5 mm i.e 5mm stroke, con.rods are the same, cyl. heads only w smaller intake valves also the same so you have them
to modyfie and play with.

I say NO to the 119 960 as you do not have any suitable intake manifold ( heads differ ) and many other issues, no air inj, no ports for the regenerated
crankcase or fuel gases etc. etc

AMG BRABUS CARLSON did stick to this block and I suspect that is what all E60 SL60 motors '96-'97 were based on, why invent the wheel all over again. Roger
 
The 6.0l engine will be built as soon as the car is assembled and running on its original drive train.

At least I got the seat cushion changed today and the seat assembled minus the head rest adjuster,of course.
 
Great, what else can we do up here in the northern Scandinavia? You have absolutelu nothing to do now when the snow has not
come yet, thank G for that. Keep up that good work and dream of the coming springtime and 6 litres awaik.

Just think of it Sweden 1 Norway 1 and now Finland 1 are there some more up ahead? Roger
 
Am I right assuming the heat insulating glass(code 592) has a bit golden mirror shine to it compared to regular green tinted glass?


Roger,how is your project coming along?
 
Last edited:
Some pics of the seat surgery...
I really HATE upholstery work.


proxy.php
[/URL]
Option list of this car:


So it is one of 1169 Japan versions...
And only 10% of all 036 did not have a sun roof..
I do not like sun roofs anyway,so I am not unhappy it is missing...
 
Quite well I'd say as the hollidays has taken it's toll. The complete manifold assembly is going to it's place a few parts away.
The next" unforseen" item will be the making of (partly) new upper harness, I was trying to fool myself to belive the 400 harnes
was good to go BUT. I will be using what can be used from the E50 harnes quite a lot acctually. The good thing here, the TBA was made
1998 so it had been changed. I will post a few pictures later on,,,Happy New 500E500 Year to everyone Roger

Ps I just saw your seat cusion, nice, I know of one owner here ( COBRA) who is in the need for the same.
The former owner of his '95 500 was, a 6'7" 300 pounder (w cheese ) you can say he flattened out that seat...
 
Last edited:
Supersprint offers for 400E/E420 models a back box.

I am very tempted to get this one,but with single wall round tips instead of the rolled tips..

If you do, make sure it looks like the one in this thread. The 500e muffler tucks up into a recess on the side of the spare tire well and the tips angle down. Most aftermarket mufflers don't do this and sit too low. You end up scraping the muffler body on everything.
 
If you do, make sure it looks like the one in this thread. The 500e muffler tucks up into a recess on the side of the spare tire well and the tips angle down. Most aftermarket mufflers don't do this and sit too low. You end up scraping the muffler body on everything.

The Supersrint for E430 appears to exit straight out of the muffler.

http://www.supersprintna.com/product-exec/product_id/4616/category_id/139/search_make/4/search_year/1996/search_model/215

Not to mention over $1k for a fricken muffler? It must come with a tube of KY jelly.
 
Last edited:
If you do, make sure it looks like the one in this thread. The 500e muffler tucks up into a recess on the side of the spare tire well and the tips angle down. Most aftermarket mufflers don't do this and sit too low. You end up scraping the muffler body on everything.
Yes - this is a tradeoff. The Remus (shown below) and similar muffers hang below the 500E bumper and will scrape when driving across dips entering/exiting some parking lots or side streets. Moderately annoying. However, I think I'd prefer that over cutting a notch in the bumper, as I've seen done on some cars. I figure it's easier and cheaper to replace a scratched muffler tip, than it is to replace and repaint an entire bumper.

:pc1:

proxy.php
 
The 6.0l engine will be built as soon as the car is assembled and running on its original drive train.

Before any naysayers chime in, I wanted to say that I know that the low deck 5.0 and 4.2 blocks have different casting numbers but I still remain convinced that it is for some other (probably stupid) reason, NOT because the water jacket structure is different. I look forward to the results of the sonic test comparisons between both blocks!

Ps I just saw your seat cusion, nice, I know of one owner here ( COBRA) who is in the need for the same.
The former owner of his '95 500 was, a 6'7" 300 pounder (w cheese ) you can say he flattened out that seat...

About 13 years ago, I met with a guy who was selling his wife's mid-80s 300SD. When I test drove it, I noticed how it's seat was severely flattened and commented to the guy: "Wow! This seat is destroyed! Whoever owned this car before you folks must have been enormous!" He didn't really give me much of a response. I decided to buy the car anyways because the price was right. We had to go to his wife's place of work because she needed to sign the title too in order to properly complete the paperwork. When we got there, I got to see who it really was that had crushed that seat! My, that was a big woman! One of the many times in my life that I suffered from foot in mouth disease!

Regards,
Eric
 
Eric, unless NO one say against I take it we belivers are right, right? When I first studied the 400 block w all that "meat" around the bores
it was obvious. Also, why did it become a 4.2? 4 or 4.5 or even a 3.8 we will never know.
.
Also, was the exessive ammount of material around the bores "accidental" or did they have the 6liter in mind? Roger
 
Went today to visit one of my mates who runs a breaker yard.

Scored a few useful parts like a pristine door pocket for the driver door,washer fluid tank(mine is really yellowish),ash tray,interior light and some other stuff..
We were talking a bit and turns out he also recently bought a 1992 500E...
Checked it out,really nice car that also gets a bit restoration work done.


And a picture of my Christmas present:

 
Oh lucky you, here in Sweden there are no 500eds left at the brakers, not even 400-420's that was a long time ago, that was at first
my intention w the 400 I bought for spareparts but it was too good to break. Collect what you need now before too long.

X-mas present, I have one Brilliant silber and one Rauch silber, I would like a Bornit one aswell......Roger
 
Roger,the 500E he has is his personal car,not a breaker car;)

He has quite a few normal 124s,201s,210s,202s,some 126s and 140s to break,this is the cars where I took the parts off..
 
Can someone please tell me where these parts come from I found inside the driver side door?


Found some surface rust in the trunk and engine bay.
So after wire wheel,chemical rust converter it is painted with etch primer.
Final paint will be applied after new year...


Those parts are from the window regulator. If the window works correctly, the regulator has already been replaced.
 
Those parts are from the window regulator. If the window works correctly, the regulator has already been replaced.
Glen, the window can still work normally with that piece broken and missing. I've found several of my cars like this. You need to inspect the regulator to see if that piece is intact. The front regulators don't often fail and require replacement, but this piece often breaks. It's a pain to replace, but it is available separately from MB. (It's the rear regulators that are usually either good or bad, with no "in between" state.)

036/199, that engine compartment looks very nice! Make sure you replace the transmission tunnel insulation while the engine & tranny are out, if you haven't already done so. This is easy and relatively cheap while the powertrain is removed, and impossible to do with the transmission in the car.

:star:
 

Attachments

  • trans_tunnel_insulation_both.jpg
    trans_tunnel_insulation_both.jpg
    160.7 KB · Views: 72
Dave, maybe our definition of "normally" is different :-)
LOL! True. :)

To elaborate: I've had several front windows that went up and down smoothly with no apparent problems, no noises, binding, etc. Only when I had the door panel removed for something else (i.e., removing the door check strap) did I find this plastic piece missing, usually broken and sitting inside the bottom of the door. It's just an extra guide piece. They are spendy for new OE and most of the aftermarket ones are junk brands, so be careful when buying new ones.

:pc1:
 
Raikku, FYI, the insulation is p/n 124-682-45-01 (superceded from the original 124-682-38-01). You'll need to cut holes for the HVAC foam drain tubes, and for the O2 sensor connector.

Have fun!

:banana1:
 
Thanks,Dave!
Order it thursday when my other parts hopefully arrive at the dealer...

Cleaning the engine bay and getting the heat shield for the steering box plus loads of bolts and nuts yellow plated will be fun.
If my hang over tomorrow is not too bad,I change all tie rods and idler arm bushing...
Seriously considering to open the steering box and check it.
 
Seriously considering to open the steering box and check it.
The steering boxes are a pretty rare failure. Only common issue is fluid leaks at the output shaft to the pitman arm. There's a "how to" thread with photos on this. If it's tight, I personally wouldn't open it up, other than pulling the end plate to change the output shaft seal. The input shaft seal rarely leaks, which is good, as it requires complete disassembly to replace (I've never seen one leak, and never had to do this - yet!)

:watermelon:
 
You can "check it" visually, without having to disassemble anything. You will see wetness on the output shaft of the steering box if there is a leak.

If it's just moist, I wouldn't bother with it -- it's not a bad leak. You'll know/see a serious leak right away.:banana2:

Cheers,
Gerry
 
Ordered new sealing rings for the steering box.
Also while installing the new tie rods and steering damper,figured out the idler arm has play.So ordered the repair kit.
All the stickers for the cross member panel are on order as well.

Heat shields for steering box and the center tie rod go next week for yellow coating.

Painted the front cross member panel today and cleaned most of the engine bay.


Wanted to see how bad the paint is,so did a paint correction on the rear quarter panel.
The result is ok,but not perfect.


Member Palmz dropped by today with his nice E420 and we were chatting cars a bit and found a few issues like vacuum leaks and a broken apart CPS on his car.

Spent most of last night with cleaning the engine bay better and polishing the driver side.


Next weekend it is time to replace all the control arms,bushings and wheel bearings on the rear axle as well as assembling the driver seat.

Does anyone have the part number for the sticker of the ZHM container?
 
Dave,thanks for your input!
Do you have a part number for the updated chain cover?

Crank journals are a bit scored,so they need a bit work.
Need to get the crank,rods,pistons and rings balanced this week that I can assemble the bottom end.
Want to assemble the engine still this year.

Hello Raikku.

Here is the PN on the later style timing cover: A119 010 03 17 replaced with: A119 010 04 17
For 119.974 engines from #001894 and up.


-a-
 

Attachments

  • M119 timing cover, late style.jpg
    M119 timing cover, late style.jpg
    109.6 KB · Views: 31
Does anyone have the part number for the sticker of the ZHM container?
The SLS reservoir? The sticker is not available separately. However, the price just went down substantially (30%+) on the entire reservoir. Just buy a whole new one, it comes with a new lid, dipstick, filter, and.... sticker. I need to get a photo of that for my website. P/N 201-320-00-14, MBNA list is $48.50, parts.com $34.80 USD:

http://www.parts.com/parts/index.cf...xt=201-320-00-14&action=oePartSearch&siteid=2

:spend:
 
Thanks again,Dave!

Just ordered it with the spring fastener,new nuts for the bracket and rubber grommet.


Will take a pic for you when I got it.
 
I am selling the AMG Japan back box,do not like the look at all.

Back box is used,bottom of the tips are scratched,otherwise fine.

Open to reasonable offers..
 
I am selling the AMG Japan back box,do not like the look at all.

Back box is used,bottom of the tips are scratched,otherwise fine.

Open to reasonable offers..

Refer to post #97 of this thread for a photo.
 
Nice job on the restoration! I had to look back at the early photos to see just how far you have come and how thorough you are being.

Thanks for documenting the process!
 
Few more parts arrived,like the hydraulics container and some bolts.

Still waiting for the rod and main bearings to arrive,should be here next week.

Want to have the engine assembled by the end of next week.

Also picked up the oil pump chain.
It is the same as on some BMW engines,so I ended up paying 8€ for the IWIS chain from my parts dealer.
 
Crank,rods and pistons balanced and ready to install.
Main and rod bearings arrive today,so I will have fun assembling the bottom end this afternoon:

proxy.php
 
Nice to behold, what do we see, what's new and was there anything out of balance? Do you also think of the lower part of the rod
as *clumsy* I guess it's made so to act as a counterweight? Crank, no need to regrind? Piston rings? Roger
 
Rods are not a state of the art design....:)
Def something I will change for my next M119 "high output" engine build..

The M119 bottom end with lighter pistons and rods can handle 7k rpm..

Top end needs upgraded springs,retainers and locks for sure,though...


But back to the stock M119:

Crank was a bit out of balance,but at least straight.
Some journals were scored,so needed a bit love.

Rods and pistons had also a bit too much weight difference(about 4g),now 1g difference.

The piston rings are in perfect shape,so I do not see any need to change them,end gaps are well within spec as well.

Should have the main and rod bearings in 1h,then start measuring the axial and radial play of crank and rod with bearings...

With the micrometer measure all main and rod bearing journals after the scored journals were fixed,perfect within the specs for standard size bearings.

For mains I use Glyco bearings,no need for the Merc color coded ones.

More pics and update on the progress follow within the next few hours...
 

Who has viewed this thread (Total: 3) View details

Back
Top