• Hi Guest !

    Welcome to the 500Eboard forum.

    Since its founding in late 2008, 500Eboard has become the leading resource on the Internet for all things related to the Mercedes-Benz 500E and E500. In recent years, we have also expanded to include the 400E and E420 models, which are directly related to the 500E/E500.

    We invite you to browse and take advantage of the information and resources here on the site. If you find helpful information, please register for full membership, and you'll find even more resources available. Feel free to ask questions, and make liberal use of the "Search" function to find answers.

    We hope you will become an active contributor to the community!

    Sincerely,
    500Eboard Management

RESTO PROJECT: M119 / W124 / E500 Engine Top-End Refresh

I just ran the car again for some additional errands. The oil leak at the back lower corner of the valve cover is pretty severe. I probably had 30-40 drips on my garage floor from the area just while idling the car so I could check the level on the transmission fluid a couple of times (sequentially for accuracy). It definitely needs to come off. Evidently I did a poor job with that lower back bolt. I thought I'd torqued it down quite well. Hood is up, airbox is off, and things are cooling down now. Sigh.
 
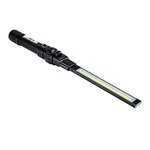
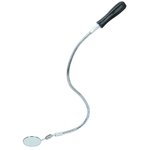
Before pulling the cover, can you sneak a mirror back there with a light, to see exactly where the source is?

:runexe:
 
My telescoping mirror was too large. With all of the wiring harnesses and such in the area, it was just too much to get it back there. And super small clearance between firewall and valve cover, anyway.

I just pulled the valve cover. It appears that the rear lower screw was VERY VERY loose. Evidently I could have forgotten to tighten it. I'd say it was snug, but definitely not torqued. So I think that is the problem with that one. The front corner, I need to do a little more investigation there.
 
Valve cover came off. Removed, cleaned and reinstalled gasket. Took about 6-7 tries to carefully refit cover. Think I got it finally. All bolts reinstalled with new copper washers, and ready to torque in the AM.

Felt around the lower corner a few times and from what I can feel, the gasket is fully in place. I also re-cleaned the gasket sealing surface all around the top of the head. Fingers crossed.
 
These things happen! It is good to have lots of MB copper washers on hand. For this reason I measure the common ones such as transmission banjo fittings, fuel pump check valve and valve cover washers. Then order in bulk from ebay and always have lots to hand. (Copper washers don't have to come from MB)

And having several sized cheapie inspection mirrors and pick up tools from fleabay definitely helps. Every time I install a valve cover gasket I go all around the edges with a mirror before tightening the bolts up. If it nipped the gasket it could require replacement which would suck.

I am going to check my S500s m119 valve cover bolt torque again now too. Second test. I hope none will have loosened again. It certainly isn't leaking a drip of oil which is good but I'd hate for a slow seep to start soiling the motor
 
Indeed they do, JC! It's the same process as new US Navy ships undergo with "shakedown cruises" and why our US Navy submarines go through the process of "angles and dangles" immediately after leaving on patrol. Sorry, too much information. It comes from living literally a stone's throw from the US equivalent of the UK BRNC.

I have a small bag of 100 Elring copper M119 washers, which I just opened when I replaced the covers the first time during this project, so I'm covered quite a while into the future. I tried to order another bag of Elrings but they were out of stock. Never hurts to have ~200 copper valve cover washers in one's stock .... especially for a fleet owner like yourself !!

The other common washers (I try to get Fischer + Plath when I can) I generally order 2-3x more than I need, indeed so I can have extras on hand. This came in super handy this go-round.

It is amazing as to the variety of copper and aluminum washers that are on the .036.

The modest leak at the FRONT corner of the valve cover (next to the SLS reservoir) is the leak that irked me the most. Once I discovered the relatively loose rear bolt, that made total sense. But I'd tightened the front bolt, and it still leaked yesterday. Enough to drip down onto the motor mount cooling pipe, and from what I could best tell it was on the edge of the cylinder head, NOT the timing chain tensioner (which is just below that area along with the smog pump, as you know). I did put a new gasket on the chain tensioner and carefully torqued it, so it should be fine. I could actually see oil on the edge of the cylinder head sealing surface that extrended a mm or so beyond the gasket, so that was where the oil was seeping from.

I'll be very careful to torque things this morning.
 
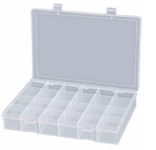
I have a 15-compartment storage box with assorted Mercedes/OEM copper/aluminum seal rings. It really should be a 20-25 compartment box as there are more than 15 different sizes I keep in stock. For the ones which are available cheap, I buy 50-100 like Gerry does. When inventory drops to single digits, I order more.

Gerry, FWIW, every time I've found oil at the chain tensioner, the source of the oil leak has always been elsewhere, running down via gravity from further up (usually related to the cam solenoids). Not once has it actually been the chain tensioner.

1600439584562.png
 
A final suggestion on the copper washer front, they should be pliable by hand. Eg a sump washer. If it feels hard and you can't bent it a small amount by hand then it may not do a great job of sealing. I find some new copper washers to feel like steel washers!!

Hence why more often than not I anneal them. Quick blast with a blow lamp and dunk in cold water. Immediate improvement is felt and the washer will actually crush and seal.
 
Yeah, I saw oil at the very edge of the cylinder head flat sealing surface, about 1 mm where it sticks out proud of the seal (when the valve cover is in place). This is ABOVE the chain tensioner, as you know.

If it continues to leak, I'll pull the cap, rotor, and insulator and check the cam seal and the solenoid area. But the oil seems to be coming from the SIDE of the engine, not the front. Dang, I hope it's not the cam seal on that side, though I can't imagine it would be leaking as many drops of oil as I saw on my garage floor. I don't how how cam solenoid/seal oil could drop onto the engine oil filter lid and below onto the motor mount cooling pipe.

I'm going to take the car out for another long run (to the county recycler to get rid of a LOT of accumulated fluids) of about 40-50 miles round trip, so this should get things nice and warm and pressurized and flowing.

Valve cover is replaced, and carefully re-torqued to @jhodg5ck's recommended 10Nm of torque all around. Checked the lower front and rear bolts a couple of times. I also lubricated the hood hinges and latch+grill pull lightly with synthetic grease.
 
the washer will actually crush and seal.
This is why I prefer the "crushable" (hollow) washers of the M117 valve cover to the flat washers that the M119 uses. The M117's actually are circular tubes, and they do very definitely crush and flatten when used. Even the M104 has a better valve cover washer setup than the M119, IMHO.
 
I drove the car about 80 miles today after I re-installed the valve cover. I am happy to say that BOTH oil leaks are GONE. It took quite some time to "burn off" all of the oil that had dripped down from yesterday, so it was smelly for a while, but enough time and distance burned 'er off nicely. No traces of oil at the front corner nor at the rear corner. The driver's side valve cover gasket seems to be sealed nice and tightly.

Right now I'm changing the oil, seeing as the car is nice and hot. She is getting 8 quarts of nice, fresh, thick, 15W-50 RedLine synthetic oil. The thicker, the better. The M117s and M119s LOOOOOOVE their thickish oil !!!

One other tiny issue that I'll give an update on a bit later, perhaps tonight.

Other than that, I call her good and happy. I will put the belly pan back on early next week. I cleaned it off when I removed it (it was VERY VERY thick with oil and accumulated dirt from the front crankshaft oil leak), but I'll clean it one more time before I re-install it.

Now I need to turn my attention to the hood pad, and to a complete paint buff and cleaning on the outside. She is very dirty.
 
One other tiny issue that I'll give an update on a bit later, perhaps tonight.
Appears that the clamps on the power steering "short hose" pump need to be snugged down. I'm getting a modest leak of power steering fluid. From underneath, it is leaking down to the bottom of the tandem pump, and dripping onto the top of the driver's side motor mount cooling pipe, and then down onto the sway bar....and then onto the ground. I have a stain on the cardboard about half the size of my palm, so it's not a tiny leak. None of the lines going into the pump are leaking, confirmed from above and below. Nor the "S" hose. Looks like the short hose area is wet at the hose.

Evidently in the weeks since I installed the short hose, the new length of hose compressed. I'm going to have to get down in there to turn the clamps -- they are very hard to get at from above. I'll take care of this on Monday night after work.

All is good with the engine oil leaks from the passenger side. Another drive today proved that the front and rear valve cover gasket leaks are gone. This short hose leak should be it, and then I can re-install the belly pan.

Gerry,

I don’t know what your weather is like right now in Maryland. I have had repeated hose leaks when the weather gets cold. When hoses get cold they tend to come loose. Metal shrinks if it gets cold enough allowing the clamps to get loose. This has happened to me on more than one Mercedes. Mostly on coolant hoses but I think it would apply to any clamped hose.

Once tightened again they should be good to go.

Just a tip from an Old Guy
 
Appears that the clamps on the power steering "short hose" pump need to be snugged down. I'm getting a modest leak of power steering fluid. From underneath, it is leaking down to the bottom of the tandem pump, and dripping onto the top of the driver's side motor mount cooling pipe, and then down onto the sway bar....and then onto the ground. I have a stain on the cardboard about half the size of my palm, so it's not a tiny leak. None of the lines going into the pump are leaking, confirmed from above and below. Nor the "S" hose. Looks like the short hose area is wet at the hose.

Evidently in the weeks since I installed the short hose, the new length of hose compressed. I'm going to have to get down in there to turn the clamps -- they are very hard to get at from above. I'll take care of this on Monday night after work.

All is good with the engine oil leaks from the passenger side. Another drive today proved that the front and rear valve cover gasket leaks are gone. This short hose leak should be it, and then I can re-install the belly pan.
Thank you for this amazing thread. I was very interested in the steps you outlined for changing the upper timing chain rails. I was waiting for you to drop the oil pan to see if you could find the plastic bits from your broken chain rail. Is there any chance that those bits could cause issues in the future?
 
Thank you for this amazing thread. I was very interested in the steps you outlined for changing the upper timing chain rails. I was waiting for you to drop the oil pan to see if you could find the plastic bits from your broken chain rail. Is there any chance that those bits could cause issues in the future?
No plans to remove the lower oilpan to investigate the chain rail failure. I can pretty much guarantee that there are pieces of the rail in the oilpan.

I am not worried about any problems in the future, because there is a screen that protects the oil pump pickup from anything that is caught in the oilpan. I had the lower oilpan off the car a few years back when I replaced the oil level sender, and pickup screen. No need to remove it again, at this point.

Maybe having double hose clamps are the way to go for that short hose. I haven't had a drop leak out since I doubled up.
I think I'm going to go back to four clamps. I will have to drain the PS fluid reservoir and remove the metal pipe that goes inside the hose, but I agree that the extra security was nice, and I didn't have any significant leaks in the years after I had the four clamps installed, as well. I do remember that I had to tighten the four clamps once or twice in the weeks and months after I installed them, which is probably the same case that I have now, but I think I'm going to add the extra clamps back in. I have them sitting right on the shelf next to my work area, so they are very close at hand.
 
I had the lower oilpan off the car a few years back when I replaced the oil level sender, and pickup screen. No need to remove it again, at this point.
Since you had the pan off not long ago, it was probably ok to not repeat that job. For anyone else, if the lower pan has not been off, it's a must-do. Every vehicle I buy with an M119, the first time I change the oil, the lower pan comes off. Always. Depending what I find in there may determine if the valve covers immediately come off next, or not...


I think I'm going to go back to four clamps.
FWIW, I've never once had leaks with "only" 2 clamps per factory. I think the issue is the clamps were not tightened fully. This is a lesson I have learned the hard way over many years. Hose clamps have to be stupid tight when put on brand-new hoses. Think about it... Mercedes didn't have owners come back 500 miles after delivery to tighten every hose clamp, did they? Nope. If the factory was able to do it, we should too. Since I've stared going gorilla on clamps on new hoses, I've had a 99% success rate and almost never need to go back and mess with them.

Side note: If possible, orient the hose clamps for the P/S short hose, and t-stat 90° hose, such that a flexible-shaft 7mm driver can access them without removing any other parts. That way if you do need to tighten in the future, it's much easier.

:banana1:
 
:update:

I decided to re-tighten the TWO clamps that I installed on the short hose. They were quite loose, which is a minor surprise as I'd tightened them quite well when I installed them. I got a driver down in there and I would say that I was able to turn the clamp screws AT LEAST 4 whole turns. On both clamps. One note is that this is a NEW length of short-hose that I cut (despite my existing one being about 5 years old and in good enough condition). So it only makes some sense tha a new length needs a bit of time and slight use (heat cycle) to compress, and this is why I believe I got the leak after the third or fourth time I drove the car, not the first time.

I tightened both clamps until I had a LOT of resistance, and then I cleaned up the area under the bottom of the tandem pump (motor mount air duct, sway bar, various other items). We'll see if this takes care of the problem. Will plan to drive the car a bit in the coming days.

If I get more leaks, I'll remove the reservoir and re-install with FOUR clamps.

No other obvious/major/minor leaks underneath, other than that. Main thing was that I got the valve cover on the passenger side all settled and sealing down.

A couple more minor things to do, then put all of the plastic and zoom tubes back on atop the engine, and we should be ready for the next go-around.
 
Everything is back together. I'll do another test run tomorrow. I saw some additional leakage on the cardboard today. It appears that it is still seeping, from the back side of the tandem pump. Drips on the underside of the tandem pump, where it mates to the mounting plate. All of the connections on the fender side of the tandem pump are confirmed dry.
 
This stuff will drive you to the crazy. There's not really any place for the pump to leak at the rear. Ideally, you'll need to de-grease/de-oil the pump and surrounding areas, and see if you can pinpoint the source. Oil can practically the laws of physics when it comes to leaks, and may be coming from somewhere else.

Can you tell if the drips are engine oil, or PS fluid? Or something else?

:banger:
 
It seems very light in both weight and color, and not as oily in color as motor oil. So I’m 80% sure that it is PS fluid. Don’t think it is SLS fluid as that is darker.

I just sat bolt upright in bed — now wondering if it is motor oil and could be a leaking cam seal from that side.

Crap. Now I’m not going to rest until I remove the distributor cap, rotor and insulator and look behind it.

I have REALLY looked all over the tandem pump and it is dry at all of the connections. I don’t think it is the SLS side of the tandem pump because the drips are on the bottom of the tandem pump where it touches the mounting bracket. This would be the back side of the pump. And the pump was NOT leaking prior to the top-end job. The area around the frame rail hose connection is dry, and the “S” hose connection at the metal pipe looks to be dry.

I looked and some moderate leaking happened despite tightening up the two clamps. And the clamp area didn’t appear to be wet last night after I tightened up the two clamps. I have not ruled it out, though.

Question — would the cam seal leak despite not running the car and rotating the cam?

I guess removing the ignition parts will tell me things quickly. If it’s not the cam seal, then it’s got to be the tandem pump.

I also believe the PS fluid level in the reservoir has gone down slightly. I’ve topped it up two times ever so slightly.

I will tighten the “S” hose connection just to be sure.

I need to check the other end of the connection of the “S” hose hard line as well.
 
Gerry, did you tighten the return tube snug to the reservoir... I know you used a new O ring last time, perhaps it shifted this time or isn't sealing properly. Those small bolts are hard to get tight....

On that note, my slow leak there is a result of the short hose. It isnt cut square on the bottom, and the lower clamp has moved a bit, not keeping things tight evenly down low. The upper clamp is stripped so I have no choice but to replace the short hose and clamps. I can live with the leak but I will not since I have the car apart anyway!
 
Even on my car that had leaking cam seals, the amount of oil dripping out was pretty minimal. It sounds more like a leak in the power steering to me.
 
The oil is very light both in color, and drippiness (viscosity). I would tend to agree that it is PS fluid. I checked the return tube at the back of the reservoir.

I may just remove the reservoir and start over with all of that, 4 clamps, etc. Sigh.
 
The oil is very light both in color, and drippiness (viscosity). I would tend to agree that it is PS fluid. I checked the return tube at the back of the reservoir.

I may just remove the reservoir and start over with all of that, 4 clamps, etc. Sigh.

There is an I ring pipe seal where the solid metal pipe meets the reservoir Gerry. If a new O ring was installed it should be OK but maybe worth a 2nd look if you think fluid is coming from behind the pump area.
 
There is an I ring pipe seal where the solid metal pipe meets the reservoir Gerry. If a new O ring was installed it should be OK but maybe worth a 2nd look if you think fluid is coming from behind the pump area.
It's a good idea and one reason why I am considering removing the reservoir and re-checking everything, and adding two more clamps to the short-hose like I had before. The o-ring at the rear return line was new a few years ago, and was in perfect condition when I unbolted the pipe from the reservoir. I will do a little more visual investigation, and pull the cap/rotor/insulator to ensure that it is not a cam seal leak (small possibility), and then concentrate on a removal of the reservoir and closer inspection of all hoses and connections to the pump and reservoir.

I didn't see any leakage at the return line when I looked at it closely last night. I am going to put my magnifying glasses on for forthcoming inspections. My very-soon-to-be 53-year-old eyes are not nearly what they used to be.

@gerryvz & @emerydc8 At 53 & 55 You Guys are just babies. Quit your bitchin. HaHaHa

PS: I wish I could get back that 20 years
 
:update:

I did a little more investigative work. I'm now 99% sure the fluid is indeed power steering fluid, and not engine oil nor SLS hydraulic fluid.

CONFIRMED that the rear reservoir return connection is dry, as are all of the connections on the fender side of the tandem pump. The "S" hose appears to be fine at both ends, as well.

Some judicious mirror work and some feeling around for liquid, appeared to find a seep at the top connection of the "short hose" where it attaches to the metal pipe at the bottom of the reservoir.

I'm going to remove the reservoir, re-cut yet another new piece of short hose, use a new aluminum washer at the metal tube (where it screws into the reservoir's platform), and add the four clamps. This should get it sealed for good. Fortunately I have a couple of new aluminum washers that I ordered from MB late in the process; I had re-used my original aluminum washer at the metal line that goes inside of the short hose when I re-installed the reservoir. This re-used aluminum washer may be the culprit.

It is the only situation in the entire job where I re-used a crush washer or rubber seal. By the time the new aluminum washers came in from MB, I didn't want to disassemble the reservoir again to hassle with it.

I will report back, but I'm about 80% sure I found the leak. It's a seep directly from the reservoir/short hose downward through/along the back of the tandem pump, and then dripping down.

More soon.
 
I spent the entire afternoon today removing the power steering reservoir, and checking the camshaft seal for an oil leak. Cam seal was 100% tight as a drum, so that was eliminated. I took a little time to re-route the distributor wires a little more efficiently, as well.

I removed the metal pipe from the reservoir, and replaced the aluminum crush washer with a new one. The old one was pretty beat up. Loosened both of the short hose clamps and cranked them very tight upon re-assembly. I removed the tandem pump pulley and loosened the serpentine belt to get better access/angle to the short hose clamps for tightening.

Buttoned things up and went for an 8-mile test drive before things got dark. Zero leaks after letting the car sit for a couple of hours after returning. Still burning a little left-over oil from the valve cover leak off the rear of the engine area, but zero oil leakage since I re-seated the valve cover.

I will re-check things tomorrow for any drips/seeps/leakage, as I have cardboard under the engine. If no leaks, one more longer test drive, and then the belly pan goes back on and the job is done.

I took a couple of photos and will post them on Sunday.

I've driven the car about 100 miles since completing the bulk of the work. Tonight I spent an hour cleaning up all of my tools used for the job. It was an incredible collection of hand tools that were used !!!
 
Last edited:
:update:

ZERO leaks on the cardboard I'd placed under the car last night. Not a SINGLE DROP of anything.

I'm going to clean the belly pan (both sides) one more time today, and re-install it.

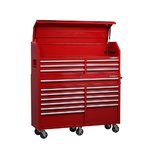
My birthday present from Laura arrived yesterday, a couple of days early. So now I have to make like a hermit crab, and move from one shell to a larger one.

gloss-red-husky-tool-chest-combos-h61ch6tr12r-64_1000.jpg gloss-red-husky-tool-chest-combos-h61ch6tr12r-c3_1000.jpg
 
It's a good idea and one reason why I am considering removing the reservoir and re-checking everything, and adding two more clamps to the short-hose like I had before. The o-ring at the rear return line was new a few years ago, and was in perfect condition when I unbolted the pipe from the reservoir. I will do a little more visual investigation, and pull the cap/rotor/insulator to ensure that it is not a cam seal leak (small possibility), and then concentrate on a removal of the reservoir and closer inspection of all hoses and connections to the pump and reservoir.

I didn't see any leakage at the return line when I looked at it closely last night. I am going to put my magnifying glasses on for forthcoming inspections. My very-soon-to-be 53-year-old eyes are not nearly what they used to be.
Welcome to the optically challenged club, or the non PC "blind as a bat" organization. Apologies to any flying mammals or Louisville sluggers. I also doubt the leak is from the cam adjusters. I hope it's an easy fix. That would only be fair after that exhaustive service project.

drew
 
Welcome to the optically challenged club, or the non PC "blind as a bat" organization. Apologies to any flying mammals or Louisville sluggers. I also doubt the leak is from the cam adjusters. I hope it's an easy fix. That would only be fair after that exhaustive service project.

drew
Cam was dry as a bone both on the new adjuster, and the cam seal at the distributor.

Since I don't have any further leaks, I'm going to drive the car a bit today, get it nice and hot, and let it sit for a few hours one more time with cardboard underneath it. If nothing, belly pan is going on.
 
Didn't end up driving the car yesterday at all. But I took it out this morning on a few errands, for a total of about 12 miles. Other than a little continuing oil burn-off (from the splatters at the rear passenger side cylinder head from the valve cover gasket leak mentioned above), there are ZERO leaks. No leakage from the tandem pump area, and no oil leaks from the valve covers.

I also filled it up with a fresh tank-ful of Shell V-Power 93 octane Super gas. Reminds me, I need to put a bottle of Techron into the tank. It was the first tank of gas I'd put in the car since December 27 of last year. I really need to drive the car much more, and I will. Even this winter, when the roads are dry.

It's sitting in the driveway, cooling down, with cardboard underneath the motor. This afternoon I'm going to put the car up on ramps, do a final inspection and cleaning of everything from below, and re-install the belly pan.

It is so nice to have ZERO CEL every time I start up the car. I lived with the damned CEL for some years because of the two codes (air injection and EGR) due to the broken vacuum lines.
 
Final Wrap-Up

I let the car sit in the driveway for s 7 hours yesterday, with cardboard under it, cooling down from hot. Zero leakage anywhere -- not even a single drop of any fluid. I drove the car up on my ramps, did a final inspection of everything, and a wipe-down, and re-installed the belly pan.

Now it's time to start cleaning up the shop and getting things organized. Compounded a bit by the new birthday present I received, but I'll power through it :)

Cleaning up from the job itself, I leave you with these final images that I took.

First, from a couple of days ago -- removing, revamping and re-installing the power steering reservoir, to fix the significant seepage at the short hose under the reservoir.
IMG_1255.jpeg IMG_1256.jpeg IMG_1258.jpeg


And checking the cam seal area, after driving the car for around 100 miles after it was installed. Tight as a drum.
IMG_1257.jpeg


As I was taking these photos, a large, 8-point white-tail buck (Odocoileus virginianus) decided to pay us a visit. The first buck we'd seen on our property all year. He was quite a majestic one. Would have made some VERY nice venison and/or deer jerky If I'd had my .308 Winchester handy. I was able to get within 50 yards of him — which would have been an exceedingly easy shot — before he turned tail and ran down into the woods behind my house. I'd put him at about 3-4 years old, judging by his body mass (WAY over 200 lbs), antler spread, ear size, and antler-base-to-eye ratio.
IMG_1264 2.jpeg


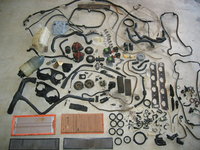
And here are some images of what was left over from the job.

First, a few photos of all of the individual parts — and pieces of parts — that I replaced during the course of the five months. How many of these parts can YOU identify properly ?!?!?
IMG_1267.jpeg IMG_1269.jpeg


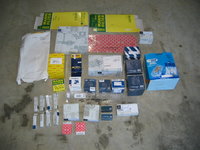
Here are all of the various part boxes that things came in. No URO, Trucktec, FEQ, Hamburg Tech, Meyle, or Febi anywhere to be found.
IMG_1270.jpeg


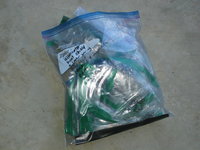
And all of the individual MB parts bags that individual parts came in from my MB Annapolis orders, all stuffing a lower wiring harness MB parts bag almost totally full to the gills.
IMG_1254.jpeg IMG_1273.jpeg IMG_1274.jpeg


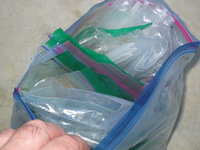
And lastly, a collection of all of the Ziploc bags that I used to catalog and identify parts as I removed them from the car — and re-install them. Again, a large freezer bag, almost totally stuffed full of smaller Ziplocs. I wrote on each bag where the parts came from, any size of the Allen key or wrench/socket used, the locations of any larger or smaller items (for example specific valve cover and water pump bolts), and any other info that would come in handy for re-assembly.
IMG_1275.jpeg IMG_1276.jpeg

And with all of this, I will call the job a wrap. For sure this time.

Hopefully this thread helps and/or inspires other members to refurbish the soft items in their engine compartments, if and when needed.
 
Thanks Gerry,

Your documentation on this project was superb.:thankyou:

I for one will be referring to it a lot when I start my top end re-furb. I hope I do not expect to go into it as extensively but I have a lot of the top end stuff same as Gerry.

lol

PS; That is a beautiful Buck, I'm glad you only shot it with your camera.:giggle:
 
Last edited:
:update:

An update from Saturday, with about 3 hours total time spent out in the shop.

I installed the new "MOT" (purge or regeneration) valve onto its bracket, and then installed it back into the car. The rubber MOT valve surround is smaller than the original one that came with the car, but it is 100% compatible with the bracket and was a direct fit. In the photos below, you can see the new valve being fitted onto the bracket, in preparation for installation.
View attachment 111967 View attachment 111968 View attachment 111969


Fitting the valve and bracket into place, and tightening the two 10mm nuts that hold it to the fenderwall.
View attachment 111970 View attachment 111971 View attachment 111972


Here's what the valve looks like fully re-installed.
View attachment 111973


I then cleaned off the connector, and re-installed it onto the top of the valve.
View attachment 111974


The next job was to complete a couple of steps that I hadn't yet done — re-connecting the final couple of pieces of the accelerator cable linkage together, and re-installing the vertical spring. The first photo shows the vertical linkage piece that connects the throttle cable plate's pivoting assembly to the intake manifold's pivoting assembly. I also hadn't installed the third small bolt that held the throttle cable plate to the intake manifold, so I also did this, as you can see in the second photo below. The third photo shows the vertical spring that goes between the two pieces. This spring is a bit tricky to fit, but some long needle-nose pliers make the job go much easier.
View attachment 111975 View attachment 111976 View attachment 111981


Next, I turned my attention to the new Automotive Lighting (nee' Magneti Marelli and/or Bosch) turn signals I'd recently ordered, and received. Below are a couple of direct comparisons of the left side lamp, and labels. As you can see, the "new" units made in the Czech Republic are of FINE quality, and every bit as good as the originals.
View attachment 111977 View attachment 111978 View attachment 111979


More interesting, you can see what 25 years of sunlight has done to the orange reflector in the outler lens itself. This right here is a good case for freshening up the front end, and made the $130 investment for the new lenses TOTALLY worth it.
View attachment 111980


Pulling the light bulbs out of the old turn signal assemblies, they looked old and quite tired. So I grabbed some of the bulbs in my parts stock, as shown in the first photo below, and installed them.
View attachment 111982 View attachment 111983 View attachment 111984


Here are a couple of views of the right-side lenses ... old faded and new crisp.
View attachment 111985 View attachment 111986


And, a few shots of re-installing the new bulbs, and then then lenses, back onto the car.
View attachment 111987 View attachment 111989 View attachment 111990 View attachment 111991


Here's what the new, crisp, sharp turn signal lenses looked like, installed. Quite nice.
View attachment 111992 View attachment 111993


The next step was to install the fuel injectors into the intake manifold, in preparation for the installation of the fuel rail. I had gone back and forth on this, at first decided to install the injectors into the manifold, then opting to install them directly into the fuel rail.....but then after more reading and thought, I decided to push them into the manifold, and then re-install the fuel rail on top of them. The injectors take a fair bit of effort to push down into the manifold to their proper depth. I used hand pressure, with a folded-up piece of lint-free towel (fourth photo) to press each injector into place with the heel of my hand. I used a small amount of silicone grease on each injector's o-ring and the intake manifold injector hole to help ease installation.
View attachment 111995 View attachment 111996 View attachment 111997


Here's what an injector looks like, properly seated into the intake manifold.
NOTE: Early cars through about mid to late 1993 have a separate, plastic piece that presses into the intake manifold that the injector slides into. Later cars from late 1993 through end of production have a modified manifold that eliminates this piece; the injector slides directly into the manifold.
View attachment 111998


Here is what the injectors look like, fully seated into the manifold on each side. The injectors can be rotated in their holes, as needed, once mounted.
View attachment 111994 View attachment 111999


Next up — installation of the upper wiring harness. I pulled the harness out of storage and examined it carefully, taking an inventory of its condition and what needed to be mended or fixed. A few things came to light: one of the metal clamps was bad (shown in the second photo below), and the two plastic connectors at the cam adjuster solenoid connections had broken. Fortunately I had spares of all of these, so it was not too difficult to repair.
View attachment 112000 View attachment 112001


Here are a couple of photos of the label on my wiring harness. I had replaced it many years ago (around 2005), when I was living in Portland, Oregon.
View attachment 112012 View attachment 112013


First, replacing the clamp.
View attachment 112003


Then I moved on to replacing the plastic connectors for the cam solenoids. I cleaned the pin bushings after extracting them from the broken pin bushing housings.
View attachment 112004 View attachment 112005 View attachment 112006 View attachment 112007 View attachment 112008 View attachment 112009 View attachment 112010


And, the refurbished pin bushing housings for the cam solenoid connections.
View attachment 112011


Next, I grabbed the upper wiring harness and loosely fit it into position. I had to work its larger plug end through the hole in the inner firewal where the lower wiring harness and the heater hose go through, but this wasn't too difficult...
View attachment 112014 View attachment 112015


The next few photos show me wrestling the harness into general position where it needs to be.
View attachment 112016 View attachment 112017 View attachment 112018


Moving the ETA cable into position...
View attachment 112019


Then, I moved the fuel rail into general position on top of the wiring harness. I took a Q-tip with a little motor oil on it, and carefully and lightly swabbed the upper o-ring of each fuel injector with motor oil, to ease its sliding into the fitting on the fuel rail. The third photo below shows the clips, and the small water bottle cap-ful of motor oil that I used as a small oil container for the Q-tip.
View attachment 112021 View attachment 112022 View attachment 112023


Moving the fuel rail into final position above each fuel injector, and pressing the rail down evenly across it onto the injectors. You should generally hear a small "click" or "pop" when each injector's o-ring fits into the fitting on the fuel rail.
View attachment 112024


The photo below shows a seated injector in the fuel rail.
View attachment 112025


And once the injectors are fitted into each port on the fuel rail, then you can add the clips. The clips slide into a small slot onto the top of each injector, and around the rounded fitting on each rail. There is a rectangular projection on one side of each injector (you can see it in the photo directly above) that fits into a slot in each clip.
View attachment 112026


And here is the fuel rail, in place, with all clips installed.
View attachment 112027


I fitted each fuel rail hold-down bolt into its attachment point in the top of the intake manifold, but only screwed each bolt 1-2 turns into the manifold.
View attachment 112028 View attachment 112029 View attachment 112030


For the passenger side of the fuel rail, the upper wiring harness's plastic "J" tube needs to be fitted on top of the fuel rail connection point. This is just two of the three bolts on that side. So I removed those bolts, and as shown below, moved the upper harness "J" tube into place, and re-installed the two 10mm fuel rail bolts that hold it down. I did not tighten anything down, yet.
View attachment 112031

At that point, Laura came out to the shop and let me know that the homemade pot of chili that she'd been cooking all day, and the scratch-baked cornbread she'd just made, were done, and we were ready for dinner. So, I somewhat abruptly knocked off for the day.

More to come.....stay tuned !!

View attachment 112032
Whoa—nice comparison shot of the faded corners next to brand new ones. The lighter yellow next to the fresh, darker almost orange, is a pretty stark difference. I’d been leaning toward getting some prefacelift Euro ambers for my post facelift 94, because I wasn’t liking the light yellow reflectors. But seeing what brand new ones look like, it’s almost like the perfect balance between what I like about prefacelift and post facelift. Looks like I need to find myself a pair!
 
I continue to take the car out for occasional weekend trips and the like. Yesterday I drove the E500 ~40 miles each way from Annapolis to National Harbor (across the Potomac River from Wash. DC and Virginia). I've got about 700 miles on the car since completing the work last fall.

Everything is tight and right. Inspecting the lower plastic panel, ZERO leaks anywhere. No check engine light or other issues. Car idles and runs like an absolute top, and goes like a scalded cat. Plenty of time at 100 MPH, and no issues whatsoever.

Am getting a slight squeal from the front right brake disc upon light braking, but have the replacement ATE discs (different part numbers for the later cars) and new AKEBONO Yurro pads ready. May try to get to that job this afternoon/evening, but definitely this week. In nearly 18 years, I've never replaced the front discs, and I noticed when I was doing the Top-End work that they had small ridges and (finally) needed replacement. Which is great, because I've had those Akebonos ready for many years to install when I did the discs. My AMG Monos will be very happy at getting less dust. Which reminds me, I will need to clean those front wheels before re-installing them.

These cars really like to be at 80+ MPH, and come into their own at those speeds.
 

Who has viewed this thread (Total: 3) View details

Back
Top