After some experimentation and careful measuring, I decided the best way to get everything aligned was to index off the cam lobes and then start from scratch.
First, I had to eliminate all the holes in the cam flange so I would be able to drill new holes. One of the biggest challenges was the fact that there are 7 holes in each flange, 5 of which need to be relocated in order to get everything aligned correctly.
In some cases the new holes I needed to drill would have intersected existing holes, so step one was plugging the original holes. To do that I threaded M7 bolts into the 3 original bolt holes, then I drilled and tapped the other 4 holes to the nearest common size bolt and threaded bolts in each of those. I secured all 7 bolts with red Loctite, and then took the cams to the lathe and machined the flanges smooth.
Side note. These engines use M7 x 1.0 fasteners in a few places. M7 is an odd size. They're not commonly stocked by most hardware suppliers and tend to be far more expensive than similar M6 or M8 fasteners. I ended up using some extra factory cam cap bolts to fill the sprocket bolt holes. When it came time to tap the sprocket bolt holes, I combed through my inventory of hundreds of thread taps and came up with only one M7 tap. Fortunately it was in good shape, but I'll order a couple more. I also ordered up a box of M7 bolts to add to my inventory in case something like this comes up in the future.
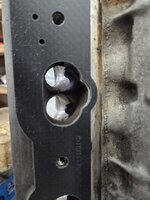
In this first picture you can see where I'd experimented with one bolt in one hole. I was happy with that result, and decided to proceed with the other 6.

Once the thread locker was cured, I cut the bolts off with an angle grinder, and then chucked the cams in the lathe to turn everything smooth.

It might not look smooth and flat in the picture above, but it is. The threads of the bolts will have a valley where the minor diameter meets the flange face. The apparent "step" in the face is around 0.002" deep where I faced the flange smooth. Not enough to cause any issues.
With that done I installed an original exhaust cam into a cylinder head that was bolted down to my milling machine table. I installed a lightweight spring and a lifter in one bore, with an extended dial indicator measuring the lift on the #1 cam lobe. I secured a degree wheel to the end of the cam, and then used the dial indicator and degree wheel to find the exact position of maximum lift, and then I clamped the cam in that position.
I then used a pin that was the exact diameter of the aligning pin hole mounted in a right angle head on my mill to adjust the position of my mill table to align perfectly with the cam alignment pin hole.
With that in position, I locked the mill down and swapped the original exhaust cam out for the new, modified intake cam that will replace it. I used the degree wheel and the dial indicator to again find the position of maximum lift, and clamped the cam down. Now, since the milling head was already in the exact correct position for the alignment pin hole, I just drilled the hole.
I then proceeded to do the same thing for each subsequent feature on the flange. I had knocked the small dowel pin out of the cams at the start, and I simply reinstalled the dowel in the new location and secured it with green sleeve retaining compound. The whole process took a few hours, but when it was done I had an intake cam that had all the correct holes necessary to bolt a standard exhaust timing sprocket on with no modifications. Because the distributor rotor indexes off the exhaust sprocket, the ignition timing is now also going to be correct.

I have one cam finished, and the other just needs the new holes drilled. I will hopefully have that done today. I expect to have the cams in the motor tomorrow and with any luck the engine will run.


