Preamble-
Sunroof repair is something many people avoid (myself included until recently) because of fears of complexity and not having the ‘know how’ to tackle it in the first instance. The FSM does contain some PDF’s on the subject but IMO the instructions are not very clear or easy to follow.
As many of our cars are 25+ years old this task is very much overdue and I’m betting 99% of w124’s out there have never had the sunroof properly overhauled like this. Lubrication will be discussed in full – but this DIY will show that lack of lubrication is not the only issue these sunroofs suffer from.
The moving parts can and do (nearly always) fall off inside the mechanism which also jam it up and prevent smooth operation. Applying the specially formulated lubricant- Gleitpaste externally will not help matters much at all as the only proper way to lubricate these roofs is to remove both ‘lift arms’ from inside the mechanism.
The purpose of this DIY is to show clear, pictorial step by instructions on how to completely dismantle, lubricate and service your W124 Sunroof fully and properly. This DIY is applicable to all W124 Saloon models (Not just the E500E) and also C124 Coupe models. I have already done this before on my 1992 500E – this time I am carrying out the refurbishment on my 1994 320CE.
This is not a difficult task and should not be feared. Refurbish, use and enjoy your Sunroof with confidence that you can repair it in your own garage!
Prerequisites before your begin this DIY-
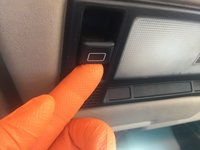
For the purpose of this DIY your sunroof should be somewhat functional. If the Sunroof does not function at all when pressing the switch then you will need to do some basic troubleshooting first including checking the Fuse in the main Fuse Box and that the motor has power. The motor is located in the trunk near the power antenna – the trunk trim liners will need removed to access it.
If the motor can be heard moving when operating the switch but the sunroof does not move – it could be damaged plastic gears in the motor itself or a broken cable / component inside the sunroof.
In the instance of a dead / silent motor you might try using the white plastic nut on the motor itself as a manual override for moving the sunroof. This is a basic first test let you know if the Sunroof will move and the problem lies within the motor or associated circuitry. I have taken spare lift arms from parts cars by using just this white plastic nut and it works just fine – although much slower!
If the motor does work and movement can be heard inside the roof – but the lid stays closed then there are much bigger problems. At the time of writing the only way to repair this is to pull the whole headlining and sunroof cassette complete. I will be repairing such a case on another w124 of mine in a couple months so the additional steps will be detailed in this DIY in due course.
As with all my DIY’S I try to make the instructions clear and to the point. This DIY will be posted in several Parts as I carry out the refurbishment on my CE over the coming week. All aspects will be covered in a stage by stage basis as the DIY continuous with top tips to improve the Sunroof and it’s reliability for many years to come.
These sections will be posted as;
Part 1- Disassembly of the sunroof and removal of both lift arms
Part 2- Removal, cleaning, lubrication and re-fitting the Sunroof Cable
Part 3- Cleaning,Inspection of lift arms and ordering replacement parts
Part 4- Refurbishing the lift arms- assembly tips and lubrication
Part 5- Re-assembly and final adjustments for smooth operation
Last edited:


