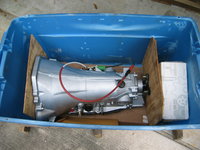
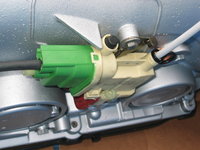
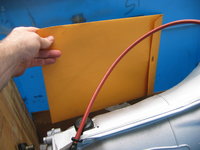
Well, as I'd mentioned on another thread, last Sunday my wife's 1995 E320 wagon transmission died, with 203,200 miles on the odometer. It died suddenly, losing all four forward gears. Reverse worked fine.
This is the classic 722.3 "B2 piston failure" that is very common to the 722.3 transmission. The transmission can be fixed fairly easily by removing it from the car and replacing the B2 piston and associated parts, which are accessible from the exterior of the transmission.
However, with the overall mileage on the car, and the fact that I'd just rebuilt the top end of the motor, I decided to just replace the transmission with a professionally rebuilt unit, rather than to apply a "Band-aid" approach by fixing just the B2 piston assembly. Either way, the transmission was going to have to come out of the car.
I decided to go with Sun Valley Mercedes Transmission, located in Van Nuys, CA. A couple of conversations with Marc there helped along my decision. On Wednesday, I had Marc begin a build-up of an existing core unit, and a progress report on Friday indicated that the transmission would be done and ready for shipment either at the end of the day on Friday, or on Saturday. Once shipped, it will take 2 (at the outside 3) days to get from Southern California to Houston.
My local mechanic quoted me $2,500 to rebuild the transmission (if I removed it), and $2,700 to rebuild and remove/install it. Sun Valley quoted me $1,750 for the rebuild, and $200 for shipping to me (with return postage of my existing transmission paid for by Sun Valley). No sales tax was charged because I am outside of California. I would have had to pay an additional 8.25% sales tax if I'd have had the work done locally, on top of the quoted price.
So, doing a bit of research during the week, I launched the job late this afternoon, and put about two hours into it so far (taking my time and documenting things). About one hour of time was just spent letting the transmission pan and torque converter drain its fluid, so the actual labor time was really only about 1.25 hours total.
Here's how I got started.
First off, I jacked up the front of the car as high as I could. To do this, I put three small sections of 2x4 on top of my floor jack saddle (which JUST fit under the rubber lift point on the S124). Next, I raised the jack as high as it would go, and then placed a jack stand with a small section of 2x4 on top of it (extended as high as it would go), and slowly let the jack down. Then I repeated this on the other side. As a safety factor, I also kept the hydraulic floor jack pumped up under one side of the car near one of the jack stands, to serve as an additional safety support. It is just snug against the jack point.
Once the car was jacked up, I opened the hood and disconnected the negative terminal of the battery. I did my customary thing of removing the clamp from the terminal and wrapping it in several layers of shop rag, and carefully bending it aside.


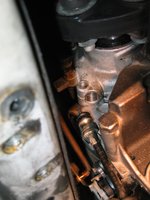
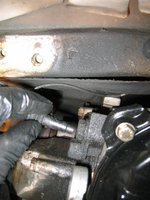
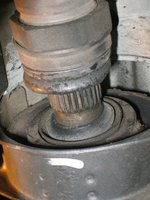
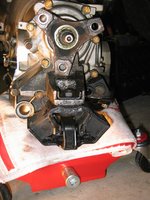
The next step was to remove the underbelly plastic cladding and then survey what things look like at the transmission. Here are a few views of things, including views of the driver's and passenger side of the automatic transmission.
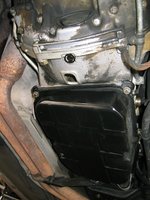


After that, I drained the ATF from the transmission pan, and then rotated the engine with a large, flat-blade screwdriver, and drained the torque converter. This took about 45 minutes to an hour to let totally drain.


Next I removed the plastic plug in the engine housing, which allows access to the back side of the torque converter. This was for a later step where I would remove the six bolts that hold the torque converter to the engine flywheel.

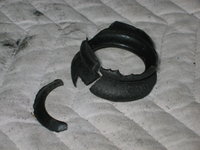
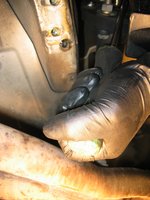
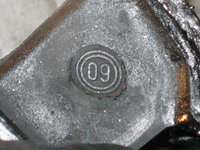
And when I removed the plug, and turned it over, lo and behold what did I find?!? A "Trucktec" part ... basically the equivalent of a URO part. I raced down my driveway with this highly toxic, faux hot potato part in my hand, and flung it off my property just as far as I could. No wonder my transmission decided to give up the ghost .. it was rejecting that crap part near it. And to think that this $3.00 factory part had been replaced by a cheap, ersatz part. Shiver me timbers !!

Here's what the back of the torque converter looks like with the plug removed, with one of the six bolts visible.

I proceeded to remove the six bolts, rotating the engine in between pairs. A 13mm socket on my 3/8" ratchet took care of the job with little difficulty.


Next up, I turned my attention to disconnecting the items that were attached to the driver's side of the transmission, such as.....
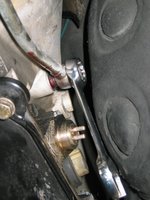
... the neutral safety switch

... the transmission overload connector
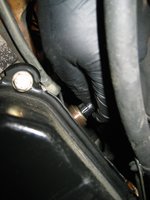


... the vacuum line going to the modulator

... and the end of the shift rod


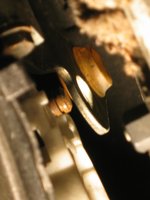
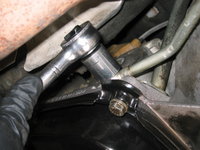
Then I turned my attention to loosening the two bolts that held the transmission mount to the cross-piece.

Next up were the 5mm Allen bolts that held the transmission coolant pipes to the engine block and transmission bell housing. These were rather quickly removed, getting things ready for the removal of the actual lines themselves from the transmission.


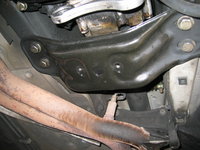
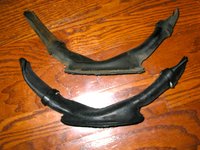
The last job for the night was to remove the exhaust pipe support (that "rare" piece of metal on the E320 that attaches to the transmission and the exhaust pipes).


That's about it for tonight's installment, folks.
More to come very soon.
Cheers,
Gerry
This is the classic 722.3 "B2 piston failure" that is very common to the 722.3 transmission. The transmission can be fixed fairly easily by removing it from the car and replacing the B2 piston and associated parts, which are accessible from the exterior of the transmission.
However, with the overall mileage on the car, and the fact that I'd just rebuilt the top end of the motor, I decided to just replace the transmission with a professionally rebuilt unit, rather than to apply a "Band-aid" approach by fixing just the B2 piston assembly. Either way, the transmission was going to have to come out of the car.
I decided to go with Sun Valley Mercedes Transmission, located in Van Nuys, CA. A couple of conversations with Marc there helped along my decision. On Wednesday, I had Marc begin a build-up of an existing core unit, and a progress report on Friday indicated that the transmission would be done and ready for shipment either at the end of the day on Friday, or on Saturday. Once shipped, it will take 2 (at the outside 3) days to get from Southern California to Houston.
My local mechanic quoted me $2,500 to rebuild the transmission (if I removed it), and $2,700 to rebuild and remove/install it. Sun Valley quoted me $1,750 for the rebuild, and $200 for shipping to me (with return postage of my existing transmission paid for by Sun Valley). No sales tax was charged because I am outside of California.
 I would have had to pay an additional 8.25% sales tax if I'd have had the work done locally, on top of the quoted price.
So, doing a bit of research during the week, I launched the job late this afternoon, and put about two hours into it so far (taking my time and documenting things). About one hour of time was just spent letting the transmission pan and torque converter drain its fluid, so the actual labor time was really only about 1.25 hours total.
Here's how I got started.
First off, I jacked up the front of the car as high as I could. To do this, I put three small sections of 2x4 on top of my floor jack saddle (which JUST fit under the rubber lift point on the S124). Next, I raised the jack as high as it would go, and then placed a jack stand with a small section of 2x4 on top of it (extended as high as it would go), and slowly let the jack down. Then I repeated this on the other side. As a safety factor, I also kept the hydraulic floor jack pumped up under one side of the car near one of the jack stands, to serve as an additional safety support. It is just snug against the jack point.
Once the car was jacked up, I opened the hood and disconnected the negative terminal of the battery. I did my customary thing of removing the clamp from the terminal and wrapping it in several layers of shop rag, and carefully bending it aside.


The next step was to remove the underbelly plastic cladding and then survey what things look like at the transmission. Here are a few views of things, including views of the driver's and passenger side of the automatic transmission.


After that, I drained the ATF from the transmission pan, and then rotated the engine with a large, flat-blade screwdriver, and drained the torque converter. This took about 45 minutes to an hour to let totally drain.


Next I removed the plastic plug in the engine housing, which allows access to the back side of the torque converter. This was for a later step where I would remove the six bolts that hold the torque converter to the engine flywheel.

And when I removed the plug, and turned it over, lo and behold what did I find?!? A "Trucktec" part ... basically the equivalent of a URO part. I raced down my driveway with this highly toxic, faux hot potato part in my hand, and flung it off my property just as far as I could. No wonder my transmission decided to give up the ghost .. it was rejecting that crap part near it. And to think that this $3.00 factory part had been replaced by a cheap, ersatz part. Shiver me timbers !!

Here's what the back of the torque converter looks like with the plug removed, with one of the six bolts visible.

I proceeded to remove the six bolts, rotating the engine in between pairs. A 13mm socket on my 3/8" ratchet took care of the job with little difficulty.


Next up, I turned my attention to disconnecting the items that were attached to the driver's side of the transmission, such as.....
... the neutral safety switch

... the transmission overload connector


... the vacuum line going to the modulator

... and the end of the shift rod


Then I turned my attention to loosening the two bolts that held the transmission mount to the cross-piece.

Next up were the 5mm Allen bolts that held the transmission coolant pipes to the engine block and transmission bell housing. These were rather quickly removed, getting things ready for the removal of the actual lines themselves from the transmission.


The last job for the night was to remove the exhaust pipe support (that "rare" piece of metal on the E320 that attaches to the transmission and the exhaust pipes).


That's about it for tonight's installment, folks.
More to come very soon.

Cheers,
Gerry


