Follow along with the video below to see how to install our site as a web app on your home screen.
Note: This feature may not be available in some browsers.
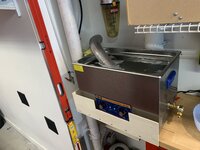
Wow! What's the first thing "you" will clean? AND, knobs not digital keypad - smart man!!!Let the (30L ultrasonic) cleaning commence! Dials (not digital keypad) and Fahrenheit markings for the win. Had to build a little shelf to cram the thing into the garage space I had chosen which is just a wee bit too small,,,
View attachment 164739 View attachment 164740 View attachment 164741
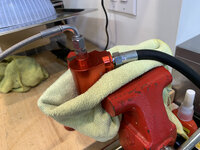
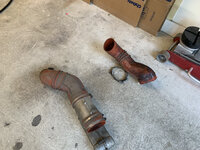
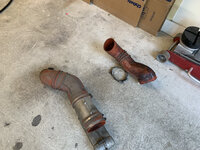
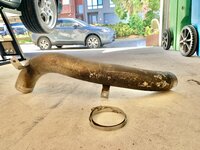
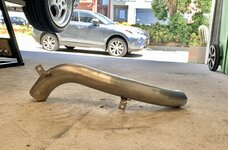
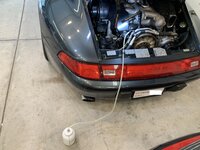
Well it turns out that the first thing I cleaned were heater hoses and metal heat / tube assembly on my 993! I had been procraaaaaaaaastinating like crazy to change the oil on this thing, and this is the year that I decided I should do it myself.Wow! Whats the first thing you will clean? AND, knobs not digital keypad - smart man!!!
Heh. They got cleaner but not 100% clean. I think the machine did a better job on the metal pieces than the (silicone?) soft orange pieces. I cleaned them for 2x 30 min cycles and about 160F heat. All I used was water and some car wash soap. It looks like there's a learning curve to the ultrasonic cleaner.No after shots of the orange tubies in the zzz zzz machine!?!! Mean!
Jlaa, I'd expect the interval is fine, assuming TBN is above 1.0 level. I have yet to read a logical explanation why there's a time limit at all for oil changes. FWIW, once I had oil in an M119 for almost a decade (and 4kmi) between changes - the car was in storage most of the time, with exercising every year or two. Analysis came back with flying colors. With Red Line at >$16/gal now, I may be pushing OCI's further out... shoot, for yours, I probably would have gone another couple of years!Finally changed the oil after 18 months and 1400 miles. Im gonna send the old oil to Blackstone to see if my 18 month interval was kosher or if it was bad juju.
Certainly is an improvement, but overall, maybe a different solution is needed? Particularly for the orange sections?I DID pour out THIRTY LITERS of ultra black water from the machine, so I know it got cleaner --- just not perfect. I wonder if I should have cleaned it for *hours* or used a different solution.
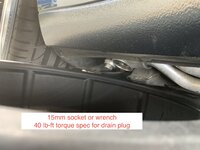
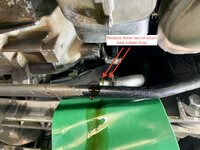
Thank you for the visuals... Makes me appreciate 15 pumps and walk away for MB cars ever so much!!!GEEZ! Remove rocker panel, drain oil tank, jack up right rear, remove RR wheel, remove and replace tank filter, re-install rocker panel, re-install RR wheel, put car back on ground, raise car with lift, remove L heat exchanger assembly, remove R heater hose, drain engine case, remove oil return tube, Instantly regret it because of re-recreation of Exxon-Valdez, remove and replace engine case oil filter, replace two o-rings in oil-return tube and re-install, assemble everything back together, put in 8 quarts of oil, remove Motronic relay and crank engine but dont start engine, replace Motronic relay, start car and wait for oil temp to get high enough to open oil cooler / oil cooler lines, shut off engine, add another 2 quarts of oil, re-start car, let engine idle, check dipstick while engine running ---- ok done! It took me EIGHT HOURS (including cleanup)
![]()
interesting. I would have expected a better result. I'm wondering if the dish soap (while great on your hands...) just isn't enough for the grease.Heh. They got cleaner but not 100% clean. I think the machine did a better job on the metal pieces than the (silicone?) soft orange pieces. I cleaned them for 2x 30 min cycles and about 160F heat. All I used was water and some dish soap. It looks like theres a learning curve to the ultrasonic cleaner.
I DID pour out THIRTY LITERS of ultra black water from the machine, so I know it got cleaner --- just not perfect. I wonder if I should have cleaned it for *hours* or used a different solution. Before and after below:
Certainly is an improvement, but overall, maybe a different solution is needed? Particularly for the orange sections?
Actually I mistyped my message and indicated that I used dish soap when I had actually used car wash soap. OK Next time I will upgrade from car-wash soap to dish-soap (cuts grease/fat better?) and see what happens ..... before I splash out the money on Simple Green Extreme. Thanks.interesting. I would have expected a better result. Im wondering if the dish soap (while great on your hands...) just isnt enough for the grease.
Youve got a big boy there, but I typically just use 100pct SGE in mine. Things typically come out clean enough to eat off of.
Cool. I will report back the findings / TBN from Blackstone Labs....I had Brad Penn dino oil in my 560SEC which sat in my driveway undriven for 2.5+ years - changed the oil not too long after recommencing daily-driving it and the TBN was just fine, zero ill effects. I have to agree - I have yet to see why there is a time limit on oil, especially if it is not near the point of needing to be changed and laden with combustion by-products and contaminants.
I think it is silicone - https://www.ecstuning.com/b-genuine-porsche-parts/heater-air-hose/99357278501/What material are these orange pipes are made of?
So, don’t judge… take a small clean rag, spray some brake cleaner or electric parts cleaner, and do a little swab on the worse area…. That’s how I clean the all light color all season mats at the end of the season (the areas that don’t come out clean with other cleaners)I think it is silicone - https://www.ecstuning.com/b-genuine-porsche-parts/heater-air-hose/99357278501/
The takeaway from this, appears to be that BMW goo will gunk up your pumps!!I need to clean out my tank after my BMW project is finished. Also my regular parts washer is so junked up with oil. I need to take it outside now, let the water evaporate, and then clean up the sludge with paper towels and dispose. The pump in my parts cleaner is jammed up. Need to take that apart now what is going on.
You are right! See below. This post is titled - MURPHY'S LAW STRIKES AGAIN!The dish soap should work significantly better. Car soap is formulated weak to avoid stripping wax.
Jlaa, Id expect the interval is fine, assuming TBN is above 1.0 level. I have yet to read a logical explanation why theres a time limit at all for oil changes. FWIW, once I had oil in an M119 for almost a decade (and 4kmi) between changes - the car was in storage most of the time, with exercising every year or two. Analysis came back with flying colors. With Red Line at >$16/gal now, I may be pushing OCIs further out... shoot, for yours, I probably would have gone another couple of years!
![]()
I had Brad Penn dino oil in my 560SEC which sat in my driveway undriven for 2.5+ years - changed the oil not too long after recommencing daily-driving it and the TBN was just fine, zero ill effects. I have to agree - I have yet to see why there is a time limit on oil, especially if it is not near the point of needing to be changed and laden with combustion by-products and contaminants.
Well, w/ 18 months and ~1400 miles on the Mobil-1 15W-50, the oil analysis came back with ....... flying colors. Next time I will try changing the oil at 4000 miles and however-long-that-is. Note TBN of 6.8 and strong Zinc numbers.Cool. I will report back the findings / TBN from Blackstone Labs....
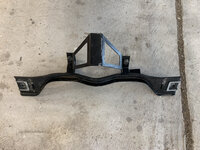
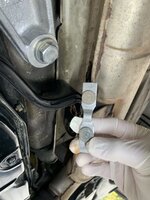
This bracket has always bothered me in all of its disgusting crudeness and rustiness.
I dont know why these brackets seem to disintegrate more quickly than the rest of the car but .... I had to do something about it.
Yuck:
View attachment 163479 View attachment 163482
Of course what is any project, no matter how straightforward / simple, without some aggravation. Reverse drill bit to the rescue:
View attachment 163478 View attachment 163477 View attachment 163476
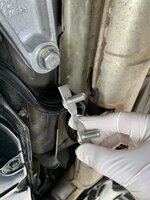
Removed - look at all that grossness!
View attachment 163475 View attachment 163481
After wire wheel, some grinding stone, and brake parts cleaner:
View attachment 163474 View attachment 163480
Painted with rustoleum rust converter, hit with a heat gun to accelerate drying, then VHT brake caliper paint, then more heat gun, then install. Much better. Ignore the corroded nuts --- waiting on those for delivery. But I wire wheeled the rest of the hardware and used anti seize this time around. Little wins made possible by QuickJack!
View attachment 163473 View attachment 163472
Love this! Had a similar rusty bracket holding a hose in my 560SEC. Small, but stuck out like a sore thumb to me. 20 minutes of wire wheel plus spray paint and Im sleeping easy at night. Paint the back of the fence, as Steve Jobs Dad used to tell him...
While working, Paul shared a piece of advice with Jobs: “Youve got to make the back of the fence, that nobody will see, just as good looking as the front of the fence,” Isaacson told “60 Minutes.” “Even though nobody will see it, you will know, and that will show that youre dedicated to making something perfect.”
Okay I finally received the extra trans mount bracket captive dual stud thing (129-490-00-44) and the nuts that go with it (140-990-07-50). I put it on and it is kind of disappointing because it feels like MB cheaped out on all the supersessions. The original nuts had copper sealing surfaces, if not entirely copper. The replacement nuts have no copper on them whatsoever (but have a larger mating surface). Copper is nicer. Oh well. I used some copper anti-seize on the nuts and it does look nice...Nice. I should point out that I wire-wheeled these nuts to remove corrosion. I dont know if wire-wheeling these removes any plating on these either, so Ive ordered new nuts too. When I receive the new nuts as well as the two new copper nuts that bolt onto the exhaust, I will drop and clean the cast aluminum transmission support bracket too.
View attachment 163530 View attachment 163531 View attachment 163532 View attachment 163533
Fabric sounds like a good idea as it is porous and absorbs glue. I will use that next time if the 5-layer frog tape fails. Thanks!I want to say my 126 had fabric vs. vinyl and that I used contract cement to repair it once. Been too long to be sure.
I have a spare front storage compartment tambour that has the same issue. I tried some sort of glue, i cant remember what, that would not bond to the vinyl. Thanks for the solution.
I too have played around with this on replacement cubbies, when I converted the rear of the S55 to 4-seater look, a la .036. You have to be careful with the glues and fabrics because the glue can run and stick to the wood itself. I didn’t think of tape, but now that I see what @Jlaa has done it occurs to me there may be types of tape with spots of glue than can work for such a purpose. Madeira should be interested in this as a practice tip.I want to say my 126 had fabric vs. vinyl and that I used contract cement to repair it once. Been too long to be sure.
Yeah having glue run was a concern of mine … that it would run and get into the little crevices between the slats. I thought about using 3M Super 77 spray used for medium duty upholstery work (I used it to glue down carpet in my sport beetle when I replaced all the carpeting) as a backup in case 5-layer-frogtape didn’t work.I too have played around with this on replacement cubbies, when I converted the rear of the S55 to 4-seater look, a la .036. You have to be careful with the glues and fabrics because the glue can run and stick to the wood itself. I didn’t think of tape, but now that I see what @Jlaa has done it occurs to me there may be types of tape with spots of glue than can work for such a purpose. Madeira should be interested in this as a practice tip.
maw
Funny, on my way back from California on Monday the exact same thing happened to my front stowage tambour door. Seems like Madera doesn’t do a proper job with that element when they refurb the trim (my pieces were redone in 2020). Will also go the painter tape route you outlined!I had the interior wood refinished in December 2016. The work was great. However, the vinyl backing for the rear console wood tambour door had become unglued and fell off. I think the glue they used was not compatible with the vinyl backing they used. Thats the only reason I can think of --- the car is basically a garage queen in a climate controlled garage in a corner of the country that is basically always between 55F and 80F. The car never bakes in sunlight or heat.
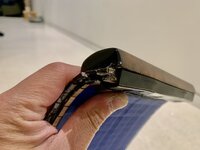
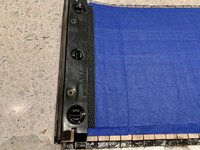
The vinyl backing is important because it holds all the little strips together. Actually, the strips were still being held together by the glue that they had used to glue the vinyl to the strips..... all the glue had stayed on the strips and the vinyl had fallen off ---- and it was clear to me that none of the glue had stayed stuck to the vinyl. But, the only thing holding the strips together was the glue itself ---- there was no rebar (in this case the rebar would have been the vinyl backing) to give the glue any tensile strength.
I emailed Madera for help a few days ago but they didnt reply. Being too busy to chase them down by phone, I was annoyed and decided to just fix this sh*t.
Anywaysl because the vinyl fell off, there was no way for me to slide the tambour around 180 degrees to release the wood tambour from the plastic console because the vinyl would jam the movement of the tambour at the 180 degree u-turn. The only way to release the tambour was to cut the %$#@%$@# vinyl.
[ATTACH alt=IMG_6659 Large.jpeg]167621[/ATTACH] [ATTACH alt=IMG_6681 Large.jpeg]167620[/ATTACH]
After cutting the %$@%$@# vinyl I could release the tambour:
[ATTACH alt=IMG_6678 Large.jpeg]167622[/ATTACH] [ATTACH alt=IMG_6677 Large.jpeg]167623[/ATTACH] View attachment 167625 [ATTACH alt=IMG_6674 Large.jpeg]167624[/ATTACH]
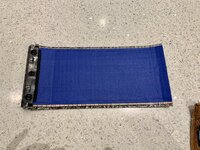
And then I as able to fashion my own rebar -- i.e. 5 layers of Frogtape painters tape. Actually I think this is a perfect material for this application - thin, lightweight, and sufficiently strong enough for holding little strips of wood together. I bet this will adhere to the wood strips for a longer time than the vinyl. BTW you can see the 1/4 of black vinyl that still remains sandwiched between the black plastic the holds the first master big strip together......
[ATTACH alt=IMG_6660 Large.jpeg]167627[/ATTACH] [ATTACH alt=IMG_6661 Large.jpeg]167626[/ATTACH] [ATTACH alt=IMG_6664 Large.jpeg]167628[/ATTACH] [ATTACH alt=IMG_6662 Large.jpeg]167629[/ATTACH]
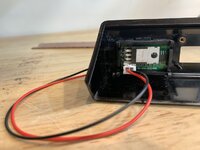
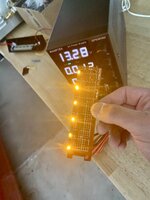
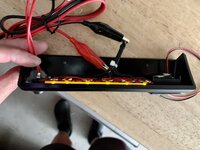
@Jlaa, you’re the only guy who is more Sacco than Sacco himselfIn fact, I took this opportunity to change the LED color from stock green to AMBER/YELLOW to more evenly match the OE instrument lighting.
Yep! @smilecenterlab do this asap! Or come over and we will dremel your caps in my garage!That's a nice wet cap right there! And you can see the carbon tracks to the wrong terminals. Now use the Dremel disc I referenced here to add the vent slots!
![]()