• Hi Guest !

    Welcome to the 500Eboard forum.

    Since its founding in late 2008, 500Eboard has become the leading resource on the Internet for all things related to the Mercedes-Benz 500E and E500. In recent years, we have also expanded to include the 400E and E420 models, which are directly related to the 500E/E500.

    We invite you to browse and take advantage of the information and resources here on the site. If you find helpful information, please register for full membership, and you'll find even more resources available. Feel free to ask questions, and make liberal use of the "Search" function to find answers.

    We hope you will become an active contributor to the community!

    Sincerely,
    500Eboard Management

SL500 progress and thank you all!

Cheers Dan!

Thanks for the link to Noico, seem to be a good product, very affordable price point, I still have a large roll of FatMat from prior installs, but when I do run out, definitely will give Noico a try.

Plastics... ohh those plastics!!! You are not kidding! Now, those particular corner covers, yes - however, there is a gentleman in Germany makes these from brass, $100 per pair, (cheaper than factory) and will never break... Some day, for now, I do have a spare set from a parts car. From what I've learned about these corner covers, if one was to use just a small, thin stainless washer between the mounting point of the car and the that corner cover, that excessive pressure is relieved enough to prevent the stress fractures for much much longer!

Headliner - this is 5th R129 headliner for my DIY (2 of my prior R129, 1 my brothers car and a friend's R129), these are easy indeed, going to use the same foam backed "synth-suede" from Headliner Magic... I wish they had this stuff locally, but no...

Regards,
D
 
Cheers Dan!

Thanks for the link to Noico, seem to be a good product, very affordable price point, I still have a large roll of FatMat from prior installs, but when I do run out, definitely will give Noico a try.

I used it recently on the W111 and was quite pleased with it, as I had some DynaMat left over and worked with both side by side so I could compare the two. A lot more affordable than DynaMat, and reading reviews on it I found that most users considered it comparable.

Headliner - this is 5th R129 headliner for my DIY (2 of my prior R129, 1 my brothers car and a friend's R129), these are easy indeed, going to use the same foam backed "synth-suede" from Headliner Magic... I wish they had this stuff locally, but no...

Regards,
D

I found the gray headliner material at my local JoAnn Fabrics store, along with the spray adhesive. Wicked stuff.

Dan
 
I used it recently on the W111 and was quite pleased with it, as I had some DynaMat left over and worked with both side by side so I could compare the two. A lot more affordable than DynaMat, and reading reviews on it I found that most users considered it comparable...
As long as it does not smell like asphalt in a hot car lol In the late 90's everyone jumped on the bandwagon making some kind of deadening mats, some smelled awful!!! Definitely will keep that one in mind, bookmarked amazon''s page

I found the gray headliner material at my local JoAnn Fabrics store, along with the spray adhesive. Wicked stuff.
Good stuff, affordable, used it on our pick-up truck, and our store carries black, light grey and dark grey choices. I do, however prefer the look and feel of that "alcantara" style, used in in my brothers's car

32820592226_07335d7786_b.jpgWP_20170212_11_43_08_Pro by Duh_Vinci, on Flickr

And in my SL320

32755139580_7633c26162_b.jpgWP_20170226_18_24_21_Pro by Duh_Vinci, on Flickr

It feels great to touch, so I will use the black one again... Now I need to find x2 W202 with black interior on the junk yards to harvest Black front passenger "oh shit" handles to use instead of grey stock R129 units :yahoo:

Regards,
D
 
Its official, "Red Devil" is getting painted!!! Stopped by the paint shop, got the final estimate for a full re-spray... Removing all the badges, panels, trim, door handles, claddings, bumpers, lights and such is on me, they do the rest. :yahoo:

So next week, mounting Carlsson rear box, since rear valance will need a cut-out for those dual tips, all that needs to be done first, then I will have to make a cut in a virgin rear Expression Motorsport skirt apron to match... Pre-fit the front apron/skirt of the same package and and start taking it all apart!

I will have to order tons of new clips plastic fittings/pistons for the lower cladding, going to delete the headlight wipers (must fill-in the holes in the trim).
Can't wait for it to start looking like a proper R129 instead of "rad-rod" ish as it is now :jono:

Regards,
D
 
Related to your refinishing project (nicely done btw), who do you trust to handle the mounting of tires on painted finish wheels?
 
Cheers Ace!

Do I wish I had the option to powdercoat them - absolutely, but that was not an option, 2 of the wheels had major curb rash, that I had to use some metal infused filler in places. So painting was the only thing I could do.

With that said, my brother has a friend, who's father is a die hard 944/928 enthusiast. He has an alignment rack and Hunter balancing equipment in his garage. He is very very, meticulous, been using him for the past 17 years. This 1/6 set - the tires would be mounted from the rear of the wheel (same as many AMG with clear coated lip are meant to be mounted). He did in on my brother's 928S wheels and his sport optioned R129 AMG's ...

Otherwise, I indeed would be worried, and possibly would have chosen some version of a epoxy coating instead.

Regards,
D
 
Nobody.

*sigh*
Soo, Dave, you would do it yourself? :yahoo:

Clear has cured well enough to complete the wheels... Spent the evening finishing the set with 1000/1500/2000 wet sanded, then 3M Perfect-It (1-2-3) with mop/grey/blue pads to match, and absolutely gorgeous luster and shine!

47682795761_a94d794401_c.jpg20190423_203604 by Duh_Vinci, on Flickr

46766786345_3c9889938f_c.jpg20190423_203917 by Duh_Vinci, on Flickr

81782

Now these will cure for few weeks until I get the car back from the paint shop!!!

Regards,
D
 
Soo, Dave, you would do it yourself? :yahoo:
With the proper equipment, yes I would! Have you looked at prices on "rim clamp" tire machines that R&R the tire over the rear of the wheel? You could buy a really nice R129 SL500 for what those cost! Ditto for a good balancer...

:spend:
 
I hear you! It actually started in the early 90's when a local NTB (NTW back then) scratch 3 of my Antera 101 wheels, and didn't even mentioned it, mounted the tires, brought the car around for me to pick up and handed me the keys... I walked outside and saw near 360 degree scrapes on 3 of the 4 wheels... "were you going to mentioned that you pretty much ruined the factory finish on my wheels or just let me off thinking I would not notice?":fun: 
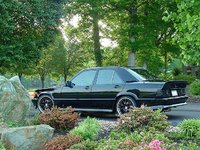
They did replace those wheels...

So luckily, my brother said that his friend's father ended up purchasing all of the mounting and balancing equipment for his own use on his Porsches and bikes, and will do some side work, for fee. He does great work, very meticulous, and balances with in the fractions of the ounce, slicing off those stick-on weights as needed for as close to 0.00 as one could get. So, that is my "go to" for all the tire and wheel needs for many years, happy to have him around for sure!

Regards,
D
 
After a bad start this morning, the Carlsson rear box is installed, resonator deleted, buttery smooth and just enough throat!!! Absolutely ZERO drone! Love it!!!
First shop where I've made an appointment, arrived, they took the car in, owner comes back: "Can't do it..." "Why not?" "Too tight for my equipment to get there"... "You do custom exhaust shop, don't you?" "Yes, can't do your car..." "Pull it out of your shop, thanks for wasting my time, never again will you have my business!"

Basically, the ass was too lazy to remove 4 bolts after the cats to remove the section of rear resonator (2 in one out) with the rear box attached... I've used them before (few years back), B&R customs, I don't remember them being such half ass lazies. I guess direct replacement muffler business is much better for them, so be it...

Google, EAG Custom Exhaust and Performance comes up, on face book, E63, S4, Brabus G-wagon and such... Made a call, very nice guy picks up the phone (owner), meet him at the shop, put the car on the lift: "I can do it today..." Very nice welds, young guys but very much car enthusiasts and willing to do whatever it takes to make the project work. Couple of hours later I get a call, they wanted me to see everything before the final "button up" and to see if was happy with the location/protrusion of the dual tips of this Carlsson box.

Drove home for 40 mins with absolutely NO music, just enjoying different tones of this wonderful wonderful exhaust through various speeds and gears.

32755457897_7e150b88b1_c.jpg

47698723411_9557641459_c.jpg

32755458337_be02dc7101_c.jpg

The car is not annoying at all!!! I was a little worried with deleting the resonator, but no regrets, well mannered, the sound wakes up with the throttle nicely, and highway really really pleasant tone. Very very happy!

Regards,
D
 
Yeah, these things sound civilized with open downpipes, actually. When I did mine, the guy had me “sound test” it with open pipes to see how she sounds, to help me decide how much to button her up. I thought that was a really smart idea. I wanted her to still sound like a proper MB sedan, just not Grandma’s MB sedan. Glad you got it done. Nice cut out. They didn’t want to hit the cut with some red engine enamel before mounting (nit-picky comment)?

maw
Precisely, I wanted that deeper V8 throaty to come out and play a little! I tell you, I'm approaching 50 and can't wipe the smile of my face with this exhaust and overall progress of this $900 "parts car"!

Now, to nit-picky comment - well seen and spotted indeed! They did offer to touch up, but the car is going to a full re-spray in a week or two, starting to disassemble it all this weekend (timer permits), so it's kinda of waste. Besides, this opening - I would probably have to enlarge a little, then make the same cut into the "virgin" rear apron from Expression Motorsport that goes directly over the lower section of the factory bumper (then re-enforce the opening a bit and make the small inner lip for a finished look)

Can't wait to have it all proper!!! Getting there, slow but sure!

Regards,
D
 
My little struggle here: Is it placebo effect or am I really feeling a subtle improvement with this new exhaust modification?

I would like to think that I know this car fairly well by now, I know this particular car comes to life at about 3K RPMs (noticeably). I'v driven the car quite a bit in the last day and a half and what I'm noticing that now, the the car feels lighter on accelerator pedal up to 3K RPMs, almost as if the rpm/torque curve is smoother and starts the "raise" earlier in the range and does not have the same "peak" at 3K as it did before (it just keeps pulling)... even with the light throttle, it is almost "effortless" with lighter pedal feel under acceleration. Again, noticing this 2-3K.

So, am I imagining this or is it really possible to have these smaller changes and some minor gains at lower RPMs with exhaust change?

LH with WOT enrichment I still need to clear and install sometime this week.

Regards,
D
 
And so it begins, finally got myself together, despite the topless driving pleasure, the car neeeeeeeeeeeds new paint job. Started taking the red devil apart...

i-sCn43SB-L.jpg

i-Lp7mgfC-L.jpg

i-RRbvZhw-L.jpg

The amount of dirt and sand like sediment underneath of all the trim pieces is astonishing, what can I say, 23 years later... Absolutely ZERO rust so far, spotless body, glad that I'm not seeing a single bubble!

i-26QqNkP-L.jpg

Going to tackle all the sound system wiring tomorrow, perfect time while its all apart. Going to test fit my front and rear aprons, then remove all the cladding and start making a list of all the plastic pistons that are missing/broken/cracked so it will all fits snugly back.

Regards,
D
 
Last edited:
Test fitted my front and rear aprons...

I've ordered them directly from Expression in Belgium, spoke directly with Daniel, molds were opened, and both aprons were made to order. Very very accommodating, they reached out to a few shippers for various quotes, and found me the best deal (much appreciate it). All in all, very enjoyable experience dealing directly the them, not something I can say about Performance Products (the only US dealer, whom I contacted first, who told me flat out, no, nothing is available for my car. Not even after I provided them with the part numbers I needed)

i-5n7VbV4-M.jpg

Yes, I waited that long to install these... Meant to go onto my SL320, but since there is "no replacement for displacement" glad I didn't install them. Now they are going onto SL500!

The fit and finish is absolutely wonderful! When I ordered them, I liked about this kit was something between Carlsson and Brabus styling packages that were developed for R129. Not too big, not too low, and the lines that flow with the pre-facelift R129 bumpers very nicely imo:

i-cZMK8Kb-M.jpg

i-Tnsxbz2-M.jpg

Now I need to make a cut in this rear apron for the exhaust and mold in an extension/lip inwards, so it does not look as I just made a quick cut, but rather as if was rolled and designed this way, otherwise I imagine it just would look half ass... Weekend project (I don't "love" working with fiberglass, but I'll suck it up and itch for a day or so)!

Regards,
D
 
Last edited:
Ok, the lip is complete. Could have left it as is, but it would bother me knowing that it could have been better. Besides, now, the cut-out no longer has a weak spot!

The cut

i-hLhnfDL-M.jpg

Made a mesh core, that took a bit of time, since the shape is rather complex

i-76WcBrb-L.jpg

Test fitted and did some minor tweaks

i-7kWS2wh-L.jpg

Final positioning

i-qbXw2mw-L.jpg

3M Bondo "Hair" is a perfect starting point, fills the gaps and perfectly secures the mesh to the apron

i-tFfD3xn-L.jpg

3M Bondo "Glass" layer on the outer surface, spreadable, strong, good base

i-fRkJ9XV-L.jpg

Coarse mat layers on the inside (similar to what was used by Expression)

i-jLnWxZs-L.jpg

Fine fiberglass weave layers on the outer surface to minimize future sanding and shaping

i-SfsT6nX-L.jpg

Once cured, trimmed all the access

i-GZ8NTpG-L.jpg


First layer of primer, will be used as a guide coat

i-j73gDk3-L.jpg

Next, just need to smooth out the edges a bit, a little "rounding" off is in order and good to go.

Regards,
D

P.S. Itching from fiberglass like crazy, but OCD satisfied once again! :yahoo:
 
Ok, the lip is complete. Could have left it as is, but it would bother me knowing that it could have been better. Besides, now, the cut-out no longer has a weak spot!

The cut

View attachment 82710

Made a mesh core, that took a bit of time, since the shape is rather complex

View attachment 82711

Test fitted and did some minor tweaks

View attachment 82712

Final positioning

View attachment 82713

3M Bondo "Hair" is a perfect starting point, fills the gaps and perfectly secures the mesh to the apron

View attachment 82714

3M Bondo "Glass" layer on the outer surface, spreadable, strong, good base

View attachment 82715

Coarse mat layers on the inside (similar to what was used by Expression)

View attachment 82716

Fine fiberglass weave layers on the outer surface to minimize future sanding and shaping

View attachment 82717

Once cured, trimmed all the access

View attachment 82718


First layer of primer, will be used as a guide coat

View attachment 82719

Next, just need to smooth out the edges a bit, a little "rounding" off is in order and good to go.

Regards,
D

P.S. Itching from fiberglass like crazy, but OCD satisfied once again! :yahoo:
Looks so pro!
 
Cut to the stereo!

Jokes. Good work.

maw
Getting there maw, gettin there! Not enough time in a day to do all that I need to do!

Today finished final test fitment of the body kit (minor tweaks and trimmings), had to trim the original bumper a bit more to compensate for the thickness of the new exhaust lip

i-fDhhXB3-M.jpg

My old W201 I've installed the original AMG duck tail, bought it from Thorsten Stadler of 190teile.de I loved the look of it. Now these pieces (at least for R129) seem way pass $$$ my comfort zone, last OE amg piece I've seen was as much as I paid for the car. So no... I was promised a very good quality replica from Latvia, it arrived and quality indeed they delivered! Very pleased, took less than 10 min of tweaking to make it fit as good as original did, very happy with it!

i-PH5SP59-M.jpg

Regards,
D
 
Hi Dan,
(y)...sooo true!:mad: Specially, that plastic surround of the sun visor, I've had to order that 2 times ...and to think my interior color is dark blue...at least MB Germany had stock (while it lasts)
 
Hi D,
Regarding the cylinders for the soft top, may I share my experience? A few years ago, even if there were no problems with mine, I decided to have all of them removed, sent them via air freight ($$$) to the USA shop of a "very well respected/highly rated" shop. They processed my items and then shipped them back to Manila, again via air ($$$). I had them re-installed and surprise o_O, one of the cylinders leaked oil. Upon inspection, there was no oil seal inside :mad:. I took a picture and emailed the shop owner...who said sorry for the "error" and if I can ship it back to them for repair.

Moral of the story, don't believe these "highly rated/well respected" repair shop, just buy the German ebay viton seals and do it yourself, one cylinder at a time. You can obliviously do it yourself, judging by your thread here.

Best regards
 
Cheers Chicky!

Thanks for the feedback, appreciate it! I would indeed attempt rebuilding these myself first, as you said, one at a time, since I have a complete spare set from the donor car. The entire idea of this project was that I would do everything that I can myself, it is a budget project. The car still needs a new soft top, watched the video few times
It is very involved, and time consuming, but not impossible DIY, so I would try at least, once removed, that would give me the idea how difficult it really is for me to tackle the "reverse" order.

Regards,
D
 
Finally, its in the body shop!

i-wtzgJqC-L.jpg

I decided to use the spare roof, better condition than original, better trim and rubber seals, zero corrosion or dents (indeed, will be red as well)

i-CSC24Pp-L.jpg

"Pile" of trim pieces and spoilers to go with the car.

i-5Lmvxws-L.jpg

Looking at the timelines, its been 1.5 years since I purchased this thing for "parts", hard to believe, time does not stand still! While in the shop, I'll have time to re-do the headliner, assemble all the roof interior trim that I've recovered in leather and will give a cerium oxide a try - need to polish out the foglights glass. They are not bad, just need that extra "shine"

Regards,
D
 
Few steps closer to looking "new" again. My brother sent me few pics of the progress of the car in the body shop... Amazing how much of those "little imperfections" on the body and paint after 20+ years of use (and neglect)

i-P9pMDqn-M.jpg

i-k77MPt5-M.jpg

i-4bkFkgK-M.jpg

i-DV6G36d-M.jpg

Tomorrow they will do a final 320 grit all over, then primer, cure, final sand then paint... I miss this car a great deal!!!

Regards,
D
 
Another headliner for the books (this one is #4 for R129) - synthetic "alcantara"

i-C3QcwqM-L.jpg

This summer need to take care of my W202, it finally sagged... Will start after finishing this car.

Regards,
D
 
Awwwww, mailbox happiness!!!

i-qhNnHnK-L.jpg

Finally found a set of authentic centercaps at non-astronomical price, since my used wheels didn't come with the set. Now the decision to be made: Do I just "feather" them back to original aluminum finish or do I refinish them to the same color as the wheels (I tend to like monochromatic "theme" on the wheels.... Decision decisions. :yayo:

Regards,
D
 
Cheers all!

In the process of purchasing a house with a lot needs, had to halt this project for few weeks... On the positive side - the paint and clear had the time to cure properly, and now can do what I want with it! About 80% back together, mounted the aprons (curing, sourced out some tried and true Wurth bonding adhesive we have used in the past), the exhaust is back on, all the cladding is back on the car.

I couldn't be happier with the aprons, the look - something between Brabus and Carlsson with few very subtle differences... I really like how these do not scream "its an aftermarket add on" imo, almost look as if these could have been a part of the factory options on pre-face cars.

I've also in the process of swapping all the metal trim, scored original dark, minimal fading trim (compare to my faded almost gold toned by now). This takes some patients, but working through it.

Euro headlight conversion is done, wow what a difference! Kept the wipers for now...

Fired on the first crank this morning after 3 weeks of being parked in the garage, miss this beast!!!

i-fdgp7gq-L.jpg

i-L7RL9H3-L.jpg

i-Vhcnsgr-L.jpg

i-tMKBcTx-L.jpg

Regards,
D
 
Quack... Terry - not sure, I like how it looks on the photos of Gen 1 AMG cars, but now, with the aprons installed, I almost think it may take away from the "understated" look? I have it, it is painted, I will decide sometime soon, just not now.

Still few things left to do, but coming along nicely I think

i-WcStfJj-L.jpg

i-GTHV9Zs-L.jpg

Regards,
D
 
D,

IMOP, It looks great w/o the Ducktail.

I loved the original integrated DT on the “Hammer” and used to think I wanted one on my 500E but decided that Bruno Sako’s original design is timeless and the DT was a trendy passing fad who’s time has passed.

BTW, Those Carlson’s really set it off!!
>> Much better than the black wheels.

Take Care
 
Cheer Terry!

I'm kinda in the same boat as you, liked the original units, liked it so much that actually ordered authentic DT from Germany for my old W201. Loved it, but now, looking back at the old photos, actually prefer the look of my W201 w/o the DT.

So I'm going to sit on it for a bit, my brother wants the DT, he may just get it.

Carlsson - yes, love them, always have, they actually look bigger than many of the same size wheels due to their lipless design. Took me about 5 years to find the set, well worth the wait.

Regards,
D
 

Attachments

  • myW201_quack.jpg
    myW201_quack.jpg
    101.5 KB · Views: 22
  • myW201_no_quack.jpg
    myW201_no_quack.jpg
    75.5 KB · Views: 20
Need to mount the fog lights, button up the under bumper plastic pieces/coverings, and pretty much done with the car, almost ready to drive! Amazing how much different Euro head lights from the rotten plastic trimmed US versions, its like a whole different car, and visibility much improved too!

i-RNzFXNm-L.jpg

All the emblems are now low gloss black (I know, not for everyone), but I do like it.

i-TnMNsfv-L.jpg

Waiting on the last piece - the center trunk star, mine snapped...

Started on the sound system. Factory speakers were completely shot! Used all the original hardware to mount the new separates, used the factory mid/tweeter - gutted out, and use it to make a filler/trim ring for the new tweeters.

i-mttspQK-XL.jpg

i-wMmcxST-XL.jpg

Working progress!


Regards,
D
 
Finished the wiring, the car is completely re-wired for the sound system from scratch, all OFC wiring, 4 Gauge power cables, RCA cables ran in the center of the car (as other r129's I've done) to avoid any noise interference.

I personally hate the menu driven subwoofer level adjustment on any modern head unit. Love the manual dial on my old home audio HK receiver. So I've installed the level knob in this car as well, found a good use for the ashtray

48614134843_76bc99528f_c.jpg

Going to make the amp "rack" tomorrow, and if everything goes well, may even button up the "red devil" tomorrow...

Regards,
D
 
The sound system IS alive!!! Spent about an hour with it tuning and tweaking DTA, dsp, levels and such - sounds great, considering it's a "roadster", couldn't be happier for the moment. I did ended up with the extra pair of tweeters in the dash, just brings up the stage to entirely different level.

Found a good use for what use to be CD changer mount - dissembled it and adopted the mounting bracket and the rails for the amp rack.

i-4f5N5WJ-L.jpg

i-WjTMNzQ-L.jpg

Very useful, I can/did performed all the adjustments for an hour with the amp just sitting in the trunk, filly accessible for OCD me, then, once satisfied, just slide the amp with the rack into the rails/side pocket of the trunk and its all out of the way.

I'm out of trunk carpet material, going to swing by fabric store in a bit, will cover the amp rack in carpet so it doesn't look out of place, then time to button everything back up.

Regards,
D

P.S. Very nice little amp, a bit over an hour of running/testing, just warm to touch... Never used JVC amps before, bought it out of curiosity, so far so good.
 
Ok, a little more progress... I knew that "Rattle-Trap XXX" would go to a good use. Delivery date of that sound deadening roll was early 2012. A this point I don't even remember for which project/car I've ordered it for... Took a little while, but lined up entire trunk as much as I could fit

i-SrrVPKg-L.jpg

i-vnTcnxR-L.jpg

That is all I can handle for the day...

Regards,
D
 
D,

I remember when you were really wondering what you were going to do with it. Seemed everything was wrong w/ it and you thought it would be to expensive to fix. You’ve come a long way since then.

I’d say you made a silk purse out of a sow’s ear!

I’ll drool w/ you!

Beautiful Job!

lol
 
Gerry, I must admit, I do love this this thing, keep going back in the garage to see the completed car (garage looks like a bomb went off - will take few days to re-organize it).

Now, thanks to Virginia law, I have to violate the "born again virgin" front bumper and mount the licence plate holder and the state required front plate 😭
 
...

Now, thanks to Virginia law, I have to violate the "born again virgin" front bumper and mount the licence plate holder and the state required front plate 😭

You can do a "tuner-style" mount on the front tow hook receiver.

The look isn't to everyone's taste, but I cannot bring myself to drill into a pristine bumper skin.
 
Last edited:
FWIW, I never mounted my front license plate on my Toyota pickup on the bumper (not due to the aesthetics, just lazy), instead I just placed the plate on the passenger side of the dash for the past 2.5 years. No stops, comments, or tickets yet from the local gendarmerie during that time (granted its a red '95 pickup and not a smokin' red MB SL500, but still . . . )

p.s. D, love those refurbished Carlsson's!
 

Who has viewed this thread (Total: 1) View details

Who has watched this thread (Total: 3) View details

Back
Top