• Hi Guest !

    Welcome to the 500Eboard forum.

    Since its founding in late 2008, 500Eboard has become the leading resource on the Internet for all things related to the Mercedes-Benz 500E and E500. In recent years, we have also expanded to include the 400E and E420 models, which are directly related to the 500E/E500.

    We invite you to browse and take advantage of the information and resources here on the site. If you find helpful information, please register for full membership, and you'll find even more resources available. Feel free to ask questions, and make liberal use of the "Search" function to find answers.

    We hope you will become an active contributor to the community!

    Sincerely,
    500Eboard Management

HOW-TO: Removing and re-sealing ZF tandem pump (SLS and power steering)

Re: Power Steering Pump Leak Investigation

I just finished re-sealing my other cam advance solenoid, as well. That job took about an hour, start to finish, working carefully.

With regard to brake cleaner. I have never heard of any problems with using it on aluminum parts (remember that some brakes, such as 1991 and 1992 500E brakes, are aluminum Brembo calipers) and I've been using it for years as a parts cleaner/washer. It evaporates pretty quickly (within 2-3 minutes) and so there's not much time to act on things, and many if not most shops I know use it for just about everything when a full-on parts washer is not needed. I've been using it for 8-10 years with no problems whatsoever. I think it will take coatings off of parts such as clear-coated wheels (soft coatings) so that's something to be aware of. I try to use the full-chlorinated stuff because it's stronger, though I know that it isn't available in states run by eco-freaks like California.

It is not a good idea to use brake cleaner on plastic although I do this on occasion (just used it to clean the inside of my plastic covers that go over the cap/wires/rotor) and I wiped it off right away.

In any case, brake cleaner should not be an issue around aluminum. Best used on bare-metal parts that are removed from the car. The one you DO have to watch out for with aluminum is Simple Green. That stuff is REALLY aggressive on aluminum.

By the way, generally speaking .. brake cleaner is much less aggressive than carb/choke cleaner.

Whenever I'm done with a wrenching job on my cars, I always soak a shop rag in brake cleaner and use it to clean all of my tools used -- handles, sockets, screwdrivers, pliers, etc. Works great for cleanup as well.

Cheers,
Gerry
 
Re: Power Steering Pump Leak Investigation

Is there any way to just pull the front of the pump off like the E420?
There is one clarification & distinction that should be made with regard to this.

It is certainly possible to take the front of the pump off, for example to replace the front seal where the pulley/shaft goes into it. But on the 036 tandem pump, it honestly makes sense to do this ONLY if there is an SLS leak, rather than a power steering leak. If there's ANY sort of PS leak involving the pump (not the short hose or other hoses) then the pump really should come off. The reason for this is because the front half (closest to the radiator) of the tandem pump is the SLS portion, and the rear portion is the power steering portion. It would be much more work to take the front off, remove the rear half of the pump etc. to get at a power steering leak -- given the limited working area, etc. -- then it would be honestly to just remove the pump from the bracket, even with the two semi-difficult rear bolts. Like I said, only the top-most bolt is the difficult one, and I found I was able to have a line of sight on that top-most bolt from at least two if not three vantage points, and could easily feel it with my fingertips by reaching around the end of the pump with my right hand.

The top-most bolt got MUCH easier once I was able to get the hex socket inserted up and into the top-most bolt, and loosened. From there I could turn it with my fingertips from below the car (reaching upward) and then later on from above with my fingertips around the edge of the pump. I'd say that the pump removal can be accomplished in about an hour once the job is properly pre-scoped and/or done before.

So, bottom line is that I recommend that the pump just be removed for an overhaul, and that the overhaul be done right, rather than trying to pull the front cover off and reseal it from the front by extracting the guts of the pump. It's MUCH easier to lay the pump out on a clean work table and do the surgery rather than trying to do it in the confines of the car behind the radiator, while it's bolted onto the car in a horizontal way. It's hugely advantageous with the tandem pumps to be able to turn them all over and around at different angles when working on them, and for some of the o-rings you pretty much HAVE to do this.

Also, I got a much better sense and appreciation for how the pump works and is laid out once I had it apart. What I found is that the SLS portion is a near-identical design to the radial piston pumps that were used by the W116, W123 and W126 models, with the exception that the tandem pump is belt-driven with a pulley, whereas the aforementioned earlier SLS pumps were driven directly off the crankshaft of the motor and bolted directly onto the front of the block. Oh yeah, and paired up with the power steering pump on the M119s with SLS. The earlier design pumps are rebuildable as well, requiring several o-rings and a paper gasket between the pump and the engine block. I actually had to replace this gasket on my 450SEL 6.9 many years ago. The pumps themselves are lubricated by the hydraulic oil, so it's pretty rare that they go out. When they do, it's generally because the fluid is not regularly changed and dirty fluid circulates through the pump internals, permanently scoring and etching them and eventually causing wear.

Cheers,
Gerry
 
Re: Power Steering Pump Leak Investigation

Does the 500E use two different brands of pumps like the E420/400E? They used ZF and Vickers and the only way to tell which one was on the car was to look at the tag.
 
Re: Power Steering Pump Leak Investigation

Yes, exactly. They used both ZF and Vickers/LuK tandem pumps. The Vickers/LuK pumps are a bit more of a PITA in a couple of ways - there is an extra circlip in the system (from what I understand) and (according to GSXR) the small lip at the end of the shaft that the main circlip attaches to, is quite brittle and can be easily damaged when removing or installing the clip. The ZF pump's flange/lip seems to be of a more robust design.

MB offers two different rebuild kits as well - one for each brand of tandem pump.

Cheers,
Gerry
 
Re: Power Steering Pump Leak Investigation

This is superb stuff, I need to do a very similar job on my R129, and your tutorial has made it seem much less daunting.

This forum is by far the most focused of any I belong to, and whilst I don't have a 500E, it's compulsive reading.

I am fortunate in having a brand new Luk pump available, an ebay find from a few years back :thumbsup2:

Thank you Gerry.

Richard
 
Last edited:
Re: Power Steering Pump Leak Investigation

Question on the brake cleaner for engine/parts cleaning. I was always under the impression that brake cleaner was aggressive on aluminum(possibly other metals, too) and discolored plastic and rubber parts(potentially breaking down plasticizers, etc). You're always detail oriented on your work, have you ever heard of negative effects using brake cleaner?
Talking about brake cleaner ....

Today at lunch I headed out for a few errands and stopped by O'Reilly for a few cans of brake cleaner. The guy comes from behind the counter to help me when I walked in and I told him what I wanted. He says "you want the 49-state or the California stuff?" When I told him "I want leaded, hell yeah, we're in Texas, right?!?" he starts laughing and says "damn straight, that non-chlorinated water-based stuff don't even work right! You didn't look like a California type, but I was just checkin'" and we both snickered about it.

Cheers,
Gerry
 
Re: Power Steering Pump Leak Investigation

He's absolutely right! That non-chlorinated stuff is about as effective as water. You are better off getting a metal spray can and using gasoline. I can't get it here in Arizona -- I have to order it from a supplier and have it shipped to me. I'm half way through a case and I'm glad you brought this up because I'm going to order a second case this week before Obama signs a presidential order and completely outlaws it.
You could probably pop over to New Mexico (or down to Mexico proper) and get some of the real stuff there, too....
 
Re: Power Steering Pump Leak Investigation

Went out last week to get some and wouldn't have known about the "light" version. They had both. I bought extra. Nothing gets metal cleaner easier.

drew
 
Re: Power Steering Pump Leak Investigation

Just ordered 12 more 20 Oz. cans for $55 including shipping. I can see them phasing this out everywhere, just like they did to the R12. I'm sure it started in California.
 
Re: Power Steering Pump Leak Investigation

It's $3.99 a can (sometimes cheaper when on sale) here in Houston, normally about $5 a can, whether it's 49-state or Cali cleaner juice. The whole R-12 thing was a farce, when you delve into it you see that it was more of an arm-twisting conspiracy by the refrigerant makers (mainly DuPont) and that R134a is just as bad (or worse) for the environment than R-12 is/was.

The good thing is that there is plenty of supply of both new and reclaimed R-12 out there, and not so much demand for it anymore. And it stores almost forever. My house's two A/C units (as well as everyone else I know) uses the near-identical R-22, which is the residential equivalent of the automotive R-12. Newly installed A/C units are using a different (and supposedly "environmentally friendlier" R410a ... the residential equivalent to R134a...HA) refrigerant but there is no problem getting R-22, and heck I'd use that in my car if I ever had problems getting R-12 (which I won't). They still manufacture new R-12 in Mexico, FYI.

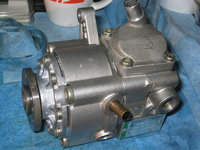
So, I think that chlorinated brake cleaner will be around for a long time to come. Man, is that good stuff. You can see what my pump looked like above, as soon as it came out of the car and I cleaned it up for 3 minutes with brake cleaner. Almost looked new !! :deniro:

proxy.php
 
Re: Power Steering Pump Leak Investigation

Gerry, sorry to hijack the thread :bump: my power steering has been on and off sporadically since I got the car. Last month it's been off and the steering wheel (while not THAT hard to turn) squeeks. I used to have a leak, but power steering fluid hasn't moved since that month it stopped working.

I was thinking of just changing the filter to start with, (this is not a vital issue for me and I don't want to take the car apart) but I am afraid of air getting into the system. Maybe I am just misinformed :D. What is the best way to just change the filter without doing anything else? Anything I should watch out for?
 
Re: Power Steering Pump Leak Investigation

So, I think that chlorinated brake cleaner will be around for a long time to come. Man, is that good stuff. You can see what my pump looked like above, as soon as it came out of the car and I cleaned it up for 3 minutes with brake cleaner. Almost looked new !! :deniro:

Thanx a lot !!!! It so great that there are people like you who share their knowledge and experience with photos in such tiny details ! :nicethread: :bowdown::bowdown:

I have slightly different problem.

Couple of weeks ago I noticed leak and found out that my reservoir fot the SLS fluid is almost empty. So I am losing the SLS fluid pretty quick.
It seems that I wiil do the same job as you did (thanx again for your pics) but for now I was curious if the problem is ONLY in the tandem pump itself or it could be some hoses issues weak clamp or something else ?
Does the second part for SLS (as I understand there are two different parts for the PS and SLS) has the rubber hoses or it is only alumni lines which are unlikely t leak ?

Roman
 
Re: Power Steering Pump Leak Investigation

Tonight, I did about 30 minutes of work out in the garage, mainly to:

a) check out the extent of the pitman arm shaft seal leak
b) strategize about how I'll replace the pitman arm shaft seal and two o-rings tomorrow
c) use brake cleaner to clean the grease off the pitman arm area and under the car

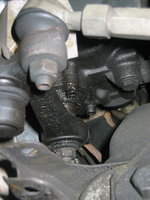
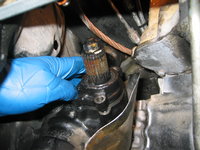
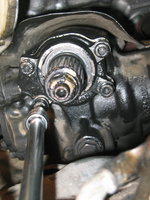
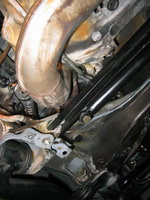
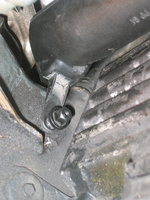
Here are a few photos of the pitman arm on my car (bottom of the steering box). The leak was not horrible (not as bad as some I've seen) but certainly would only get worse. It appeared to be leaking from the pitman arm shaft seal.

Tomorrow I'll remove the crossover pipe (again, after doing this to drain the torque converter) and will remove the cover and reseal the lower part of the steering box. I ordered new upper and lower nuts/bolts for the crossover pipe, so I will replace them. I will be removing them again in the near future when I replace the transmission juice and filter with RedLine D4 fluid, so it will be nice to have new bolts.

Saturday and Sunday I'll also be completing the tandem pump re-seal job and beginning to re-install the pump back in the car. I will be very happy if the rear two bolts that hold the pump to the bracket go back on the car as easily as they came off.

Also I will replace the driver's side transmission cooler hose, which seems to have a very slight leak from one of the fittings. The part is supposed to arrive tomorrow (Saturday) via FedEx from Naperville, IL ordered from MB in Germany.

Cheers,
Gerry


More to come very shortly....
 

Attachments

  • IMG_2219.jpg
    IMG_2219.jpg
    549.5 KB · Views: 45
  • IMG_2220.jpg
    IMG_2220.jpg
    605.3 KB · Views: 37
  • IMG_2221.jpg
    IMG_2221.jpg
    605.3 KB · Views: 38
  • IMG_2222.jpg
    IMG_2222.jpg
    573 KB · Views: 36
  • IMG_2223.JPG
    IMG_2223.JPG
    455 KB · Views: 29
Re: Power Steering Pump Leak Investigation

Your Pitman arm is about as damp as mine has been for several years -- No drops on the ground, but I can see there is a slight leak. I've been hitting it with brake cleaner (the chlorinated stuff) every time I'm under the car. I'll be interested to see how your reseal job goes.

I bought a reseal kit for my old 400E but was overwhelmed with all the seals in it. I'm thinking there are only a few that really matter. I haven't even checked to see if it will fit my E420.
 

Attachments

  • SteeringBoxSealKit.jpg
    SteeringBoxSealKit.jpg
    51.7 KB · Views: 34
Re: Power Steering Pump Leak Investigation

much cheaper to just buy the lower shaft seal + 2 orings. One of the dealer parts guys turned wrenches for quite a while said they use to do only the lower seal quite frequently. Customers didn't like the leak but couldn't justify the $$$ for a complete box re-seal. So they, would do just the lower shaft seal for a lot less.

I think both my cars are similar with a leakage.
 
Re: Power Steering Pump Leak Investigation

I think both my cars are similar with a leakage.

Then I guess we can both sit back and watch GVZ show us how it's done. Then decide if we have the guts to follow. :watchdrama:
 
Re: Power Steering Pump Leak Investigation

Ordinarily I wouldn't bother to fix this leak, as it's not leaking on the ground. Just a weep.

BUT, since I'm "in there" and have recently done the crossover pipe removal, and have drained most of the rest of the PS fluid per the tandem pump R&R, it's going to be an incrementally less messier job to remove the bottom of the pump and replace the seals. There is only the center seal (a press-in) and two o-rings (large and small). My box is NOT leaking from the top -- the rest of the box is bone-dry above the bottom cover. It's really all incremental labor.

I also CLOSELY inspected the two PS hoses from above and below last night (that go between the box and the pump) and NEITHER are leaking in any way. Although I have the hoses and the aluminum heat insulation around them, I decided NOT to replace them at this time. I'm sure they may well leak in the future, but for now I'm not going to bother them.

This weekend is pretty much shot because I am volunteering at church for our Easter services, but I'm hoping that by the end of next weekend (working some weeknights this coming week) I can have this job wrapped up and in the bag, and be running my car again to test things out next weekend.

Cheers,
Gerry
 
Re: Power Steering Pump Leak Investigation

much cheaper to just buy the lower shaft seal + 2 orings. One of the dealer parts guys turned wrenches for quite a while said they use to do only the lower seal quite frequently. Customers didn't like the leak but couldn't justify the $$$ for a complete box re-seal. So they, would do just the lower shaft seal for a lot less.

I think both my cars are similar with a leakage.
The box almost never needs a total re-seal. Usually it's just the Pitman shaft seal that needs to be replaced. Full details with photos and part numbers are in the thread linked below, from when I did this on my wife's 500E a few years ago:

http://www.500eboard.com/forums/showthread.php?1138-HOW-TO-Re-sealing-the-power-steering-gearbox

:banana2:
 
Re: Power Steering Pump Leak Investigation

Question: did you remove the tie rod and drag link from the other end of the pitman arm when doing this job? I'm assuming so, but just wanted to check. The factory manual doesn't specify this as a "pre-step" but I'm going to do it anyway. It looks like they're just direct bolt-ons. As per normal, I'm planning to get a factory alignment at the end of this process, so removing them is probably a moot point anyway.

Cheers,
Gerry
 
Re: Power Steering Pump Leak Investigation

I also CLOSELY inspected the two PS hoses from above and below last night (that go between the box and the pump) and NEITHER are leaking in any way. Although I have the hoses and the aluminum heat insulation around them, I decided NOT to replace them at this time. I'm sure they may well leak in the future, but for now I'm not going to bother them.
IMNSHO... unless you have a record of these two hoses being replaced in the past, I would bite the bullet and replace them now, while the pump is out and you are working on the gearbox anyway. You've already done half the work to access the hoses. And since you have new hoses sitting on your workbench anyway... duuuuude, just go for it! Then your entire PS system will be dry for another 15+ years.

The S-hose is easy. For the straight hose, you disconnect the banjo fitting at the gearbox, and loosen the hose clamp which is visible at the forward edge of the heat shield. Then remove the pipe with the hose still attached to it. Replace hose on workbench, re-install. To aid installation of the banjo screw, loosen the 1 or 2 screws which clamp the metal pipes to the frame rail, up near the radiator. This allows enough movement to get the threads engaged. Don't forget to tighten everything up afterwards.

:mushroom: :mushroom: :mushroom:
 
Re: Power Steering Pump Leak Investigation

Today I did the complete re-sealing of the lower part of the steering box. This entailed two main rubber o-rings, as well as the white Teflon o-ring that goes inside of the lower cover.

Photos of the procedure are below. There are quite a variety of tools required for this job.

First, you should remove the lower cross-over pipe. See how rusty those exhaust bolts get? I have brand-new ones awaiting when I re-install the cross-over pipe. You should order new ones -- they're cheap. Don't forget brand-new copper nuts too !!
IMG_2225.jpg IMG_2226.jpg IMG_2227.jpg IMG_2228.JPG


After removing the crossover pipe for better access to the pitman arm area, let's examine the subject of our work today.
IMG_2229.jpg IMG_2230.jpg


The next job is to take a pair of digital calipers and measure the distance from the pitman arm to the cover. This is a VERY important measurement, and you should get it accurate to the tenth of a millimeter. My measurement was 17.8-17.9mm. You will need to replace the pitman arm on the shaft to this exact position upon re-assembly, so performing this step up front is IMPERATIVE.
IMG_2232.jpg


Next, remove the circlip from the end of the steering box output shaft with a pair of circlip pliers.
IMG_2233.jpg IMG_2234.JPG


Then, another IMPERATIVE step: marking the pitman arm's position on the output shaft. I used some body paint and also the end of a screwdriver to make small marks in the pitman arm and the edge of the shaft. Then, remove the pinch bolt that holds the pitman arm onto the shaft. You will need a 17mm socket, and likely a stubby open-end wrench.
IMG_2235.JPGIMG_2236.jpg


After removing the pinch bolt from the pitman arm, you can pry the pitman arm off of the shaft. It should come off pretty easily, but you may need to use a small pry-bar or long/thick screwdriver to "help" it along. Soaking the splines of the output shaft in WD-40 can help things along a bit...
After you have the pitman arm off the shaft, it looks like this.
IMG_2237.jpg IMG_2238.jpg


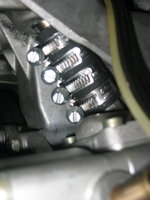
Then comes the fun part -- breaking loose the four hex bolts that hold the lower output shaft cover on the bottom of the steering box. These allen bolts are blue-Loctited into the steering box threads, so they will be VERY difficult to break loose. You will need leverage to do this. It's a good idea to use small blows from a hammer to ensure that your allen socket is inserted all the way into the bolts, so you don't strip the heads out.
IMG_2239.jpg


After removing the four allen bolts that hold the cover to the bottom of the steering box, carefully pry/work loose the cover down the shaft with your fingers, and CAREFULLY perhaps with a small flat-blade screwdriver to pry the cover from the box. BE CAREFUL not to gouge the sealing surfaces of the cover and box if you do this. This is what the bottom of the box looks like with the cover pried off and worked over the output shaft.
IMG_2240.jpg IMG_2241.jpg


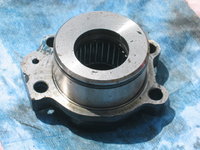
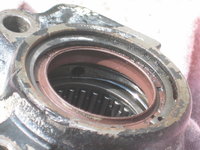
Here's the lower cover, immediately after removal. Check how dirty the output shaft seal is!
IMG_2242.JPG IMG_2243.JPG IMG_2244.JPG IMG_2245.JPG IMG_2246.JPG IMG_2247.JPG


The first step in refurbishing things is to change the seal. Before you do that, you have to use circlip pliers to remove the circlip that retains the seal in the output shaft cover. Then, use some seal pullers to carefully and slowly remove the seal.
IMG_2248.JPG IMG_2249.JPG IMG_2251.JPG IMG_2250.jpg IMG_2252.JPG


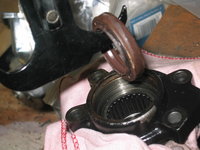
Then, you have the sealing area exposed. Carefully clean it with a lint-free rag or paper. Then, get your new seal ready for installation. You can see the new and old seals compared, here.
IMG_2253.JPG IMG_2254.JPG IMG_2255.JPG


Then, use a seal installer to CAREFULLY press in a new seal to the cover. Replace the circlip that sits in the groove, directly atop the output shaft seal.
IMG_2256.JPG IMG_2257.JPG


Your next job is to replace the o-ring on the other side of the lower cover. Here are photos showing removal of the old o-ring and installation of the new one. I immersed the new o-ring in a light coat of power steering fluid before installing it.
IMG_2258.JPG IMG_2259.JPG IMG_2260.JPG


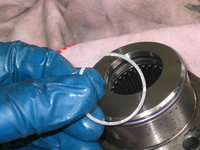
Next up, and this step is OPTIONAL (but easy, and recommended) -- replace the white plastic seal on the INSIDE of the cover. You can use a small jeweler's screwdriver to insert into the small slots in the white o-ring to get it loose, and then press in the (power steering fluid coated) new o-ring into the groove.
IMG_2261.JPG IMG_2262.JPG IMG_2263.JPG


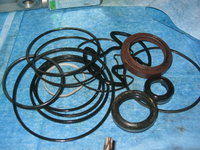
After the rebuilding of the tandem pump and now the lower cover of the steering box, here is the pile of o-rings that have been replaced. Quite a few, eh?
IMG_2280.JPG


Now, it's re-assembly time. Basically it's just the reverse of assembly. Be sure to replace the small o-ring that is found in at the top of the pump sealing area above the output shaft. It's a tiny o-ring and it's easy to miss, or forget to replace it!! I cleaned the old blue Loctite off of the threads of the lower cover bolts as best I could, and applied NEW blue Loctite to the screws.
IMG_2281.jpg IMG_2282.JPG IMG_2283.JPG IMG_2284.JPG IMG_2288.jpg IMG_2289.jpg


And, here's the completely re-assembled lower cover for the steering box. Ready to rock 'n roll !!!
IMG_2290.jpg


More to come very shortly....
 
Re: Power Steering Pump Leak Investigation

I wanted to close out the rebuild of the tandem pump with the final photos from the process.

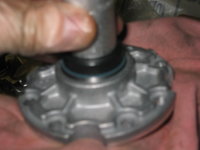
First of all, you need to carefully press the new seal into the aluminum pump cover.
IMG_2264.JPG


And after inserting the shaft into the cover, and inserting it into the pump body, you need to turn the pump over and put the impeller wheel on, per the instructions. CAREFULLY press the circlip into place. You may need to squeeze it tightly closed once installed, with a pair of pliers, as it will likely spread open a bit during the act of pressing it around the pump shaft under the lip.

Then, you need to carefully insert the 10 metal plates into the impeller wheel. I lightly coated each plate with power steering fluid, and once done I lightly coated the entire wheel assembly with power steering fluid. You can see that I angled all of the plates outward to double-check that they were inserted the correct side and orientation. I double-checked this against the photographs I took when I remove them from the impeller wheel.
IMG_2265.JPG IMG_2267.JPG IMG_2268.JPG


Next, you need to insert the metal sleeve around the impeller wheel, and insert the two metal pins into it with the correct end facing upward. Then, install the odd-shaped pressure plate. Then you install the funny-shaped rubber o-ring, and then the hard brown gasket on the outside of the o-ring. Here you see me installing these rings onto the pressure plate.
IMG_2269.JPG IMG_2270.JPG


Then, I installed the large o-ring in the groove around the outside of the impeller wheel area. Again, I immersed the o-ring in a light coating of power steering fluid.
IMG_2271.JPG


Next up, it's time to mate the two halves of the pump together with the four long bolts. Be sure to align the correct sides of the halves before bolting them together. Use your disassembly photos if necessary.
IMG_2272.jpg IMG_2273.JPG IMG_2274.JPG


Then, you replace the o-ring and re-install the top cover, which the hose that connects the reservoir and the pump attaches to on the bottom end.
IMG_2275.JPG IMG_2277.jpg


Here's what the fully re-assembled tandem pump looks like. At this point, it's ready for re-installation into the engine compartment. I also took a photo of the tag attached to the pump so I have a record of the make, model and serial number of the pump.
IMG_2278.JPG IMG_2279.JPG


More to come very shortly....
 
Re: Power Steering Pump Leak Investigation

Thanks for the great detailed writeup, Gerry! Between yours and Dave's, I think I can actually do this job without much trouble.

I did have a few questions:

Did your seals come in one kit or did you have to order some seals separately? Part numbers?

Did you separate the Pitman arm from the center/drag link?

Is that an impact driver I see on the lower cover?

I like the seal installer. What kind is it? Does it come with different size attachments?

Thanks again and Happy Easter to everyone!
 
Re: Power Steering Pump Leak Investigation

Did your seals come in one kit or did you have to order some seals separately? Part numbers?
For the tandem pump, several of the seals and o-rings are only available in the kit, not separately. This forces you to buy the entire tandem pump repair kit to get all needed items. The part numbers for the tandem pump kits, and approximate price, is:

ZF tandem pump: 000 460 37 80 -- List $34.50; parts.com $24.60
Vickers/LuK tandem pump: 000 460 45 80 -- List $112; parts.com $80.40

You can also get the steering gearbox items as a complete kit. However, this kit contains all items for the entire steering gearbox, whereas you only need the items for the lower cover of the gearbox as that is all you need to address for this particular leak. So, buying the entire kit is overkill.

Luckily, the seals and o-rings for the steering box output shaft cover are all available separately. The part numbers for these items are as follows:
- white plastic/teflon inner ring: 124 466 00 60
- large rubber o-ring on lower cover: 008 997 60 48
- small rubber o-ring on lower cover: 009 997 42 45
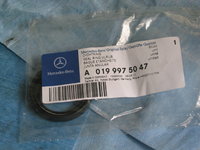
- press-in center output shaft seal in center cover: 019 997 50 47
- large circlip on end of splined output shaft (MB suggests replacement): 124 994 32 41
- circlip that retains center output shaft seal in cover: 000 994 98 41

Did you separate the Pitman arm from the center/drag link?
I did not have to, no.

Is that an impact driver I see on the lower cover?
No sir. No air or power tools were used (and no animals were harmed) in any of these jobs. Blood, sweat and tears, and to quote GSXR much earlier in this thread:

Popcorn for me, sweating & swearing for Gerry. Good times for all!

I like the seal installer. What kind is it? Does it come with different size attachments?
A common tool that is available via Amazon, Harbor Fright and other stores. Yes, there are 10-15 different sized attachments depending on the diameter of the seal you are installing. They are inexpensive, generally $30 or less and very handy to have for seals of all types.
 
Re: Power Steering Pump Leak Investigation

Thanks, Gerry. I was able to verify that my old steering box kit (124 460 79 01) has all the parts you mentioned above (and more). I found an 18-piece seal driver at Harbor Freight for $30. I might even pick up their digital caliper on sale for $21 while I'm there.
 
Re: Power Steering Pump Leak Investigation

I was at church most of today, from 0830, driving one of the shuttle carts that ferries more than 40,000 people to one of my church's 24 Easter services held from Thursday night through Sunday night.
2013-03-31 12.23.gif 2013-03-31 12.23a.gif

So, I didn't get home until after 2PM today, allowing me about 2 hours to do some work on the car before getting ready for 8 guests we are hosting at our house for an Easter dinner of lamb, cooked by my loving wife :)

However, I did have time to replace the "S" hose in the power steering circuit.

First, the old and new hoses, side by side.
IMG_2291.jpg


And then, some photos of the new hose, installed with the heat-shielded insulation. I re-oriented one of the hose clamps so that the access was from below the car; this will make it MUCH easier to access this clamp if/when this hose ever needs to be changed again. The other clamp can be fairly easily accessed from above (with a long, flat-blade screwdriver), so I left it alone in terms of its position. Of course, I used brake cleaner to clean up both clamps before re-installing them.
IMG_2292.jpg IMG_2293.JPG IMG_2294.jpg IMG_2295.JPG


More to come very shortly....
 
Re: Power Steering Pump Leak Investigation

After our Easter dinner, I stole away out to the shop just after the guests left, and my wife was clearing the table and doing the dishes. :banana2:

Started a little work to re-install the tandem pump. Here's what I got done in about 90 minutes....

First, a good overview look at the area I was going to be working in, to re-install the rebuilt tandem pump.
IMG_2296.jpg


Next, fitting the tandem pump into place, and installing the two 13mm front bolts to hold it in place. I did not cinch these bolts down, just tightened them until I just started to hit resistance. This is to provide flexibility for the more difficult rear bolts. This will be my singular task for Monday night ... to re-install the two rear bolts that hold the pump to the backing plate mounted on the engine.
IMG_2297.JPG IMG_2298.JPG IMG_2299.JPG


Next, it was time to cut a replacement "short hose" to replace the original, leaking hose. First, I measured the old hose out at 56mm with my digital caliper. Then (using one of my wife's butcher knives from the kitchen ... without her knowledge) I cut a NEW length of hose, to an 7mm longer length of 63mm. This was to provide a little more hose for the clamps to "bite" into. I also got out the new nipple I'd ordered, along with the new aluminum crush washer, and prepared them for the coming installation in the bracket.
IMG_2300.JPG IMG_2301.JPG IMG_2302.JPG


Then I sprayed the end of the length of hose I cut with silicone spray, to lubricate it a bit to help ease it on to the pump's nipple. After sliding it down the nipple into place, I did the ol' DW SD method of preparing and sliding FOUR (rather than the factory TWO) ring clamps down onto the hose. Here you can see my DW SD four-clamp arrangement, loosened but generally in place.
IMG_2303.JPG


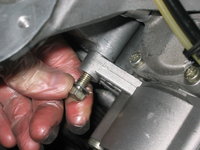
The next step was to bend the hose in place, spray the OTHER (top) end with a bit of silicone spray, and then CAREFULLY and SLOWLY insert the new nipple down through the angled hole in the bracket, and INTO the length of short hose. A key to this is NOT to have the ring clamps too tight, so that they allow the splayed end of the nipple to slide down into the short hose more easily. Once the nipple is inserted, then you thread it into the bracket, and use the hex socket (attached to my 1/2" ratchet) to turn it into place.
IMG_2304.jpg IMG_2305.jpg IMG_2306.JPG


Then it's time to tighten the DW SD four-clamp array with a flat-blade screwdriver. Note that I angled the clamps so that they are pretty easily accessible with a screwdriver for future tightening/removal.
IMG_2307.jpg IMG_2308.jpg


With that job done, it was time to attach the three hoses to the pump. This was achieved fairly quickly. With the banjo bolt, which had two copper crush washers attached, I removed one of the crush washers and exchanged it with a new copper crush washer from my stash of M117/M119/M104 fuel pump copper crush washers, which are the exact same part (the banjo bolt is the exact same bolt as used with the fuel systems on these cars at the pumps and fuel filter).
IMG_2309.JPG IMG_2310.JPG IMG_2311.JPG


Here are the next steps for the next week or so.
  1. Re-install the two hex bolts at the rear of the tandem pump that hold it to the bracket.
  2. Tighten all four tandem pump bolts to the correct torque.
  3. Re-install the pitman arm on the steering box output shaft in the correct location, and to the correct depth.
  4. Re-install the plastic surrounding the cam advance solenoid, and re-install the distributor cap and wires.
  5. Re-install the power steering pump reservoir.
  6. Replace the driver's side transmission cooler line; replace with new transmission fluid as necessary.
  7. Re-install the pulley on the flange of the tandem pump. Re-install serpentine belt.
  8. Fill, bleed and prime the power steering system; check for leaks, etc.
  9. Cross fingers that everything is good :)

Cheers,
Gerry


P.S. By the way, many of you may recall that I have often said on this forum that ALL E500Es carry at least $5K if not $10K+ of "deferred maintenance" (including my own car). As you see with this project, with a simple repair of what originally looked like a leak at the short hose, look at all of the other work that this job has entailed .... deciding to proactively re-seal the tandem pump; proactively replacing the "S" power steering hose; repairing a leaky steering box Pitman output shaft and associated cover; re-sealing both cam solenoids which had oil leaks; and replacing a slightly leaking transmission cooler hose. I can guarantee that the work to do all of this (just the items that needed repairing, not the proactive items) would have been at least $2,000+, and with the proactive items (which will guarantee a leak-free power steering system for at least the next 10-15 years) would definitely have been another $2,500 if not much more. There are always things to do and systems to repair on our cars, no matter how scrupulous the maintenance has been, how high the stack of maintenance paperwork is; and how glowing the terms that a seller/owner uses to describe the condition of their car. Yep, $5K, minimum.


More to come very shortly....
 
Re: Power Steering Pump Leak Investigation

If Mercedes gave a rip about teaching their techs how to work on these older 124's, they would hire you to write technical manuals with your pictures to use in their schools. Your writeups are ten times better than the FSM, for sure. I feel lucky to have access to this website and the great people who contribute to it. Aside from a complete transmission or engine rebuild, I think this forum database covers just about anything that could go wrong with these cars and it's getting better every day with the kind of writeups you did with your steering system. Thanks a million, Gerry.
 
Re: Power Steering Pump Leak Investigation

If Mercedes gave a rip about teaching their techs how to work on these older 124's, they would hire you to write technical manuals with your pictures writeups are ten times beaccess tand the great peopcontribute to it. Aside from a complete transmission or engine rebuild, I think this forum database covers just about anything that could go wrong with these cars and it's getting better every day with the kind of writeups you did with your steering system. Thanks a million, Gerry.

MB teaches systems. Wrench experience is #of cars. The only way they get better is to fix more of them.
 
Re: Power Steering Pump Leak Investigation

MB teaches systems. Wrench experience is #of cars. The only way they get better is to fix more of them.

Your solution is experience. Some guys have 20 years of experience. Some guys have one year of experience twenty times. Based on the quality of work we've all seen come out of these dealers, I would say that they should change this "more is better" approach, if that really is their approach.
 
Re: Power Steering Pump Leak Investigation

Tonight, no real pictures to take. I went out to the garage with one -- and only one -- purpose in mind. To get both of the rear hex bolts inserted and tightened into the back of the tandem pump through the back of the bracket.

I am happy to report that both bolts only took me 35 minutes TOTAL to re-install, and then I tightened up all four bolts. So, the tandem pump is all mounted.

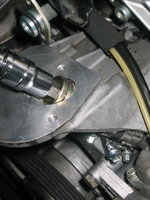
The technique was very different from that of the removal of the bolts. For the re-installation of the more-difficult-to-remove top bolt, I was able to actually snake my hand up to the back of the bracket from below the car (past the "S" hose I installed over the weekend) and insert a hex socket, with wobbly attached, and the hex bolt inserted onto the end of the socket, into the hole in the back of the pump. Using the wobbly for additional leverage, I was actually able to turn the bolt into the bracket with ease, laying on my side and reaching upward with my right arm, until I met resistance which meant that it was in all the way. From there it was a relatively simple matter to snake up four collected 3/8" long extensions, connected to a ratchet, pop them into the wobbly's female end, and tighten the top bolt down as far as it would go.

The lower -- and closer, and easier-to-remove -- hex bolt proved to be more difficult actually! The reason for this was that the new "S" hose I had installed was sort of in the way. First, I reached up and was able to insert the bolt itself into the hole with my fingers, and turn it so that it threaded into the bracket about 3/4 of the way. Then, I used a magnetic picker-upper with the hex socket on the end at a perpendicular angle, with the wobbly attached, to insert it into the almost-in hex bolt. Then I was able to attach a ratchet to the wobbly FROM ABOVE in the engine compartment, and 3-4 clicks at a time, able to tighten up the bolt.

Honestly speaking, it was much easier than I thought it was going to be. Tomorrow night I'll re-install the pitman arm and finish the steering box, and then turn my attention back to the power steering system.

Cheers,
Gerry


Here are the steps for the next week or so.

  1. Re-install the two hex bolts at the rear of the tandem pump that hold it to the bracket.
  2. Tighten all four tandem pump bolts to the correct torque.
  3. Re-install the pitman arm on the steering box output shaft in the correct location, and to the correct depth.
  4. Re-install the plastic surrounding the cam advance solenoid, and re-install the distributor cap and wires.
  5. Re-install the power steering pump reservoir.
  6. Replace the driver's side transmission cooler line; replace with new transmission fluid as necessary.
  7. Re-install the pulley on the flange of the tandem pump. Re-install serpentine belt.
  8. Fill, bleed and prime the power steering system; check for leaks, etc.
  9. Re-install fan shroud, motor mount air duct, lower exhaust crossover pipe, plastic cover over cylinder head, air intake tube, and engine plastic panel.
  10. Re-fill SLS tank with new hydraulic fluid (in effect, a partial flush of the system to replace the fluid that leaked out of the tank once the lines were disconnected to the tandem pump)
  11. Final check for lost tools, sockets, etc. in the engine compartment
  12. Shop-vacuum out remnants and bits of disintegrated black plastic flexible wire wrap that are in the engine compartment
  13. Cross fingers that everything is good :smile:
 
Re: Power Steering Pump Leak Investigation

Tonight was a productive 2.5 hours in the garage shop, grooving to the music of REM, The Smiths and Talking Heads, against the backdrop of a pretty violent and intense spring Houston rainstorm splashing water into the garage due to hitting the ground so hard.

It was productive though, and I was able to put a lot of parts back on the car :).

Here's a synopsis of what I did.

First of all, I replaced the Pitman arm back onto the output shaft of the steering box in the correct position and to the correct 17.8mm depth. Then I bolted up the tie rod and drag link, installed the new circlip on the end of the output shaft, and re-installed the heat shields that protect the tie rod and drag link ball joints against engine heat from the crossover pipe, which runs next to them. No photos of this operation simply because it was fairly simple and straightforward, and proceeded in about 30 minutes total.

When installing the Pitman arm onto the shaft (put a little silicon lube onto the shaft to ease things along), I pre-set the digital caliper to about 19mm. Then I used a small ball-peen hammer to gently tap the Pitman arm down the shaft to the correct depth, compressing the caliper about 0.1mm per tap. Took me a couple of tries to get it exact, but this was an effective method of getting it right to the correct position. Before you position the Pitman arm to the correct depth on the shaft, be sure to insert and slightly snug down the pinch bolt -- that way once you get the arm to the correct depth, it will dramatically reduce the chances of it moving out of the correct position because all you'll be doing is turning the nut/bolt slightly to tighten the arm down on the shaft.

Next up was the plastic piece around the distributor and cam advance solenoid. This was also straightforward, just positioning the plastic piece and then fastening it down with the three 5mm hex bolts that hold it to the cylinder head. Then came the distributor cap (again with three 5mm hex bolts) and then routing and installation of the plug wires. This took a bit of doing but wasn't bad -- the main thing here is to get the wires on the correct terminals on the distributor cap. I'd made a drawing of this when I removed the wires, so it was a simple matter of just matching the wires up with the drawing, and then a double and then triple check with an LED flashlight against the wire numbers to ensure things were correct.

Here's a quick view of the plastic piece, just after installation.
IMG_2315.JPG


The next item on the list was the power steering reservoir. This was a bit more involved, simply because there were a number of parts involved. I carefully cleaned off the platform on the bracket, and then broke out my $30 Mercedes-Benz reservoir gasket out of its package (tip: you can get away with the $3.00 AutohausAZ.com gasket and save yourself about $25 !!).

Front and back views of the old (black) and new (red) power steering reservoir gasket.
IMG_2316.JPG IMG_2317.JPG


But I carefully positioned it onto the platform, and then inserted and tightened down the center rod by screwing it into the platform through the center hole in the gasket.

Center rod tightening and after installation.
IMG_2318.jpg IMG_2319.JPG


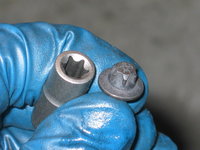
Then I carefully placed the reservoir (which I cleaned up a bit with brake cleaner) onto the gasket and then inserted and tightened the four "female torx" screws that hold it to the platform. I bought new screws from MB as the original ones were a bit worse for wear and slightly stripped out when I removed them. The new ones went on just fine.

Positioning the reservoir on the platform, and some close-ups of the new MB special female Torx screws. Then tightening the reservoir down to the platform.
IMG_2320.JPG IMG_2321.JPG IMG_2323.JPG IMG_2324.JPG


Then, I installed the return line into the back of the reservoir (held on by two 10mm bolts) -- I replaced the o-ring on the end of this return line with a new one I'd ordered from MB. The old one was OK but a new one was cheap, and I'm a big believer in new factory rubber parts wherever and whenever possible !!

Installing the return line on the back of the reservoir.
IMG_2325.JPG IMG_2326.JPG IMG_2327.JPG


From then, it was a matter of installing a new Mann power steering fluid filter, and installing the spring and fluid level plastic piece, and a new rubber gasket on the inside of the power steering reservoir cap. The reservoir is all ready now to receive new power steering fluid, which I'll add as one of the last steps when I'm ready to start the engine and bleed the system.

Finishing out the power steering reservoir install. I always date my oil, air, and PS fluid filters with a Sharpie marker. New rubber gasket on the inside of the PS reservoir lid. And a final view of everything together.
IMG_2328.JPG IMG_2329.JPG IMG_2330.jpg

Tomorrow night I'll re-install the crossover pipe and hopefully get to the replacement of the driver's side transmission cooler hose, and from there I should be done underneath the car, thankfully.

Here's how things progressed, and what's left to do (generally speaking).

Here are the steps for the next week or so.

  1. Re-install the two hex bolts at the rear of the tandem pump that hold it to the bracket.
  2. Tighten all four tandem pump bolts to the correct torque.
    [*]Re-install the pitman arm on the steering box output shaft in the correct location, and to the correct depth.
    [*]Re-install the plastic surrounding the cam advance solenoid, and re-install the distributor cap and wires.
    [*]Re-install the power steering pump reservoir.
  3. Replace the exhaust crossover pipe and install new top and bottom bolts
  4. Replace the driver's side transmission cooler line; replace with new transmission fluid as necessary.
  5. Re-install the pulley on the flange of the tandem pump. Re-install serpentine belt.
  6. Fill, bleed and prime the power steering system; check for leaks, etc.
  7. Re-install fan shroud, motor mount air duct, plastic cover over cylinder head, air intake tube, and engine plastic panel.
  8. Re-fill SLS tank with new hydraulic fluid (in effect, a partial flush of the system to replace the fluid that leaked out of the tank once the lines were disconnected to the tandem pump)
  9. Final check for lost tools, sockets, etc. in the engine compartment
  10. Shop-vacuum out remnants and bits of disintegrated black plastic flexible wire wrap that are in the engine compartment
  11. Cross fingers that everything is good :smile:

Cheers,
Gerry


More to come very shortly....
 
Re: Power Steering Pump Leak Investigation

Another great writeup, Gerry! Not only do you get the satisfaction of saving $5,000 to $10,000 in parts and labor on this, but you know it was totally done right and all questionable parts were replaced with genuine MB parts (something I suspect many dealers don't exclusively use). Plus, we get to see the details of these jobs for when it comes our turn to do them.

Based on your prior choice of fine vintage music, and your estimated age, I suspect you may be listening to either U2 or The Police during your next wrenching session?
 
Joshua Tree & both Synchronicity and Ghost in the Machine have been on previous nights' playlists, indeed.

The length of the 80s playlist spans more than 1,300 songs.
 
Re: Power Steering Pump Leak Investigation

By the way, for the record, I want to let everyone know that I "wussed out" when it came to replacing that straight hose between the pump and steering box that runs along the frame rail.

I did some additional investigation over the past couple of nights and I just could not justify the ROI (at this point) given the additional time to replace the hose. It's not leaking, and with everything else being what it is, I'm not seeing the value at this point. I have the hose and metal sheathing at the ready if and when it does start to leak. The good thing is that I will at least know how to access the area and generally how to do the job.

This is just in case anyone was wondering whether I did this straight-hose replacement as part of my pump/lower steering-box rebuild process. The "S" hose was definitely replaced.

I know, I know ... I'm a weenie.

Cheers,
Gerry
 
Re: Power Steering Pump Leak Investigation

Gerry, cannot thank you enough for such an amazing and detailed write up.

I have one question. How do you jack your car up, and at about what height do you have it to work under?

Thanks

Russell
 
Re: Power Steering Pump Leak Investigation

Gerry, cannot thank you enough for such an amazing and detailed write up.

I have one question. How do you jack your car up, and at about what height do you have it to work under?
I have had the car for the past 5 days or so (and once more briefly when I removed the crossover pipe) sitting on a jackstand under the driver's side frame rail (jack point), and supported at the same time with my very beefy, old-school (1960s vintage, rebuilt) floor jack. It's resting on the other three wheels.

I'd say the driver's side floor is about 18" off the ground -- easily enough to get underneath the car and work on it. After I do the crossover pipe tonight, I'll lower the car down for the rest of the job. I'll stick a ruler down there tonight and take a photo of the height. I couldn't use ramps for this job because I knew I'd likely be working on the steering system/box, and need access to turn the front wheels (bleed the system, etc.). Also, I backed the car into the garage so the underhood/under-car area gets max daylight. It's why my ankles and legs were getting sprayed last night with our intense thunderstorm -- the rain was hitting the driveway from 4-5 feet away so hard that it was splashing me a bit !! No complaints though -- rain is always welcome here in Houston, and it was 73F outside during the storm when I was working out in the garage (i.e. perfect temp for working on cars).
 
Re: Power Steering Pump Leak Investigation

Tonight I entered the home stretch on this two-week saga of leak-fixing. Just about every part is now back on the car, save for one of the three bolts that connects the two halves of the fan shroud, and the intake tubes and plastic center section on top of the motor. It was a night where a lot of "loose ends" got wrapped up.
Main mission tonight was to get the exhaust crossover pipe installed. I had two new long bolts for the upper connection, and two new bolts and copper nuts for the lower connection. Took me two tries to get the crossover pipe situated EXACTLY the way I wanted it, which required about 20 minutes of time. Not too bad. Everything mated up and threaded together just fine.

Here are a few views of the crossover pipe: the upper connection, the lower connection, and an overall view from under the car.
IMG_2332.jpg IMG_2334.JPG IMG_2335.jpg


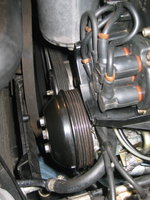
Next up it was time to install the pulley onto the outside of the tandem pump flange. This was a quick operation, although I was only able to get the three bolts finger-tight until later on when I installed the belt, when there was enough resistance on the pulley that I could snug down the bolts.
IMG_2336.JPG IMG_2337.jpg


Then it was time to re-install the plastic air duct that goes from the bumper/fog light area back to the motor mount, to supply cool, fresh air to that expensive little hydraulic wonder. This was a simple matter of getting the pipe into position, snapping one end of it into the air collection duct end, and putting the hole around the bolt that was jutting out from the frame. Then it was a quick matter to install the 10mm plastic washer and snug it down.
IMG_2338.jpg IMG_2339.jpg IMG_2340.jpg


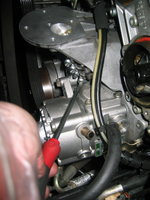
The next little "job" on the list was to re-install the serpentine belt, and tighten up the tandem pump pulley bolts. Here's a view of me pushing the belt tensioner down to create slack in the belt, to get the belt around the rightmost two pulleys.
IMG_2342.jpg


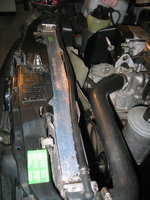
Finally, the quickest and most satisfying portions of the job. Installing the plastic cover over the driver's side distributor cap and wire area. Then it was time to clean the extremely dirty top of the Behr radiator, which had accumulated quite a lot of dirt under the fan shroud. This was a quick operation and even though no one will see the top of the radiator after the fan shroud is installed, I sleep better at night knowing that the top of my radiator is clean, and that GSXR won't have something to point out as "off" or not correct with my procedure here :watermelon:
IMG_2343.JPG IMG_2344.JPG IMG_2345.jpg


Lastly, it was time to install the top half of the fan shroud from above, and connect the two pieces with the three small bolts, and clip the shroud down to the radiator support. This went relatively quickly and on this note, I decided to end for the night and come into the house around 10:30 PM.

On Thursday I'll do the transmission cooler hose replacement, and refill the SLS and power steering reservoirs with fresh fluid, and bleed the steering system.

Cheers,
Gerry


Here are the steps for the next few days.


  1. Re-install the two hex bolts at the rear of the tandem pump that hold it to the bracket.
  2. Tighten all four tandem pump bolts to the correct torque.
  3. Re-install the pitman arm on the steering box output shaft in the correct location, and to the correct depth.
  4. Re-install the plastic surrounding the cam advance solenoid, and re-install the distributor cap and wires.
  5. Re-install the power steering pump reservoir.
  1. Replace the exhaust crossover pipe and install new top and bottom bolts
  2. Replace the driver's side transmission cooler line; replace with new transmission fluid as necessary.
  3. Re-install the pulley on the flange of the tandem pump. Re-install serpentine belt.
  4. Fill, bleed and prime the power steering system; check for leaks, etc.
  5. Re-install fan shroud, motor mount air duct, plastic cover over cylinder head, air intake tube, and engine plastic panel.
  6. Re-fill SLS tank with new hydraulic fluid (in effect, a partial flush of the system to replace the fluid that leaked out of the tank once the lines were disconnected to the tandem pump)
  7. Final check for lost tools, sockets, etc. in the engine compartment
  8. Shop-vacuum out remnants and bits of disintegrated black plastic flexible wire wrap that are in the engine compartment
  9. Cross fingers that everything is good :smile:


More to come very shortly....
 
Re: Power Steering Pump Leak Investigation

Finally, the quickest and most satisfying portions of the job. Installing the plastic cover over the driver's side distributor cap and wire area.

In contrast, this was the most frustrating part of finishing up my ETA replacement. As I pushed the plastic cover over the distributor, I watched as the hardened plastic cracked. Now I have a nice 1" crack to look at every time I open the hood.

Gerry, on those long bolts at the collector, do you remember if the square side of the copper nut goes in facing up or down? When I try to screw the new nut onto the new bolt, it seems that the threads only allow it to go in with the square part facing down (facing the bolt head) as in the picture, but it seems to make more sense to have the serrated round part go into the collector facing down. I don't want to strip it.
 

Attachments

  • UpperExhaustPipeBoltAndNut.jpg
    UpperExhaustPipeBoltAndNut.jpg
    354.8 KB · Views: 22
Re: Power Steering Pump Leak Investigation

I have a spare plastic cover for the passenger side (IIRC) that I'd send for postage charge, if you need it. I got it a few months back off of an E420. The other cover may be at that breaker's, but it's been about 3-4 months since I've been back there, so the car may be gone now.... let me know if you need me to send you the passenger side cap - I'll double check that it's that side.

As far as the long bolts at the top connection at the pipe, the nuts have always been attached so it's just been a matter of mating up the pipes, and then inserting/tightening up the bolts. Haven't had to fiddle with the nuts as they seem to be attached. I believe that the round part is facing downward, though. Perhaps GSXR can help with this; I'll try to shine a torch up there and double-check tonight. As you know, it's exceedingly difficult to see on top of that upper flange, at least from below.....

Gerry
 
Re: Power Steering Pump Leak Investigation

Serrated part goes into the manifold. The nuts are probably the "compression" type so the one side allows easy threading, the other side does not. When installed in the manifold, the bolt should easily thread in halfway, then require extra effort to tighten.

:mushroom:
 
Re: Power Steering Pump Leak Investigation

Thanks, Gerry, for offering to give me the suppressor housing. I wish I had known before I ordered one early this morning when I placed my weekly parts.com order. It was only $19.80, which was a surprise to me. BTW, I checked on the "Estimate Freight" box last time and saved about $20 on shipping and they still came via FedEx. We'll see what they charge this time. I ordered $146 in parts but they were all fairly small/light.

Dave, when I try to thread the bolt into the serrated (round) part of the nut first, it won't go in by hand. I can get it about half way in on the square side. But I think you are right -- the serrated end of the nut goes into the collector first so it is facing down toward the bolt head.
 
Re: Power Steering Pump Leak Investigation

Dave, when I try to thread the bolt into the serrated (round) part of the nut first, it won't go in by hand. I can get it about half way in on the square side. But I think you are right -- the serrated end of the nut goes into the collector first so it is facing down toward the bolt head.
That is weeeeird. I have some of these in stock, I'll go take a look at the ones I have on the shelf...

UPDATE: I checked my square copper nuts for the exhaust manifold. The OE nuts from the dealer have no serrations. The one side has a smaller, round part that should insert into the manifold. I can screw in from this side a good 3 turns before resistance is felt. The opposite end is compressed, so it takes extra torque to screw through that part, which has a natural locking effect without lock washers. I always coat the bolts with anti-seize prior to installation as they tend to corrode even in dry climates.

Jon, are your copper nuts p/n 000-990-25-52, and are they OE from the dealer (or parts.com)? Can you post a photo showing both ends?

:detective:
 
Re: Power Steering Pump Leak Investigation

Jon, are your copper nuts p/n 000-990-25-52, and are they OE from the dealer (or parts.com)? Can you post a photo showing both ends?

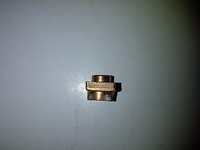
The picture above is the nut and bolt I got from the dealer about two years ago specifically for that upper connecting pipe. I can't find the receipt for it. It seems like the serrated (round) edge of the nut is the compressed side and the square side is large enough to get the bolt started by hand.

UPDATE: I took a few more pictures of the copper nut. It is clear that the serrated end is crimped. I can't get the bolt to thread by hand. :wtf:
 

Attachments

  • ExhaustPipeNut1.jpg
    ExhaustPipeNut1.jpg
    338.3 KB · Views: 17
  • ExhaustPipeNut2.jpg
    ExhaustPipeNut2.jpg
    322.4 KB · Views: 18
  • ExhaustPipeNut3.jpg
    ExhaustPipeNut3.jpg
    344.1 KB · Views: 15
Last edited:

Who has viewed this thread (Total: 8) View details

Back
Top