Thank you Dave for chiming in. And for the last advise, I didn't think about the springs. I'm still waiting on the parts (Autodoc...) so I'll check the springs. I think I have most of them in my parts bin, either new or new-ish from my E420 days.I missed the trans pan photos. Arnt is correct, that isn't bad... there is normally a fine layer of swarf at the bottom. I don't see any thick buildup, nor any chunks of friction material. Clean it all up, change filter & fluid, and pull the B1/K1/K2 spring trains to make sure no springs are broken.

Navigation
Install the app
How to install the app on iOS
Follow along with the video below to see how to install our site as a web app on your home screen.
Note: This feature may not be available in some browsers.
More options
Style variation
-
Hi Guest !
Welcome to the 500Eboard forum.
Since its founding in late 2008, 500Eboard has become the leading resource on the Internet for all things related to the Mercedes-Benz 500E and E500. In recent years, we have also expanded to include the 400E and E420 models, which are directly related to the 500E/E500.
We invite you to browse and take advantage of the information and resources here on the site. If you find helpful information, please register for full membership, and you'll find even more resources available. Feel free to ask questions, and make liberal use of the "Search" function to find answers.
We hope you will become an active contributor to the community!
Sincerely,
500Eboard Management
You are using an out of date browser. It may not display this or other websites correctly.
You should upgrade or use an alternative browser.
You should upgrade or use an alternative browser.
Did the mod to the distributor caps today, unfortunately the screws for the left bank rotor are stripped, so I'll have to sort that tomorrow.

Installed the OEM roof racks today, I'm going to haul stuff in a ski box as soon as the car is fixed anyway. I love these things, they are so utterly German:


The package with trans filter and oil is finally shipped, but I don't think it'll arrive until next week. But I still have to check on the springs in the valve body.

Installed the OEM roof racks today, I'm going to haul stuff in a ski box as soon as the car is fixed anyway. I love these things, they are so utterly German:


The package with trans filter and oil is finally shipped, but I don't think it'll arrive until next week. But I still have to check on the springs in the valve body.
I'm going to transport tools etc from my fathers garage, unfortunately the van I have access to is too high, but the 500E with the ski box is ok. I'll use the box for the dirty items now that I've cleaned my trunk.I like the utilitarian roof racks as well. There is a set on Ebay I've been waffling on for some time. They add to the Q ship experience as one passes sleek racer sports cars. Nice when the trunk is full as well.
In case you bought the MANN filter KIT which includes the trans pan gasket, then have a look at this thread:The package with trans filter and oil is finally shipped, but I don't think it'll arrive until next week. But I still have to check on the springs in the valve body.
New out of box MANN oil pan gasket sipping | Transmission and Driveline
As part of preparing my ex. Limited for handover last year I did a transmission oil & filter change. The oil pan was freshed up with a respray due to regular wear and some scratches at the bottom, but no dents. I checked the pan was 100% straight and used a MANN filter kit, but the gasket didn't...
www.500eboard.co
Thank you for the info Arnt, the filter kit I ordered is from Hengst which I have full confidence in.In case you bought the MANN filter KIT which includes the trans pan gasket, then have a look at this thread:
The gasket didn't seal at all, and it was not just a couple of drops or some sweating, the oil just flowed out! The MANN filter is made of too hard rubber and it is too thick, the needed flexibility wasn't there. The trans pan was 100% straight, but the more I tightened the more leak - which is pretty normal due to deformation of the pan.New out of box MANN oil pan gasket sipping | Transmission and Driveline
As part of preparing my ex. Limited for handover last year I did a transmission oil & filter change. The oil pan was freshed up with a respray due to regular wear and some scratches at the bottom, but no dents. I checked the pan was 100% straight and used a MANN filter kit, but the gasket didn't...www.500eboard.co
Edit: I have already straightened the trans pan, it was really wobbly.
Last edited:
Removed the valvebody today, there were a lot of ATF in there. What a mess, but I didn't want to remove the kits under the car, I don't have a lift so it's jack stands now, the ramps are too low. I also want to check everything I can while the WB is out, and clean it of course.
Got the K1 and K2 kits out today, they are both intact. I'll replace the K1 since I have a kit in my parts pile.
Is there anything else I should address or check when I have the WB out? I'm going to search a bit more on the forum, I know there's ton of info.
Got the K1 and K2 kits out today, they are both intact. I'll replace the K1 since I have a kit in my parts pile.
Is there anything else I should address or check when I have the WB out? I'm going to search a bit more on the forum, I know there's ton of info.
Sounds good! Mostly just inspect each spring train for any damage, and clean everything before re-installing. However, if the VB checks out fine and the trans is still acting up, there could be something wrong elsewhere... in which case you're back to considering a full rebuild.


Well if I have the valvebody off the trans, I might as well clean it properly. It's not at all bad, but I can see that it's been opened before by the look of the screws. The two screws holding the halves together had no marks though, so I don't think it's been split before. Got started on one of the parts, I'll remove everything, clean it and reassemble. This way I'll also know that nothing is broken inside the VB, and it will be clean of course. I won't be replacing teflon gaskets or anything at all really unless something is broken or does not work as intended.
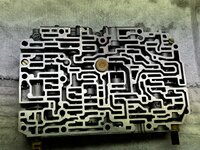

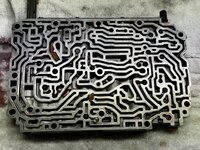


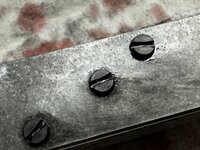


I've always wondered if there is a special tool for those screws, something that fits over the round screw head so it can't slip off. @Klink? Gotta be some ridiculously priced Hazet or Stahlwille driver...Well if I have the valvebody off the trans, I might as well clean it properly. It's not at all bad, but I can see that it's been opened before by the look of the screws.
View attachment 184667

I know there is, I just can't find the image or the name for it. It's a 90 degree angled screwdriver with a blocky end. Hard to describe. I just use a normal stubby that fits as good as possible, and then take it slow.I've always wondered if there is a special tool for those screws, something that fits over the round screw head so it can't slip off. @Klink? Gotta be some ridiculously priced Hazet or Stahlwille driver...
Got the valvebody completed today, it went fine as far as I know, I will be starting her up tomorrow hopefully. Not a superfun job, but everything looked great, nothing broken, nothing out of the ordinary. It was quite clean actually, not as bad as the ones I saw on YouTube, but it is even cleaner now. 
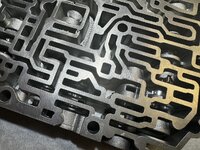

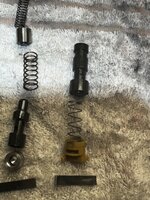
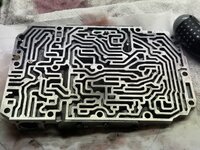


#4 is the bottom half of the VB after I split it, #7 is both halves assembled again!I am scratching my head, is image #4 and #7 the same part?
No pictures today, but everything is assembled with the trans and the first 5 liters of ATF is in. I can't start the car since I'm lacking a rotor for the left bank, I had to hack it to pieces due to completely rounded screws. I'm quite surprised that I did not have a single rotor in the parts bin, I have all other ignition parts x2 at least. 
Newly back to the hobby I discovered that no one carries these parts on the shelf anymore, the Mercedes-Benz dealer here even stopped selling parts to non-business owners! Amazon is half the price or even less than all others too, so I ordered from them, but it's not in stock in a A-Z warehouse in Sweden so it'll be a few days until I can start up.
Newly back to the hobby I discovered that no one carries
There's always something new isn't it. 
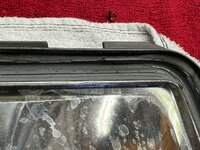
Noticed that the right headlight seems off, and yea the glue keeping the glass to the plastic frame has hardened and started to split, letting water into the housing.
This calls for a DIY repair. The reflectors are done for, and the silver mirror paint on the plastic frame is damaged too. I will swap the reflectors from another Hella light I have, I just have to remove the cover on the fog light to make it a full beam. On the Hellas they've just inserted the metal cup over the mounting for the lamp, so I carefully bent back the steel prongs and out it came.
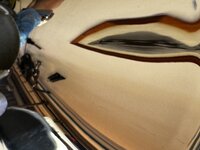
Now the full beam reflector is good enough, but the main reflector suffered from a blown out bulb and/or a too bright one, so it's got some hazing and clouding. Normally this is difficult to fix, it is so easy to scratch the mirrored surface. But it IS possible, I will not get a new surface, but it will be good enough. And it costs nothing.
So how do I do it? Well, first, remove the reflector of course, and the lamp bracket. Then, use compressed air to remove as much dust and particles as possible. After that, I use a window cleaner from an aerosol bottle, in this case Ecolabs Spray Cleaner. Spray on a layer that makes a foam, then I let the agent work for about a minute. Then I SLOWLY blow off the foam with compressed air. Time to inspect! Most of the dust and larger imperfections are gone, now its time for the scary part.
On with another layer of Spray Cleaner, and then I use a CLEAN microfiber cloth to wipe it out, gently, basically no pressure. Then another go with a new cloth. When it's almost dry and wiped out, I look for any major missed spots. But it is better to leave some of them, every time you touch the reflector is a risk. Less is more.
It came out really well in the end, this will be perfectly serviceable. Now I'm removing all of the old sealant and paint from the plastic housing to get it ready for paint. I also have to clean off sealant from the glass, and of course clean it properly.
This is the status before:
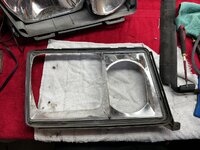


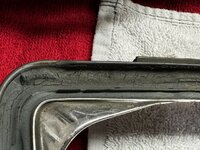
Donor headlight for the reflectors:


Main reflector before cleaning:
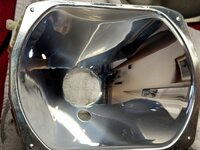

And after cleaning:


Noticed that the right headlight seems off, and yea the glue keeping the glass to the plastic frame has hardened and started to split, letting water into the housing.
This calls for a DIY repair. The reflectors are done for, and the silver mirror paint on the plastic frame is damaged too. I will swap the reflectors from another Hella light I have, I just have to remove the cover on the fog light to make it a full beam. On the Hellas they've just inserted the metal cup over the mounting for the lamp, so I carefully bent back the steel prongs and out it came.
Now the full beam reflector is good enough, but the main reflector suffered from a blown out bulb and/or a too bright one, so it's got some hazing and clouding. Normally this is difficult to fix, it is so easy to scratch the mirrored surface. But it IS possible, I will not get a new surface, but it will be good enough. And it costs nothing.
So how do I do it? Well, first, remove the reflector of course, and the lamp bracket. Then, use compressed air to remove as much dust and particles as possible. After that, I use a window cleaner from an aerosol bottle, in this case Ecolabs Spray Cleaner. Spray on a layer that makes a foam, then I let the agent work for about a minute. Then I SLOWLY blow off the foam with compressed air. Time to inspect! Most of the dust and larger imperfections are gone, now its time for the scary part.
On with another layer of Spray Cleaner, and then I use a CLEAN microfiber cloth to wipe it out, gently, basically no pressure. Then another go with a new cloth. When it's almost dry and wiped out, I look for any major missed spots. But it is better to leave some of them, every time you touch the reflector is a risk. Less is more.
It came out really well in the end, this will be perfectly serviceable. Now I'm removing all of the old sealant and paint from the plastic housing to get it ready for paint. I also have to clean off sealant from the glass, and of course clean it properly.
This is the status before:


Donor headlight for the reflectors:


Main reflector before cleaning:


And after cleaning:


Of course when the light assembly is out, it's obligatory to clean the area out, AND not forget to clean out the drain valve, it's always full of muck.

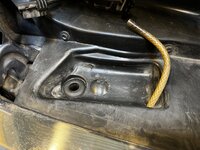
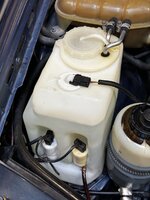
One thing ALWAYS leads to another, and I noticed that the washer fluid container had a small crack, so I'll replace it from my parts pile. Looks ok under it, a smaller area where the paint is worn off, I'll sort that before installing the container again.


One thing ALWAYS leads to another, and I noticed that the washer fluid container had a small crack, so I'll replace it from my parts pile. Looks ok under it, a smaller area where the paint is worn off, I'll sort that before installing the container again.

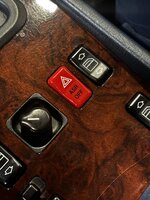
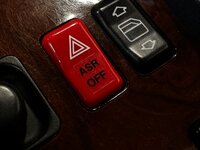
Made up a wiring for the ASR-button, the closest button I had in my parts pile was a hazard switch. At least it's the same symbol as in the instrument. It's also easily replaceable. Polished the panel when it was out, just to get it a bit better, matching the rest of the wood.
I tested the orthopedic seats that are retrofitted to this car, probably a very long time ago. It is well made with what seems to be only OEM parts. It works perfectly on both seats, all of the positions and switches. Holds air long after the car is turned off too.


I tested the orthopedic seats that are retrofitted to this car, probably a very long time ago. It is well made with what seems to be only OEM parts. It works perfectly on both seats, all of the positions and switches. Holds air long after the car is turned off too.


Transmission fixed! (hopefully...) (TL;DR: the transmission problem was the B-switch left in circuit closed position)
I feel so bad for my father, Alzheimers is such a literal mindf**k. He was an accomplished mechanic, running his own shop in the 70's.
Those of you who followed the thread knows that he had a garage break in, where they stole the wheels and some other bits, among those the gear lever. The car was repaired at a local well known and reputable workshop.
They did however manage to put the B switch in closed position when they reinstalled the gear lever gate! I didn't notice, I basically never use it anyway.
It wasn't until today when I started the car up after receiving the rotor from Amazon that I noticed something wrong. I had already added 5 liters of ATF, so I was needing to start the car and move through the gears before filling in the last of the ATF. And that's when I saw that the switch was in it right position, thereby engaging 1st gear start all the time. I just knew that this is why the transmission is hesitant to shift.
But I had to know for sure, testing it systematically, so I added the ATF, left the switch as-is, and took a test drive. Same as before, hesitant and "strange" behaviour. Back to the workshop, r&r the switch, fix it, and of course clean everything properly. New test - boom! trans shifts as normal! Imagine that my dad ordered a full trans rebuild. I was supposed to come and have a second look, but he already shipped the car out due to the Alzheimers, forgetting about the agreement we made.
Not all is perfect though:
It shifts hard-ish sometimes to and out of 4th, so I still have some adjustment to do. It may be that I've made a mistake when assembling the VB, but it's minor problems, all I can fix. I also happened to move the modulator when I was working under the car, so I will check the easy things first.
And I still have a noise from the front end of the engine, right side. It got better when I swapped the bearing on the AC compressor, but maybe smog pump, alternator. I'll test the car with the serpentine belt off tomorrow. The sound follows the revs exactly, and there's no difference in the sound apart from following the revs, so I don't think it's the primary trans pump.
So I took it home today! Went to the post office to ship a couple of packages to members here, so they have had the honor...
I have also had some other project going on:
Completed the replacement of the washer fluid bottle. I kept the extra dimple, it clears the hood AND it also lifts it up so it wont touch the inner fender. I'll leave it like this. It's a container from 1995, so a lot cleaner and of course no cracks. Also cleaned the fluid heater and valve, and the level floater. Found two good strong OE washer fluid pumps.
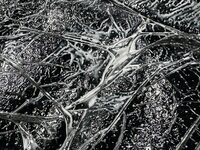
Another project is the rear left seat cushion, it's been damaged by some sort of fluid, turning the leather hard and it shrunk. I'm trying to revive it with leather reconditioner especially made for these type of damages, but it's always a gamble, mostly depending on if the leather fibers are destroyed. Worth a shot anyway, otherwise I'll have to have it reupholstered.


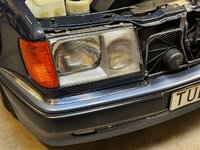
I'm still not finished with the headlight glass and frame, but the rest of the headlight is reassembled and fully working. I used one of my spare normal lenses for the time being. I'm restoring the wipers too, so it all have to come off again anyway.
Added ASR OFF text to the button:
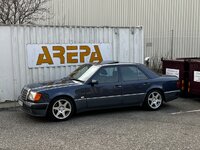
And finally, a couple of images of the car outside from today:

I feel so bad for my father, Alzheimers is such a literal mindf**k. He was an accomplished mechanic, running his own shop in the 70's.
Those of you who followed the thread knows that he had a garage break in, where they stole the wheels and some other bits, among those the gear lever. The car was repaired at a local well known and reputable workshop.
They did however manage to put the B switch in closed position when they reinstalled the gear lever gate! I didn't notice, I basically never use it anyway.
It wasn't until today when I started the car up after receiving the rotor from Amazon that I noticed something wrong. I had already added 5 liters of ATF, so I was needing to start the car and move through the gears before filling in the last of the ATF. And that's when I saw that the switch was in it right position, thereby engaging 1st gear start all the time. I just knew that this is why the transmission is hesitant to shift.
But I had to know for sure, testing it systematically, so I added the ATF, left the switch as-is, and took a test drive. Same as before, hesitant and "strange" behaviour. Back to the workshop, r&r the switch, fix it, and of course clean everything properly. New test - boom! trans shifts as normal! Imagine that my dad ordered a full trans rebuild. I was supposed to come and have a second look, but he already shipped the car out due to the Alzheimers, forgetting about the agreement we made.
Not all is perfect though:
It shifts hard-ish sometimes to and out of 4th, so I still have some adjustment to do. It may be that I've made a mistake when assembling the VB, but it's minor problems, all I can fix. I also happened to move the modulator when I was working under the car, so I will check the easy things first.
And I still have a noise from the front end of the engine, right side. It got better when I swapped the bearing on the AC compressor, but maybe smog pump, alternator. I'll test the car with the serpentine belt off tomorrow. The sound follows the revs exactly, and there's no difference in the sound apart from following the revs, so I don't think it's the primary trans pump.
So I took it home today! Went to the post office to ship a couple of packages to members here, so they have had the honor...
I have also had some other project going on:
Completed the replacement of the washer fluid bottle. I kept the extra dimple, it clears the hood AND it also lifts it up so it wont touch the inner fender. I'll leave it like this. It's a container from 1995, so a lot cleaner and of course no cracks. Also cleaned the fluid heater and valve, and the level floater. Found two good strong OE washer fluid pumps.

Another project is the rear left seat cushion, it's been damaged by some sort of fluid, turning the leather hard and it shrunk. I'm trying to revive it with leather reconditioner especially made for these type of damages, but it's always a gamble, mostly depending on if the leather fibers are destroyed. Worth a shot anyway, otherwise I'll have to have it reupholstered.


I'm still not finished with the headlight glass and frame, but the rest of the headlight is reassembled and fully working. I used one of my spare normal lenses for the time being. I'm restoring the wipers too, so it all have to come off again anyway.

Added ASR OFF text to the button:


And finally, a couple of images of the car outside from today:


Glad that you identified the B switch problem. It looks like you avoided a huge expence. I like to clean any leather items well with mild soap and water with a long dry out after. I think you will be able to save the cushion. The car is looking fantastic.
My own father had early stages of Alzheimer's and was also a very capable mechanic. I would guess your father was pleased he had a son that he could pass his knowledge to. And you pass the knowledge to us.
My own father had early stages of Alzheimer's and was also a very capable mechanic. I would guess your father was pleased he had a son that he could pass his knowledge to. And you pass the knowledge to us.
Thank you Drew for the kind words!Glad that you identified the B switch problem. It looks like you avoided a huge expence. I like to clean any leather items well with mild soap and water with a long dry out after. I think you will be able to save the cushion. The car is looking fantastic.
My own father had early stages of Alzheimer's and was also a very capable mechanic. I would guess your father was pleased he had a son that he could pass his knowledge to. And you pass the knowledge to us.
It looks amazing doesn't it? It's hard to believe that it's quite dirty, got a lot of paint imperfections, repainted sections etc, when looking at the pictures. But I'll take it.That was good news, Thomas!
The car looks great - so clean & shiny with the new wheels. I don't think I've ever seen this color up close. Let's hope that seat leather comes to live again.
Snap-On "carburetor" tools: TM83A, TM84, TM85. The 83A is a must have.I've always wondered if there is a special tool for those screws, something that fits over the round screw head so it can't slip off. @Klink? Gotta be some ridiculously priced Hazet or Stahlwille driver...

Snap-on Store
Thanks for posting, Klink!Snap-On "carburetor" tools: TM83A, TM84, TM85. The 83A is a must have.
Snap-on Store
shop.snapon.com

I've never seen those carb.tools before, but I should gladly had them when I was wrenching mopeds back in the younger days. All was slot screws and the regular screwdriver quality was a bit soft. But you learned one thing - to handle and use the tools correctly.

THANK YOU! Just ordered the TM83A...Snap-On "carburetor" tools: TM83A, TM84, TM85. The 83A is a must have.
Snap-on Store
shop.snapon.com

I have had some electrical gremlins and some ASR/ABS lights, along with error codes. So I decided to remove the ASR defeat. I don't think there is something wrong with it, but I don't know who installed it, if it's properly done etc. Instead of leaving a non-working fader wheel where I did put the ASR OFF button, I used another panel from a car without the fader wheel. It's got a few cracks and scratches, but turned out satisfactory after a polish.

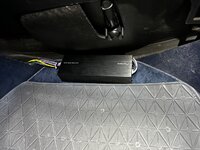
I also installed the Pioneer amp I had in my E420, it's so small but does a lot for the sound compared to the HU even with just the four speakers (I don't have the door speakers connected). A nice setup, these days if I really want to listen to music I just put my Airpods in, so ICE is not so important to me.
I placed it on top of the passenger footwell carpet, that way it's ventilated, and easy to remove etc.
The left rear seat is still under treatment, I feed it leather restorer every day and let it sit overnight. It's been a few days now, and it is slowly getting better. Hopefully I can bring it back enough for it to be ok to use without discomfort and that it wont just tear or rip:


And the final good news for today! I ordered springs for the car hoping that they would be available, and they were. The price was €810/$895 for all four. I didn't order pads because I wanted to know if I got long or short ones, and I got long, so I'll start with 1 pt pads front and rear, I already have new rear pads, so I began with the rear axle today. Production in week 43 last year for two of them, the other week 13 2019. So they are not NLA.


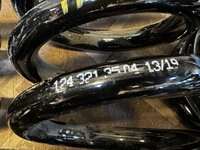

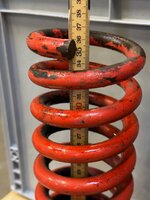
The old rear springs... They are really short, and soft. I think the car's been riding on the buffers in the back. The spring pad was totally collapsed, and the spring was quite soft I noticed when compressing it. I have no idea what brand they are, on this particular spring there are no visible markings, stamps or logos. Some comparison against the new ones:



That's all for today folks!

I also installed the Pioneer amp I had in my E420, it's so small but does a lot for the sound compared to the HU even with just the four speakers (I don't have the door speakers connected). A nice setup, these days if I really want to listen to music I just put my Airpods in, so ICE is not so important to me.
I placed it on top of the passenger footwell carpet, that way it's ventilated, and easy to remove etc.

The left rear seat is still under treatment, I feed it leather restorer every day and let it sit overnight. It's been a few days now, and it is slowly getting better. Hopefully I can bring it back enough for it to be ok to use without discomfort and that it wont just tear or rip:


And the final good news for today! I ordered springs for the car hoping that they would be available, and they were. The price was €810/$895 for all four. I didn't order pads because I wanted to know if I got long or short ones, and I got long, so I'll start with 1 pt pads front and rear, I already have new rear pads, so I began with the rear axle today. Production in week 43 last year for two of them, the other week 13 2019. So they are not NLA.


The old rear springs... They are really short, and soft. I think the car's been riding on the buffers in the back. The spring pad was totally collapsed, and the spring was quite soft I noticed when compressing it. I have no idea what brand they are, on this particular spring there are no visible markings, stamps or logos. Some comparison against the new ones:


That's all for today folks!
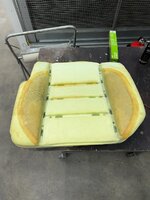
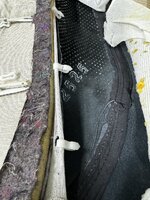
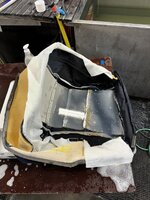
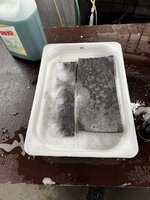
Didn't have a lot of time for the car today, but I checked on my seat, and it's not recoverable as it is. So I removed the seat cover so I could wash the foam properly, and try to dissolve whatever is spilt on the seat. It ended up with trying to dissolve the greasy/oily substance. I basically soaked it in soapy water, and then blew out all of the perforations one by one. Washed the foam pieces too, and lastly I rinsed the seat leather with demineralized water, let it dry for a bit, and then worked in some leather conditioner. It'll be fun to see what I arrive to tomorrow morning. But I didn't have any choice, it's this, or I'll have to get it redone by an upholsterer.


Then a short stint with the springs, I had forgotten about the LCA bushing, all of the other bushings/linkages are replaced by my dad, but these ones are a total disaster. Think of a sleeve of cookies left in a gym bag for two months... Crumble crumble. So I've ordered two new ones along the nuts and the tool for R&R. I think I have a tool that could work, but I'm not taking any chances, it's tight as hell there. And the tool was a reasonable $130.

My dad bought new shocks/struts all around 10 years ago, and they've done about 10000 kms, so they should be ok. But since the car's been so low, I was concerned about the stop buffers, fortunately they are ok.
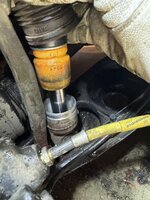


Then a short stint with the springs, I had forgotten about the LCA bushing, all of the other bushings/linkages are replaced by my dad, but these ones are a total disaster. Think of a sleeve of cookies left in a gym bag for two months... Crumble crumble. So I've ordered two new ones along the nuts and the tool for R&R. I think I have a tool that could work, but I'm not taking any chances, it's tight as hell there. And the tool was a reasonable $130.

My dad bought new shocks/struts all around 10 years ago, and they've done about 10000 kms, so they should be ok. But since the car's been so low, I was concerned about the stop buffers, fortunately they are ok.

Looks great! The outer wheel carrier support joint (where the LCA attaches) is often in bad shape. Search the forum for a HOW-TO article. Having the tool will be a big help. Be very careful when trying to push the new joint into the LCA, this is more challenging than you'd expect, and can result in tearing the rubber seal on the new joint.
Great to see the rear SLS shocks have good buffers, since those shocks are NLA now (and the buffer cannot be replaced separately, at least not as DIY.)

Great to see the rear SLS shocks have good buffers, since those shocks are NLA now (and the buffer cannot be replaced separately, at least not as DIY.)

Thanks to the How-to I found out about the tool, I've never done this job before.Looks great! The outer wheel carrier support joint (where the LCA attaches) is often in bad shape. Search the forum for a HOW-TO article. Having the tool will be a big help. Be very careful when trying to push the new joint into the LCA, this is more challenging than you'd expect, and can result in tearing the rubber seal on the new joint.
Great to see the rear SLS shocks have good buffers, since those shocks are NLA now (and the buffer cannot be replaced separately, at least not as DIY.)
I actually LOL:ed when I removed the inner screw and got the LCA loose, only to have it rock sideways while I heard the crunching noise.
This means a couple of days for parts to arrive, but I have the spring pads for the front coming in hopefully tomorrow, so I'll start on the front shortly.
Another day, another... doolar in the rabbit hole otherwise known as a hobby:
Removed the left LCA and cleaned it, some surface corrosion is to be expected. The inner bushing looked a bit iffy at first, but upon closer inspection it's deemed fine. The LCA will get a lick of paint just to protect it. Amazing how much muck there was in the troth for the spring. Happy to get it done properly, I'll do the same for the other side of course.


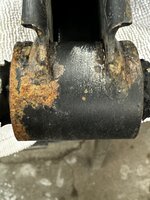
In the rear right wheel well there is corrosion, and it even worked its way through. I noticed that it had crept up behind the cladding, so I removed that. The rot in the wheel well will be temporary sorted, to protect the steel around it and basically freezing the damage. The surface corrosion on behind the cladding looks way worse on the picture than IRL, so that will just be rotored down to bare metal, then painted over. The other rear wheel well have some minor surface rust, to I rotored it away and painted it.
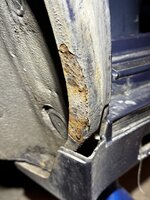

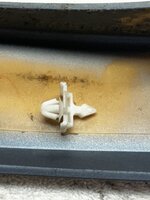
The clips needed for the cladding piece I already had in the parts bin, the lower one that's attached to the car broke, the others are fine, but I'll replace them anyway.

I also opened all four jack point covers to check on those, they are a notorious rust spot on W124's. They were good on my car, but after I flushed out all of the muck, stones etc from the plastic sill cover (the garage floor became like a gravel road...) I painted the jack points with Rustoleum. Forgot to take pictures of it though.
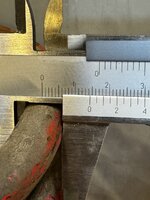
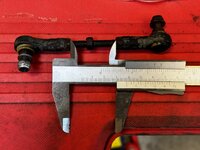
Finally I removed the SLS adjusting rod, wow that's not been serviced for a while. It will get a full cleaning and lubrication of the joints. Here it is before cleaning, I measured the length between the nuts to 37.5 mm:
Removed the left LCA and cleaned it, some surface corrosion is to be expected. The inner bushing looked a bit iffy at first, but upon closer inspection it's deemed fine. The LCA will get a lick of paint just to protect it. Amazing how much muck there was in the troth for the spring. Happy to get it done properly, I'll do the same for the other side of course.


In the rear right wheel well there is corrosion, and it even worked its way through. I noticed that it had crept up behind the cladding, so I removed that. The rot in the wheel well will be temporary sorted, to protect the steel around it and basically freezing the damage. The surface corrosion on behind the cladding looks way worse on the picture than IRL, so that will just be rotored down to bare metal, then painted over. The other rear wheel well have some minor surface rust, to I rotored it away and painted it.


The clips needed for the cladding piece I already had in the parts bin, the lower one that's attached to the car broke, the others are fine, but I'll replace them anyway.


I also opened all four jack point covers to check on those, they are a notorious rust spot on W124's. They were good on my car, but after I flushed out all of the muck, stones etc from the plastic sill cover (the garage floor became like a gravel road...) I painted the jack points with Rustoleum. Forgot to take pictures of it though.
Finally I removed the SLS adjusting rod, wow that's not been serviced for a while. It will get a full cleaning and lubrication of the joints. Here it is before cleaning, I measured the length between the nuts to 37.5 mm:

Keep an eye on the rust there. It will 100% come back until you cut it out and replace with good metal. Better do this sooner than later.
After painting everything I suggest you to spray this spots with cavity wax. It will help with keeping the moisture away from the metal.
After painting everything I suggest you to spray this spots with cavity wax. It will help with keeping the moisture away from the metal.
Yep - I will not wait long on that, I just can't deal with it right now, I have to get the car in good running order first. I don't weld myself, so I have to book it in for the work, and realistically it will be done in the fall of this year.Keep an eye on the rust there. It will 100% come back until you cut it out and replace with good metal. Better do this sooner than later.
After painting everything I suggest you to spray this spots with cavity wax. It will help with keeping the moisture away from the metal.
Today I didn't have to spend any more money! 
Removed the right hand side LCA to give it the same treatment as the left one, and the left LCA is ready to be installed:

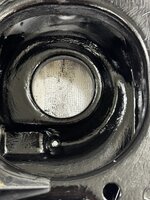
While under the car fitting the adjustment arm (which cleaned up nicely and it got the joints cleaned and lubricated too) for the SLS I noticed a faint fuel smell, so I removed the cover for the pumps and filter, and I'm very happy I did, the banjo screw on the lower pump had come loose a tiny bit. Snugged it back again, and waited for a while, shaking the whole assembly a bit to stress it, no leaks. Of course I cleaned up the mess on the cover too:


Collected the two front spring pads from Mercedes, $23 for both including VAT, not bad at all from the dealer!
Refitted the cladding on the wheel arch with new clips, snapped together nicely.
I also managed to straighten the rear lower bumper with the help of a heat gun and some persuasion. I will remove the bumper entirely at a later stage, I can see that it is not fitted 100%. I also found out that it is not the exhaust that deformed it, but my dad backing over a rock that tore it loose.
Finally I replaced four exhaust rubber hangers, two were missing and one was dry, and bent the rear exhaust heat shield back to the correct shape so it wouldn't foul the rear muffler. There are a stainless steel aftermarket exhaust on the car, so I found some generic grommets that fit well.
Removed the right hand side LCA to give it the same treatment as the left one, and the left LCA is ready to be installed:


While under the car fitting the adjustment arm (which cleaned up nicely and it got the joints cleaned and lubricated too) for the SLS I noticed a faint fuel smell, so I removed the cover for the pumps and filter, and I'm very happy I did, the banjo screw on the lower pump had come loose a tiny bit. Snugged it back again, and waited for a while, shaking the whole assembly a bit to stress it, no leaks. Of course I cleaned up the mess on the cover too:


Collected the two front spring pads from Mercedes, $23 for both including VAT, not bad at all from the dealer!
Refitted the cladding on the wheel arch with new clips, snapped together nicely.
I also managed to straighten the rear lower bumper with the help of a heat gun and some persuasion. I will remove the bumper entirely at a later stage, I can see that it is not fitted 100%. I also found out that it is not the exhaust that deformed it, but my dad backing over a rock that tore it loose.
Finally I replaced four exhaust rubber hangers, two were missing and one was dry, and bent the rear exhaust heat shield back to the correct shape so it wouldn't foul the rear muffler. There are a stainless steel aftermarket exhaust on the car, so I found some generic grommets that fit well.
Which chemicals do you use to stop or slow up further rust development?
I have used Ferro-Bet for years with great success, it is a rust inhibitor converting rust into another chemical state. Removable surface rust has to be done mechanically prior to applying the stuff. When the chemical process is done the surface has to be sealed with primer followed by coating.

I have also used Brunox which is a combo of rust converter and epoxy. Works fine but doesn't hold up forever.

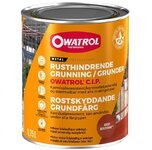
I guess Owatrol oil or inhibitor is still unbeatable for rust protection.
I have used Ferro-Bet for years with great success, it is a rust inhibitor converting rust into another chemical state. Removable surface rust has to be done mechanically prior to applying the stuff. When the chemical process is done the surface has to be sealed with primer followed by coating.

I have also used Brunox which is a combo of rust converter and epoxy. Works fine but doesn't hold up forever.

I guess Owatrol oil or inhibitor is still unbeatable for rust protection.

Last edited:
In this case I just remove the surface rust, slap on some chemical metal and two coats of Hammerite. Sacrilege? Maybe, but it will do its job until fall. It will stop water from entering the sill. And since its going to be cut out anyway, I don't care.Which chemicals do you use to stop or slow up further rust development?
I have used Ferro-Bet for years with great success, it is a rust inhibitor converting rust into another chemical state. Removable surface rust has to be done mechanically prior to applying the stuff. When the chemical process is done the surface has to be sealed with primer followed by coating.
View attachment 185606
I have also used Brunox which is a combo of rust converter and epoxy. Works fine but doesn't hold up forever.
View attachment 185607
I guess Owatrol oil or inhibitor is still unbeatable for rust protection.
View attachment 185608
I had forgot how much fun it is to r&r front springs. Even with the correct spring compressor tool it is the most scary job ever, there is A LOT of stored energy when compressed, and if the tool breaks it will be bad. But I got both springs replaced today. The red springs on the car have a little sticker on them which says "Made in Sweden" so maybe Lesjöfors then. I'll dig a bit deeper just for my curiosity.
Now I'm only waiting for the bushings and tool to arrive, everything else under the car is done. For now...
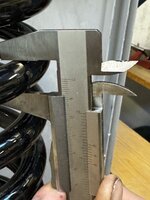
I have some comparison pictures of the front old lower springs and the new OE ones:


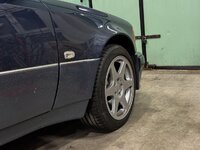
A wee bit higher immediately after being put on the ground, I think it'll be perfect once settled in:
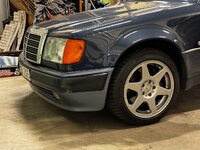
Now I'm only waiting for the bushings and tool to arrive, everything else under the car is done. For now...
I have some comparison pictures of the front old lower springs and the new OE ones:


A wee bit higher immediately after being put on the ground, I think it'll be perfect once settled in:


Attachments
The old ones are a lot softer, it was very noticeable when I had them compressed, and the new ones are a millimeter thicker as well, so I do believe it is going to be quite a large difference still. And the old springs sat on three dot pads while the new ones are on one dots, so in theory I've lowered the car if I only take the spring height into consideration.The new springs will sag a bit over the next weeks after installation, so most of those 10 mm will even out.
It'll be interesting to see what the difference in ride height it will be in the end, I have recorded the numbers of it all.
Started to renew a set of headlight washer motors today, I will do up one pair for my car to get some practice since I've never opened one of these before, then I will complete sets for @500AMM and @alibo70. I will only sell kits with restored motors, it's impossible to know what I'm selling otherwise.
Both of these two I started with, the shaft was stuck solid in the cylinder. Some WD40 did the trick, and there are no damage to the barrels or the shafts, just grime working its way in over the years.
I got to splitting the casing, removing all of the parts, cleaning out most of the old grease, then letting all parts sit in a degreaser bath to clean the rest of it off. I also tested the motor with 12v and it was strong. Next in line is to lubricate, reassemble and test.
Here's the left motor all cleaned up:


Nice work! There's a writeup on this forum somewhere with info about restoring these motors.
How did you separate the rear cover without breaking the slots on the main housing? I opened one of these years ago and IIRC multiple slots broke, despite being super careful...

How did you separate the rear cover without breaking the slots on the main housing? I opened one of these years ago and IIRC multiple slots broke, despite being super careful...

Looks really good, @doolar! I can recommend @simeon40 in case you end up refurbishing your headlight lenses - he's done a great job with mine!I decided to try to wrap the headlight plastic insert, it went quite well. Up close you can see the difference to a original one, but behind my sandblasted headlight lens it looks really good. Question is of course longevity!
View attachment 185698 View attachment 185699 View attachment 185700 View attachment 185701
Yea I've found that thread and are using the excellent restoration and testing description from itNice work! There's a writeup on this forum somewhere with info about restoring these motors.
There are three larger tabs, they are blocked from being pried open by a tiny little dentation. So I first cut that dentation with a razor blade, and the I can pry the rest of the tabs. Careful and a little at a time is the name of the game. I broke one slot before discovering the little dentation.How did you separate the rear cover without breaking the slots on the main housing? I opened one of these years ago and IIRC multiple slots broke, despite being super careful...
This is exactly why I want to do a set for myself first. And of course - if the plastic is really brittle it will break anyway. But there are a lot of tabs, and one or two broken is probably not the end of the world.
Thank you, yea I thought about sending them to him immediately, but decided to try this first, also because I've spent quite a lot already. It goes to show how true @gerryvz deferred maintenance is so true, this car being well known to me of course, and has had a lot done already of the obvious stuff.
But I will probably send both headlight lenses to him in the future, unless Mercedes makes new ones again.
Last edited:
And you did really good job. Even with removed lenses it's not easy to spot the edges on the film.but decided to try this first, also because I've spent quite a lot already. It goes to show how true @gerryvz deferred maintenance is so true, this car being well known to me of course, and has had a lot done already of the obvious stuff.
Today I learned how to service, reset and test the headlight wiper motors. I have made a "jig" consisting of two empty headlight housings, which means I can easily test the motors fully on my car. My plan was to do a set for my car to begin with, and yea I have probably opened them up ten times each testing so I understand the function and in what starting position all the gears needs to be in for the motor to work properly. Unfortunately it's not as easy as reassembling them as they were unless you absolutely know they've stopped in the parked position, and they probably didn't if they're seized up.
But I got the hang of it now, partly with the help of the excellent how-to here, although I couldn't get some of the test procedures to work as described, so I've tweaked them.
I now have a complete set working fully. They've been fully disassembled, cleaned and greased with silicone based grease from Würth that won't break down or be affected by water ingress, high or low temperatures etc. I remove the motor and test in with 12v to assess it's a strong motor, if not I either replace it or refurbish it.
Lastly I will test the motors as a pair on my car, making sure that they work perfectly, like the left motor you can see here from today (sorry my voice is toast from too many phone calls):
I have already promised @500AMM and @alibo70 one set each, I hope I haven't forgotten anybody else, if so drop me a PM. I will complete sets for you guys, and after that I will offer more sets depending on what I have available, and/or parts to forum members. I will happily restore your motors too if you want, just PM me.
Still waiting for the LCA outer bushings and tool, I hope they arrive soon so I can get the car together.


