• Hi Guest !

    Welcome to the 500Eboard forum.

    Since its founding in late 2008, 500Eboard has become the leading resource on the Internet for all things related to the Mercedes-Benz 500E and E500. In recent years, we have also expanded to include the 400E and E420 models, which are directly related to the 500E/E500.

    We invite you to browse and take advantage of the information and resources here on the site. If you find helpful information, please register for full membership, and you'll find even more resources available. Feel free to ask questions, and make liberal use of the "Search" function to find answers.

    We hope you will become an active contributor to the community!

    Sincerely,
    500Eboard Management

OWNER MercEdi (E420)

10/02/2024

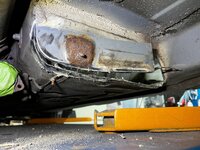
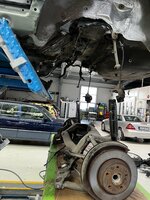
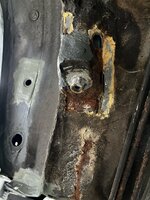
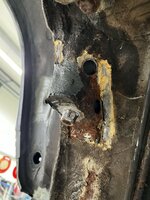
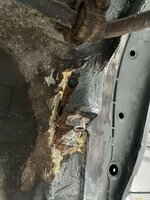
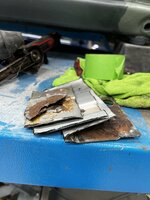
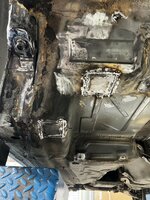
Now on to that section at the fuel pump cover. With that replacement sheet it was just a matter of cutting the rotten part out, using it as a template and welding the new sheet in.

IMG_5723.jpegIMG_5724.jpegIMG_5725.jpegIMG_5726.jpegIMG_5728.jpegIMG_5729.jpegIMG_5730.jpegIMG_5734.jpegIMG_5735.jpegIMG_5736.jpeg
 
10/26/2024

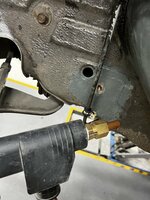
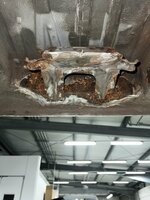
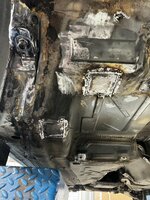
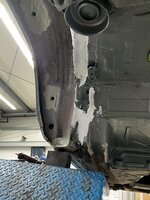
A stud welder is just the best thing ever. This would have been a lot more work without it… and i also found some more rust under the rear seats. This will be taken care of when the rear subframe is out too.

IMG_5820.jpegIMG_5821.jpegIMG_5822.jpegIMG_5845.jpeg
 
11/16/2024

My plan is to drop the rear subframe and replacing everything that comes with it during the christmas holidays. Right now i’m gathering all the parts and tools needed for that job.
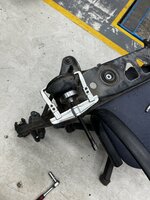
I dismantled the rear subframe as i sent it off to get sandblasted and powder coated. Got myself a special tool to pull the out the diff mounts. The problem here was that the diff mounts have a diameter of 12mm, the tools thread size is 14mm… i drilled out the diff mounts so i could fit the tool. I ordered a 12mm threaded rod when time comes to pull the new diff mounts in.

IMG_5872.jpegIMG_5889.jpegIMG_5890.jpegIMG_5891.jpegIMG_5892.jpegIMG_5893.jpegIMG_5894.jpegIMG_5896.jpegIMG_5906.jpegIMG_5907.jpegIMG_5913.jpeg

11/30/2024

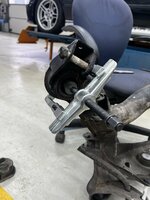
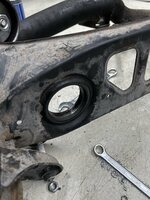
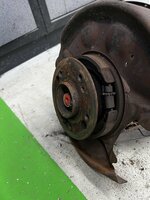
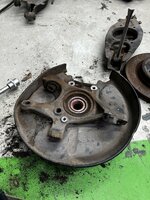
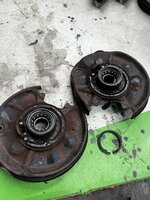
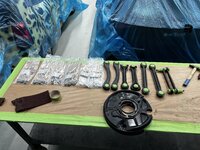
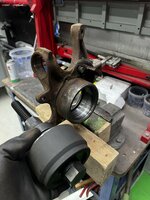
Disassembled the rest that came with the rear subframe. The special tool to extract the rear joints was a dream to work with. They came out really easily. Got an extra tool to pull out the wheel bearings. Real sturdy piece of hardware, the bearings had no chance against it.

IMG_5936.jpegIMG_5937.jpegIMG_5940.jpegIMG_5941.jpegIMG_5942.jpegIMG_5943.jpegIMG_5944.jpegIMG_5945.jpegIMG_5946.jpegIMG_5947.jpegIMG_5948.jpegIMG_5952.jpegIMG_5954.jpeg

At first i wanted to reuse the anchor plates, but one of them is a little bit bent and as aftermarket replacements are cheaply available, i went that route. For the wheel hubs i got some replacements on the way as well. They should probably be fine, but i tought that after taking it this far, new ones won‘t hurt. Now the wheel carriers are ready to get overhauled.
I‘m super excited to see all of these new/restored parts on the car, this will come out really nice i think!
 
Last edited:
At first i wanted to reuse the anchor plates, but one of them is a little bit bent and as aftermarket replacements are cheaply available, i went that route.
Are the anchor plates the "dust shield", p/n 210-420-14-44 and 210-420-15-44? These are still available new from the MB dealer, ~$60 USD each list price.

Amazing work... soooo much rust!

:buggin:
 
Are the anchor plates the "dust shield", p/n 210-420-14-44 and 210-420-15-44? These are still available new from the MB dealer, ~$60 USD each list price.

Amazing work... soooo much rust!

:buggin:
@gsxr Yes they are. I got the pair for 35€, so I decided to take a chance on them. They‘re Van Wezel 3029373 and 3029374.

Unfortunately the rust never seems to have an end:doh:
 
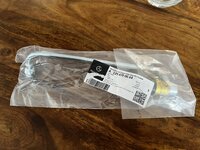
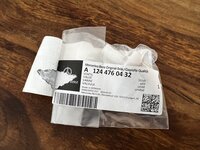
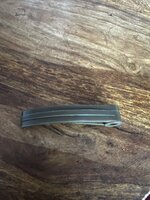
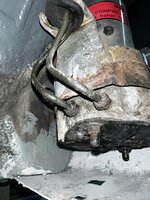
Picked up a few parts from the dealer today. Amongst them is the fuel like from fuel pump to fuel pump, one half of the fuel pump bracket. Seems to be the wrong one as it‘s got space for the pressure accumulator which the older models have. Either i’ll leave it like that or just cut that part away. The lower half of the bracket is NLA and has to be acquired somewhere else.
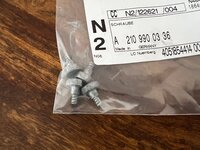
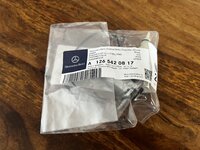
And some other bits and pieces like rear sway bar brackets.

IMG_5955.jpegIMG_5956.jpegIMG_5957.jpegIMG_5958.jpegIMG_5960.jpegIMG_5961.jpegIMG_5962.jpegIMG_5963.jpegIMG_5964.jpegIMG_5965.jpeg

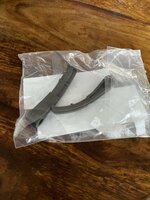
I also got an oil level sender for my parts stash. Another part that i ordered will arrive on wednesday, i‘m talking about the oil pump chain rail guide (PN: A116 181 10 59) which luckily is available again.

IMG_5956.jpeg
 
Last edited:
I also got an oil level sender for my parts stash. Another part that i orderee will arrive on wednesday, i‘m talking about the oil pump chain rail guide (PN: A116 181 10 59) which luckily is available again.
Wow! This is great news... and, hopefully is lower cost than the 3D-printed aftermarket replicas:


1733230277128.png

:wahoo:
 
Wow! This is great news... and, hopefully is lower cost than the 3D-printed aftermarket replicas:


View attachment 203195

:wahoo:
@gsxr I paid about 20€. Repro parts are priced around 100$, aren‘t they?
IMG_5971.jpeg
 
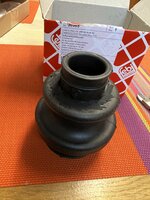
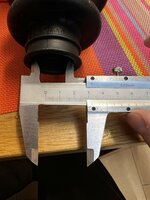
Also got the Febi 30965 axle shaft boots which seem to be OE with PN and star ground off. 32mm diameter for the ASR axle shafts. Production year indicates ‘23.

IMG_5973.jpegIMG_5974.jpeg
 
Wow! That sure seems to confirm your car did indeed come with the Sportline package from the factory.

I don't think I've ever seen an EPC data card error like this before, with multiple codes missing / added / changed.

@036? @Rouven036? @WDB748372?

:duck:

I hear your scream, Dave :detective:
Investigamos el fdoc. No hubo cambios, el coche salió de fábrica con estas opciones. Lo más probable es que algunos errores se cometieran más tarde en la tarjeta de datos.... Es todo muy misterioso.Pepita

Could you help me, please? I have an very early E420 built aprox may 1993 (how curious, it seems that the errors accumulated in first III series) and in which its equipment in last.vin does not coincide with reality. I don't have a data card.
The vin of my car is wdb1240341B993143.

My car is completely gray leather, but black fabric appears. It is a very strange car, it does not have illuminated sun visors for example.

Would it also be an error in the EPC? One hypothesis is that the car was a test car, or press car and then an order was placed and it was reconditioned at the factory. Could it be?

My car has EVERYTHING gray, upholstery, carpet, lower part of the dashboard, center console, tunnel, covers, tray...everything. Very strange that someone has changed the entire interior.
 
Last edited:
I´ll see what i can do...

Houston, we have a problem ))

No no, your car left the factory with black fabric 001A. What happened later.... well, you´ll have to ask previous owners.
BUT! What the heck is 864?? It can´t be a diesel engine from w140.....
We had a look at all 864 codes, makes also no sense...... 864 was used from 1.01.1978 to 31.12.2002.....

PS it was very funny to read my message in spanish :agree:
 

Attachments

  • 1.jpg
    1.jpg
    196.9 KB · Views: 9
  • 2.jpg
    2.jpg
    163 KB · Views: 9
  • 3.jpg
    3.jpg
    401.8 KB · Views: 8
  • 4.jpg
    4.jpg
    314.9 KB · Views: 9
Last edited:
No no, your car left the factory with black fabric 001A. What happened later.... well, you´ll have to ask previous owners.
Looks like someone "upgraded" the interior to leather, from another vehicle.


BUT! What the heck is 864?? It can´t be a diesel engine from w140.....
We had a look at all 864 codes, makes also no sense...... 864 was used from 1.01.1978 to 31.12.2002.....
Yup, this is an error in the code description. OM606 did not exist until around 1994. Clearly the description and/or date range is incorrect.

We've seen other codes/dates like this. Very, very difficult to obtain the original info from 30+ years ago.

:klink:
 
I´ll see what i can do...

Houston, we have a problem ))

No no, your car left the factory with black fabric 001A. What happened later.... well, you´ll have to ask previous owners.
BUT! What the heck is 864?? It can´t be a diesel engine from w140.....
We had a look at all 864 codes, makes also no sense...... 864 was used from 1.01.1978 to 31.12.2002.....

PS it was very funny to read my message in spanish :agree:
Sometimes I get messages in spanish, I'm glad you found it funny.

It's going to be difficult to ask the previous owners (no idea who they could have been), what seems strange to me is that:

1)Someone order an E420 with cloth seats, it being an extremely expensive car in Spain in 1993 and leather seats do not cost much more € proportionally.
2)Someone finds some w124 v8 seats (they come with different anchors), a very rare model here, and puts them together with all the rest (€€€€€) or orders them as a factory replacement (+++€€€€€ €)

Everything very strange or someone really capricious.

The code 864 thing is another mystery.

Furthermore, it does not have, as I said before, illuminated sunshades [sun visors] and no trace of electrical installation on them. The sun visors with light are standard equipment on all v8s. Perhaps because it was one of the first cars manufactured? Pre-series perhaps?
Best regards
 
Looks like someone "upgraded" the interior to leather, from another vehicle.


Yup, this is an error in the code description. OM606 did not exist until around 1994. Clearly the description and/or date range is incorrect.

We've seen other codes/dates like this. Very, very difficult to obtain the original info from 30+ years ago.

:klink:
How strange, 864 does not logically correspond to any old code.
 
Furthermore, it does not have, as I said before, illuminated sunshades and no trace of electrical installation on them. The sun visors with light are standard equipment on all v8s.
Have you verified the VIN number stamped on your chassis? Just curious. See photo below.


Perhaps because it was one of the first cars manufactured? Pre-series perhaps?
VIN WDB1240341B993143 is relatively late production, May 1993. Nowhere near the first 034's manufactured in late 1990 / early 1991.

Could be the wiring was damaged and/or removed when the complete interior was swapped.


1733924723774.jpeg
 
EPC only shows illuminated visors available for the 034 chassis. Would be interesting to find out if this is an EPC error or not.

:gsxrepc:
 
I had to check my price lists on this.

This one (01/1993) shows that the 400E had optional illuminated sunvisors.

IMG_6038.jpeg

This one (08/1994) shows the illuminated sunvisors being optional for the E420 as well.

IMG_6040.jpeg

Filled circle means optional, empty circle means free option, empty square means standard.

IMG_6039.jpeg
 
Have you verified the VIN number stamped on your chassis? Just curious. See photo below.


VIN WDB1240341B993143 is relatively late production, May 1993. Nowhere near the first 034's manufactured in late 1990 / early 1991.

Could be the wiring was damaged and/or removed when the complete interior was swapped.


View attachment 203580

No, I have not checked the VIN stamped on the chassis. I imagine that the photo corresponds to a vehicle for the US, because in Europe the VIN is on the front cross member next to the radiator

But if they had removed the wiring from the sunvisors, there would have been holes where it passed, right? But there is no trace.
 
I had to check my price lists on this.

This one (01/1993) shows that the 400E had optional illuminated sunvisors.

View attachment 203583

This one (08/1994) shows the illuminated sunvisors being optional for the E420 as well.

View attachment 203584

Filled circle means optional, empty circle means free option, empty square means standard.

View attachment 203585
Mystery solved. Illuminated sun visors were optional on E420. One less disappointment.

Thank you so much!!
 
No, I have not checked the VIN stamped on the chassis. I imagine that the photo corresponds to a vehicle for the US, because in Europe the VIN is on the front cross member next to the radiator
All chassis worldwide have the VIN stamped on the firewall, this is permanent and cannot be removed. The VIN on the removable plate by the radiator is a separate, removable item.


But if they had removed the wiring from the sunvisors, there would have been holes where it passed, right? But there is no trace.
Visors can be easily swapped. I thought you meant the wiring was missing to supply power to the visors. If the visors are not illuminated, the donor gray interior didn't have them.
 
Mystery solved. Illuminated sun visors were optional on E420. One less disappointment.
Sales brochures are not 100% accurate, just like the EPC is not 100% accurate.

To confirm we'd need some 034 VIN's with code 543 (illuminated visors) in the datacard, along with some 034 VIN's without this code.

:grouphug:
 
12/21/2024

So today was the kickoff on the rear subframe project. The removal went pretty smooth, the CV axle bolts were pretty seized, but they gave up eventually.

IMG_6093.jpegIMG_6097.jpegIMG_6096.jpegIMG_6108.jpegIMG_6110.jpegIMG_6111.jpeg

After further inspection of the rear subframe mounts i can thankfully say that welding them won‘t be necessary, it‘s only surface rust. I wonder how that‘s possible, considering the amount of other spots this car had, which were rusted through.

IMG_6112.jpegIMG_6113.jpegIMG_6115.jpegIMG_6116.jpeg

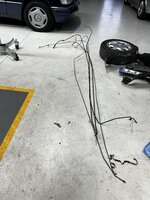
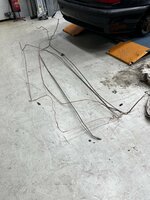
I also removed all the the hard lines, which will be remade with cunifer pipes. Also dropped the cats and drive shaft so the rust in the tunnel can also be cleaned up.

IMG_6125.jpegIMG_6128.jpegIMG_6131.jpeg
 
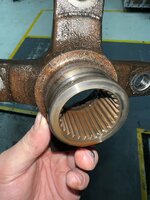
When removing the driveshaft, i noticed some play on the transmission side driveshaft flange (you can see it here). Did the nut come loose or what has happend here? Has anybody ever experienced this? The flange was also covered in some thing wet, which felt like coolant. It had no smell and color to it.
 
Only speculation here... could the nut have come slightly loose but still captive by the nut keeper allowing some wear to the splines to develop over time? I would guess the liquid is not related and may be coolant that has dripped from somewhere above.

Removal of the nut and flange should tell more. Maybe the play is normal for milage and only apparent due to the loose nut.
 
I pulled all 124.034 with and without code 543, it does seem to be an option.
WDB1240341C272473 w/o 543
WDB1240341C272121 w/ 543
Great info - thanks! Once again showing the EPC isn't infallible. :rugby:

Also, that second VIN above is drool-worthy. Midnight Blue over gray leather, full Sportline package with heated Sport seats, ASR, SLS, rear reading lamps, rear roller blind, tunk badge delete, IRCL, and sound system! Wow. Not many (if any?) options missing. It has auto climate control though, not manual. Wonder where that car is now.

:wahoo:
 
Only speculation here... could the nut have come slightly loose but still captive by the nut keeper allowing some wear to the splines to develop over time? I would guess the liquid is not related and may be coolant that has dripped from somewhere above.

Removal of the nut and flange should tell more. Maybe the play is normal for milage and only apparent due to the loose nut.
In the video it looks like the flange is loose on the splines. If so, that isn't normal. Need to remove the flange and see what's going on there.

:scratchchin:
 
Great info - thanks! Once again showing the EPC isn't infallible. :rugby:

Also, that second VIN above is drool-worthy. Midnight Blue over gray leather, full Sportline package with heated Sport seats, ASR, SLS, rear reading lamps, rear roller blind, tunk badge delete, IRCL, and sound system! Wow. Not many (if any?) options missing. It has auto climate control though, not manual. Wonder where that car is now.

:wahoo:
I had picked some random VIN! That does seem to have it all. It's hard to locate or find anything on a vehicle's whereabouts unless it's in the US. Maybe that's because I'm more familiar with resources for cars in the US but I rarely get any results from searching a non-North American VIN. I generally Google to find photos of interesting cars to then find its VIN.

For US cars I have a few spreadsheets of models where I filter through some of the notable options and find an interesting spec and research that car. I find that "digging" fun. Cars that may be one off colors or really nice specs that have lived a very short life.
 
I removed the flange to check the splines; they seem to be intact:

IMG_6138.jpegIMG_6139.jpegIMG_6145.jpeg

I tightened the nut with carefully dosed shots from my impact gun and the play is now gone. We‘ll see if that holds up.
 
12/22/2024

Todays progress consisted of lots of sandblasting and grinding down rust. Here are some before and after shots (including Owatrol oil treatment):

IMG_6150.jpegIMG_6161.jpeg
IMG_6151.jpegIMG_6162.jpeg

Also found a new rusthole near the passenger side subframe mount. Luckily the mount itsself isn‘t affected. All of the cutouts will be remade and welded in tomorrow.

IMG_6149.jpegIMG_6159.jpegIMG_6160.jpeg

And i haven‘t made my mind up on how i will treat this spot. I think the way to got is to cut out the bracket, remove all of the rust behind, sandblast the bracket and weld it back in.

IMG_6154.jpegIMG_6155.jpeg
 
This came out from my cats… it looks like they‘re done… i only noticed this because i moved them and heard some rattling inside them. On the exhaust side, they‘re looking fine (second photo), this came out of the manifold side…

IMG_6164.jpegIMG_6168.jpeg
 
12/23/2024

All the holes are welded up and most of the area is treated with epoxy primer.

IMG_6171.jpegIMG_6172.jpegIMG_6173.jpeg
IMG_6177.jpegIMG_6178.jpeg

This is how the wheel carriers are looking like after rust removal, epoxy primer and black paint. They look pretty neat, don‘t they?

IMG_6169.jpegIMG_6170.jpeg
 

Attachments

  • IMG_6174.jpeg
    IMG_6174.jpeg
    2 MB · Views: 13
12/25/2024

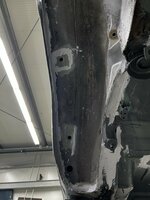
Sealed back up the spots were i ground off the old seam sealant and where i thought it could use some. Also removed the rust in the drive shaft tunnel. The rest of the tunnel will be done when the engine/gearbox are out at some point of time.

IMG_6185.jpegIMG_6186.jpegIMG_6187.jpegIMG_6189.jpegIMG_6214.jpegIMG_6213.jpeg

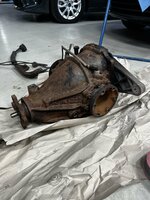
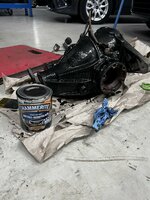
Then i removed all the loose rust from the differential. Didn‘t want to mess around with it too much. Then flooded it with Owatrol oil. When that dried out, i can apply epoxy primer with black paint. The cover with the fin tails i‘ll try my best to clean that up good.

IMG_6191.jpegIMG_6194.jpegIMG_6195.jpeg

After that i turned my attention to the axle shafts. I cut the boots and cleaned out the old grease by pumping diluent. I removed the inner cv joint and masked out the spots where i didn‘t want any grinding dust. After grinding down the shaft, i put on some good old epoxy primer. They‘ll be painted black tomorrow.


IMG_6199.jpegIMG_6200.jpegIMG_6201.jpegIMG_6203.jpegIMG_6205.jpegIMG_6208.jpegIMG_6209.jpegIMG_6215.jpeg

I decided to leave the muffler bracket alone for now. It can‘t be taken out in one piece easily as the upper side spot welds are near innaccessable. I soaked it with Owatrol oil and primed it.

IMG_6216.jpeg
 
Also tried removing the ASR pressure accumulator as i wanted to clean up the bracket and all the gunk in there but there is no way these screws will come loose. It‘s probably best to leave it alone… any suggestions here?
 

Attachments

  • IMG_6198.jpeg
    IMG_6198.jpeg
    1.9 MB · Views: 9
  • IMG_6190.jpeg
    IMG_6190.jpeg
    2.1 MB · Views: 9
And for the catalytic converters, i decided to go with this cheapo solution. The review states that it fits like crap, though it passed smog testing. Im willing to deal with the bad fitment at this price point. I looked into what alternatives there are which are TÜV approved, but there i‘m not seeing myself spending was above 2k€ for cats right now…

IMG_6217.png
 
Hi guys

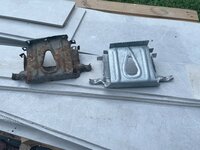
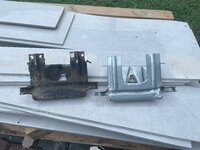
i had that rear muffler bracket decision to make on my car as well and i decided to go ahead and make the bracket from scratch. In the end it wasnt that hard. The worsk part is to make the actual hooks nice but for such a hidden detail im happy with what i made. Also after removing the old bracket there will be additional work on the rear bumper beam as in my case rust made herself comfortable there. If you wish i can share the A3 size template of the sheet metal that can be used to shape the bracket.

wieszak1.jpgwieszak2.jpg
 
Hi guys

i had that rear muffler bracket decision to make on my car as well and i decided to go ahead and make the bracket from scratch. In the end it wasnt that hard. The worsk part is to make the actual hooks nice but for such a hidden detail im happy with what i made. Also after removing the old bracket there will be additional work on the rear bumper beam as in my case rust made herself comfortable there. If you wish i can share the A3 size template of the sheet metal that can be used to shape the bracket.

View attachment 204106View attachment 204107
That is outstanding… i‘d never be able to make it so pretty… I‘d happily take the template!
 
@MercEdi,
First of all that’s a great job!! I’m not exactly sure how wide that hanger is but I’ve worked in metal stud construction for the last 30+ years and would think to make that job maybe a little easier you might be able to use a 14 gauge X 8” wide U shaped track to start with. It’s 8” wide with 2-1/2” legs. Track comes painted or galvanized in widths of 4”, 6”, 8”, 10”, & 12”+. Gauges start at 10, 12, 14, 16, 18, 20 & 25. Lighter gauge material is for non- structural work.

Anyway, it’s just a thought.

Merry Christmas!
 
12/26/2024

Sealed up the wheel arches as the primer that i applied yesterday dried out. I masked up all the areas that shouldn‘t get any stone chip protection.

IMG_6221.jpegIMG_6222.jpegIMG_6230.jpeg

While letting the sealant dry, i removed some more rust from the axle shafts. Also painted the differential with black Hammerite.

IMG_6227.jpegIMG_6228.jpegIMG_6229.jpeg

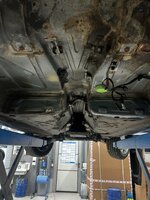
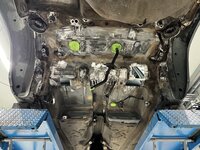
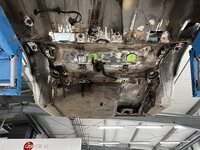
This is what the undercarriage looks like now. Came our really nice. Next thing will be painting it in 744. The inaccessible areas will be done when the car is back on its wheels.


IMG_6234.jpegIMG_6235.jpeg
 

Attachments

  • IMG_6225.jpeg
    IMG_6225.jpeg
    2.4 MB · Views: 9
Wow. Things are moving on. With the beginning of the new year i will start documenting my journey

Heres the PDF file with the bracket template. I used cheap bead roller to make all those reinforcing beads.
Amazing… i‘ll try to make one 1:1 some time. I have a bead roller at hand. Thank you so much!
 
12/27/2024

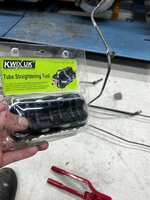
For remaking the fuel lines, i got this tube straightening tool and pipe bender. The latter left kinks in the pipes when bending them. I was aware of this cheapo bender problem aswell as that straightener thanks to @JC220 owners thread. So i filed down the area on the tool which left the kinks. After that, the tool worked perfectly fine. On the last photo, there’s a kinked pipe on the left and a good one made after filing on the right.

IMG_6238.jpegIMG_6239.jpegIMG_6243.jpegIMG_6244.jpegIMG_6245.jpeg

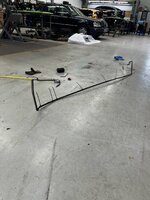
It took a few tries to get the hang of bending three dimensional, but in the end it worked out quite well. Also got the brake lines done, these i bent by hand as they aren‘t as hard as the fuel lines.

IMG_6247.jpegIMG_6248.jpegIMG_6249.jpegIMG_6253.jpegIMG_6257.jpegIMG_6259.jpeg

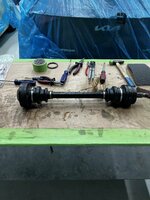
Also put an axle shaft back together. Used a cap for the inner joint from my unrusty axle shafts, which i got with that non rusty rear subframe.

IMG_6260.jpegIMG_6262.jpeg

Used the presence of my girlfriends brother to show me how to epoxy prime with a spray gun (he‘s an automotive painter). I wanted to have some extra rust protection on these parts as the factory coating is very lousy…

IMG_6255.jpegIMG_6256.jpegIMG_6263.jpeg
 
Last edited:

Who has viewed this thread (Total: 8) View details

Who has watched this thread (Total: 6) View details

Back
Top