• Hi Guest !

    Welcome to the 500Eboard forum.

    Since its founding in late 2008, 500Eboard has become the leading resource on the Internet for all things related to the Mercedes-Benz 500E and E500. In recent years, we have also expanded to include the 400E and E420 models, which are directly related to the 500E/E500.

    We invite you to browse and take advantage of the information and resources here on the site. If you find helpful information, please register for full membership, and you'll find even more resources available. Feel free to ask questions, and make liberal use of the "Search" function to find answers.

    We hope you will become an active contributor to the community!

    Sincerely,
    500Eboard Management

OWNER LWB250 (E420)

Tackled the brake booster this afternoon/evening. Thanks to @northNH for getting it to me promptly, greatly appreciated!

All in all, if I was rating this job from 1 to 5 with one being a cake walk and 5 being a total pig, I would probably give it a 3. It wasn't bad, but somewhat messy and not fun under the dash - but when is working under the dash fun?

Some observations that apply to not only the booster but also the master cylinder:
  1. Everything *will* come out of the space. Really.
  2. Expect a mess.
  3. Remove the brake master cylinder reservoir. You won't get the master cylinder out without doing this.
  4. Once the master cylinder is free of the booster, you have to rotate it 90 degrees to the right (if I recall correctly) once it's off the mounting studs to be able to move it forward far enough to clear the booster.
  5. You only need to take the nuts off the booster mounting on the inside at the 4 o'clock and 11 o'clock positions. The other two are for the bracket.
  6. Be careful not to break the brake light switch when removing the retaining clip on the clevis pin. I used the infamous instrument cluster hook tool. Not easy to do, but it worked. I'm amazed at how many uses I've found for these hooks since I broke down and bought a set.
  7. If you have ASR, be sure not to mix up the connectors between the ASR pump and the level switch on the master cylinder reservoir. They're identical.
Here's a picture of the retaining clip and pin that goes through the clevis:

1995 E420 05072020 - 1.jpg

And a close up of the clip:

1995 E420 05072020 - 2.jpg

Bled the brakes and fired up the car. Power brakes!!! Woo-hoo!! Noticed some brake lines that need replacement while I was doing this. Took the opportunity to hit the fittings with Kroil in anticipation of removal. Fun! Brakes were a little spongy but not bad. Probably still a little air in the system.

Took care of a few other items while I had time or was in the neighborhood:

Right rear jack point bumper/pad was missing. Replaced with a new one.

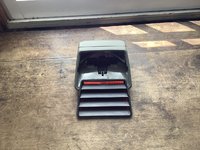
Anyone recognize this part?

1995 E420 05072020 - 3.jpg

Wait for it....

1995 E420 05072020 - 4.jpg

Yup, a clip for holding down the front of the air cleaner box. Most people don't even know these are missing.

Put a new O ring on the oil dipstick. Old one was rock hard and shattered when I tried to remove it.

Called it a night. Left the panel under the dash off as I've got to replace the ASR switch on the accelerator which I'll do this weekend. I got a load of hardware in today so I can put this on the car this weekend:

1995 E420 05072020 - 5.jpg

I'll probably replace the third brake light this weekend as well, and install a nicer rear headrest (also from @northNH) to replace the one that has a split from sun damage.

Dan
 
Last edited:
Do it! Don't break the white plastic fork clips. Also please report back if you still have all of the flower bolts.

@Jlaa - guess what I found in the bottom of the firewall area while I had the brake booster out?

Yup, one of those white clips. Figured, as I ordered a couple from my dealer. So now I have a spare... didn't find any of the flower bolts, though.

Dan
 
Dan, I'll put another package with a couple flower bolts in the mail to you, if you still need them.
 
I believe in the past it was pointed out that although dielectric grease partially insulates and somewhat protects connections from moisture and corrosion, it does NOT facilitate or increase electrical conductivity flowing between metal connectors or wires.
Some stuff made with bits of metal will do just that, just not dielectric grease.
 
Thanks, Gerry, I don't think that will be necessary. I'm pretty sure I have some here.

Dan
 
Got a few things done this afternoon after I finished up work.

1.) Replaced the fuse box cover with one that had both "legs" that it pivots on. Note the nice clean brake fluid in the reservoir. Old stuff was black.

1995 E420 050820202 - 1.jpg

2.) Put my PS reservoir cover in the ultrasonic cleaner to get the grunge off of it. Took a brass brush to it after that. Drained the reservoir and refilled with fresh MB PS fluid. A few more times and all the old stuff should be pretty well out of the system.

1995 E420 050820202 - 2.jpg

3.) Replaced the failed low coolant level float switch in the coolant reservoir. Old one came apart when I removed it.

1995 E420 050820202 - 3.jpg

4.) New coolant reservoir pressure cap. Coolant is the "evil green stuff" and will be drained and flushed tomorrow and replaced with the proper Mercedes coolant.

1995 E420 050820202 - 4.jpg

5.) Replaced the partially missing antenna grommet. At least the lower rubber piece that's still available. Why can't someone 3D print the top piece that's NLA?

1995 E420 050820202 - 5.jpg

6.) Installed the missing white "fork" clips on both sides of the cowl drains. One of these I found under the brake booster, the other I had in my parts order. Since I ordered two I've got a spare.

1995 E420 050820202 - 8.jpg 1995 E420 050820202 - 9.jpg

7.) Surveyed the third brake light. It's toast, but not the worst one I've ever seen. The replacement is black as only a few colors are left, but a few minutes with some interior plastic paint and it will look almost OE. I'll tackle that this weekend, too.

1995 E420 050820202 - 7.jpg

I was planning on putting the new belly pan on tonight, but when I realized I need to do a cooling system drain, flush, and refill there wasn't any reason to do it tonight as I would just have to take it off tomorrow. I'll replace the weird oil drain plug that's in the pan as well while I'm down there, too.

I still need to do the accelerator ASR switch as well, but I passed on that today to give my back a break. Working under the dash is not fun.

Dan
 
That PS reservoir cap is looking really good! How much of that is because of the ultrasonic cleaning, and how much of that is your brass brush? If you really look into what I'm typing, you can tell that I'm really asking "How can I justify buying such a tool?" :-) :-)

That 3rd brake light looks miserable. Jeez. Is that all from sun exposure? My 4th from the top black bar was slightly shiny (not matte like the other three bars) ... I attributed this perhaps to threshold-of-melting heat from the brake light bulb when previous owner(s) were stuck in traffic, so I just repainted that black bar ..... but jeez yours is disfigured!
 
Dan, you might want to check what antenna (and/or, antenna mast) is installed. What's showing in your photo isn't OE/OEM...

:run:

Looks original, has all the connections for the cell phone installation, too. I didn't completely remove it, just dropped the lower clamp bolt and lowered the assembly enough to get the old grommet out and new one in.

What should be in there? It appears to be a Hirschmann with the "ball" mast.

Dan
 
That PS reservoir cap is looking really good! How much of that is because of the ultrasonic cleaning, and how much of that is your brass brush? If you really look into what I'm typing, you can tell that I'm really asking "How can I justify buying such a tool?" :) :)

That 3rd brake light looks miserable. Jeez. Is that all from sun exposure? My 4th from the top black bar was slightly shiny (not matte like the other three bars) ... I attributed this perhaps to threshold-of-melting heat from the brake light bulb when previous owner(s) were stuck in traffic, so I just repainted that black bar ..... but jeez yours is disfigured!

Some of both. The top of the PS reservoir cap had some of the yellow looking Cosmoline sort of stuff (I presume that's what it is, I've seen it on these cars many times before) on it, which isn't hard to remove with gentle pressure. I was just sitting there looking at my ultrasonic cleaner while I had the cover off to drain PS fluid, and thought, "Why not drop the cover in there for a few cycles and see if it cleans up well?" So I did.

The ultrasonic cleaner softened the Cosmoline-like stuff and made the brass brush work far better than if I had gone after it dry.

My ultrasonic cleaner is a small one I snagged off of Facebook Marketplace a year ago for $20. I figured for that much I would risk trying it. I used it to clean fasteners for the Finnie restoration I did, and was amazed and how nice they came out. It won't hold much, but for small stuff like bolts, nuts and screws it works fine. I've got a pinball machine that's currently undergoing restoration and all of the playfield hardware has gone through it and now looks like new. The PS cover just happened to fit perfectly in the basket....

I know people who have larger capacity cleaners and they swear by them. I can understand why.

I've seen 3rd brake lights far worse than this one. Some from sun damage, others from the wrong bulbs melting them down. No matter what, I guarantee that anyone who attempts to remove the back cover on an original 3rd brake light will be unsuccessful and the remains of the cover will shatter into at least 20-30 pieces in the attempt. Even more likely if the car has lived any part of it's life south of the Mason-Dixon Line.

With this in mind I preemptively buy a replacement whenever I have a car with one of these. They're becoming rare and are no longer available in a number of the colors that were originally available, so I go with black, which is still available, and then get some Duplicolor interior paint and paint them. Already have a can on order at my local FLAPS for pickup tomorrow.

Dan
 
Looks original, has all the connections for the cell phone installation, too. I didn't completely remove it, just dropped the lower clamp bolt and lowered the assembly enough to get the old grommet out and new one in.

What should be in there? It appears to be a Hirschmann with the "ball" mast.
The tip of the mast is wrong... should be small-diameter, and black plastic. If the carpet is still removed, can you see a part number on the antenna? Is it the old style 1-pc unit, or the later style with removable electronic portion?
 
No matter what, I guarantee that anyone who attempts to remove the back cover on an original 3rd brake light will be unsuccessful and the remains of the cover will shatter into at least 20-30 pieces in the attempt. Even more likely if the car has lived any part of it's life south of the Mason-Dixon Line.

Gave it a shot, from north of the M-DL with fresh snow on the ground...
Success; ready for organ transplant donation.
 

Attachments

  • D8B1E0C8-573C-4802-AEEA-EA5A921B259B.jpeg
    D8B1E0C8-573C-4802-AEEA-EA5A921B259B.jpeg
    477.1 KB · Views: 22
  • 86190CB4-B1FE-4837-AF0D-D39636DC044E.jpeg
    86190CB4-B1FE-4837-AF0D-D39636DC044E.jpeg
    358.8 KB · Views: 20
  • 0791C85E-3741-4AC1-A0D1-029728D79420.jpeg
    0791C85E-3741-4AC1-A0D1-029728D79420.jpeg
    442.5 KB · Views: 19
  • 9139CCC9-CFE7-4724-A419-E13A0F2DA008.jpeg
    9139CCC9-CFE7-4724-A419-E13A0F2DA008.jpeg
    419.9 KB · Views: 22
Last edited:
The tip of the mast is wrong... should be small-diameter, and black plastic. If the carpet is still removed, can you see a part number on the antenna? Is it the old style 1-pc unit, or the later style with removable electronic portion?

One piece. You think maybe someone put the wrong mast on it?

Dan
 
One piece. You think maybe someone put the wrong mast on it?
It's possible. I hadn't thought about an early (pre-telephone) mast being used in a late antenna. I don't think that mast with the wide metal tip will fit properly inside the original threaded cap, so either the entire antenna was changed, or they replaced both the mast + cap together. Remember the pre-91 antennas also had ball-tops, with the wide mast, as seen in your photo.

:detective:

It's definitely set up for a phone, as all of the matching transformers and different coax cables are back there and connected. I might be able to get a picture of it later today after I'm done flushing the cooling system and getting the new belly pan installed.

Thanks! More as I know it.

Dan
 
Today I tackled the cooling system among other things, as I wanted to get the "evil green" coolant out of it as quickly as possible.

So I started by opening the coolant reservoir and the drain plug in the bottom of the radiator. Got lots and lots of that green stuff out.

1995 E420 05092020 - 1.jpg

I removed the top hose at the inlet fitting on the engine. As expected, the hose barb fitting was messy.

1995 E420 05092020 - 2.jpg

With some careful scraping and a brass brush, I was able to clean it up pretty well.

1995 E420 05092020 - 4.jpg

Ahh, much better. I did find some pitting in spots, but it wasn't bad. I've seen these that were far, far worse.

So while the cooling system is draining, I look at the washer reservoir. The liquid in this is really, really dark blue, not like anything I've seen before. Maybe winter washer fluid from Mercedes? Anyway, I didn't like the looks of it, so I carefully pulled one of the pumps up and out of the grommet that seals them to the reservoir and drained most of it out. I flushed it a number of times with clean water, which took a fair amount of grunge out with it, too. I also noticed that the windshield washer heater tube wasn't indexed properly in the dimple on the side of the reservoir. This is a common thing for this vintage Mercedes. Why? The grommets that seal the heater tubes to the washer cover dry out and in many cases just go away. I'll order a pair of these to replace the originals and the top cover will seal completely and the heater tube will fit into the dimple in the tank correctly. Refilled the reservoir with almost a gallon of Mercedes Summer windshield washer fluid.

1995 E420 05092020 - 3.jpg

Notice anything else amiss here? If not, look closely at the reservoir lid. It's missing the rubber O ring inside the lid. That's on the order sheet for the dealer, too. I'll probably order a whole new lid, since it probably comes with the seal anyway. They're not expensive.

I didn't go through documenting opening the block drains, as it would have been messy. Suffice to say I got them open and got "baptized" as expected in the process. Nice. I then flushed the block with clear water for several minutes to remove any vestiges of the green stuff. After doing so I moved on to other things while the engine drained.

I got a brand new belly pan ("sound attenuating panel") from Mercedes this week since by the time I paid to ship a used one that would probably have been marginal at best it just made sense to get a new one. This one had been sitting in New Jersey for some time, as it was pretty dusty. I got out my car wash bucket, some soap and a brush and had at it. Yeah, I know, it's going to be dirty and greasy in fairly short order, but it's just my thing, what can I say? After all, where do you think I got the "Mercedes Martha Stewart" moniker anyway??

1995 E420 05092020 - 8.jpg

There we go, nice and clean.

When I poke around on the bottom of any car, I'm always on the lookout for missing seals, drains and plugs. It amazes me how many of these go missing over the years, and no one ever bothers to replace them. They're terribly critical to the integrity of the chassis, and in some environments if they go missing can speed up corrosion and other nasty stuff. I always keep some on hand as they're pretty generic. Same with muffler O rings.

1995 E420 05092020 - 14.jpg

I had to replace a drain in one of the trunk side sections and one O ring on the muffler. It's important to check these drains, too, as they will get clogged with detritus over the years and prevent these areas, like the spare tire well, from draining if they get water in them.

With a recent move a lot of my Mercedes bits and bobs got commingled and tossed into common containers. I spent a little time going through all of my containers for parts as I came across a spare oil drain plug - I just bought one at the dealer for this car. Grr. So now I have another spare. But the best part was discovering some things I forgot I had, like this little gem:

1995 E420 05092020 - 5.jpg

Yes, it's what you think it is. An antenna grommet that's NLA. And no, it's not for sale. I wish I had a way to scan this so I could 3D print some. It will be going on the new rubber grommet that I installed on Friday.

So it's time to go below decks now that the engine has pretty well drained out and start buttoning things back up. While I'm down there I'm replacing the weird drain plug that's in the oil pan with a stock Mercedes drain plug and copper washer. Finally! I'll have a use for all of these copper rings I've accumulated over the years because I use an oil extractor and not the drain plug. So here's the old drain plug. Weird. Looks sort of generic.

1995 E420 05092020 - 6.jpg

Next I checked to make sure all of the captive nuts were in the chassis cutouts for the belly pan. Despite having a handful of these nuts in my parts stash, I didn't need any, they were all present and accounted for. Great! But - I did get to use a pile of the correct screws I had.

1995 E420 05092020 - 7.jpg

I closed up the drains and got the new pan in place and started to run the screws in. It took a little jockeying around to get them all in their respective places, but they made it. I had to pry the side panels out a bit to fit over the edges, but they cooperated. Sort of. The right side panel was pretty beat up, but that's probably because the sway bar bracket had been broken on that side, so no telling what sort of abuse it had taken. I'll probably need to go back and try and get it all straightened out at some point, but I'm calling it good for now.

1995 E420 05092020 - 13.jpg 1995 E420 05092020 - 12.jpg

I did notice that one of the "funnels" for the engine mount cooling tubes that goes behind the bumper is missing. Something else for Monday's parts order. No matter, the pan is now in place! Huzzah!

1995 E420 05092020 - 11.jpg

Drains are closed, hoses are reinstalled and coolant and distilled water assembled for filling.

1995 E420 05092020 - 9.jpg

Being that I live in Florida and may cars are garaged and not exposed to freezing temperatures, I typically go with a 50-50 throw for my coolant. I keep an old coolant bottle for premix on the shelf for topping off and a fresh bottle of "raw" coolant for make-up of premix. This makes it easy to mix things with some level of accuracy, although I know that the small amount of water left in the block can and will affect the ratio slightly. Not enough to make a difference, however. Mix it up and fill the system.

I put my 8 year old license plate on the car and tossed the documents I have for it on the front seat and went for a short ride. Wow! I didn't realize how much fun these cars are to drive compared to the "commodity" cars like my S210 wagon. I'm looking forward to getting this car titled and registered this coming Friday so it will be totally legal for road use around here. I've got to drive it to the registration office which will involve some highway driving, something I'm really looking forward to.

I found a few things I need to address while under the car today besides the items previously mentioned. The driver's shock doesn't have a boot. I'm going to have a closer look and see if I need some new bumpers for the shocks as well. Fronts have been replaced with Bilsteins, rear shocks are originals from what I can see. Looks like a steering damper is in order as well, which I sort of figured based on the steering feel. I'll pop one end off and check it to be sure. Nothing else noticed or amiss. Engine mounts are newer OE mounts, which is nice. I figured, as the engine really idles quietly and with almost no vibration.

Oh, I almost forgot!

I'm getting ready to head out on the road and notice that my brake lights are on without my foot on the pedal. Weird. Then I realize that I replaced the booster and didn't reset the brake light switch. So I pop down under the dash, release the tab and rotate, drop the switch and pull the plunger all the way out. Put it back, rotate until it clicks, then step on the brake and let it return. Click-click-click and the brake lights are good again.

Maybe some more tomorrow, we'll see. The other cars are grumbling a little, so I should probably do something with them. That being said, they've been around long enough to know the "treatment" that takes place when a new car arrives, as they've been there, too....

Dan
 

Attachments

  • 1995 E420 05092020 - 13.jpg
    1995 E420 05092020 - 13.jpg
    145.4 KB · Views: 28
Last edited:
Dan, what game are you restoring? I have done a few machines myself.

In high school I worked at a "arcade", which was viewed upon as a den of iniquity, of course, where I repaired and maintained pinball and arcade games. Later on I used to buy/sell/restore EM games years ago, like in the 1980s. Back then everyone wanted electronic games, so the electromechanical pinball machines were plentiful and cheap. I used to go to a regional auction the coin-op people would have every 2-3 months and bring home a U-Haul truck full of games. Clean them up, keep the ones I liked and sell the others. I usually held up until November and then would run ads in the local paper to sell them for Christmas.

I was keeping an eye out on PinSide for something in my area that was reasonably priced and needed some love. I ended up finding a Williams "Klondike" only a mile away from my house! Got ahold of the pinball parts guys in Poughkeepsie, NY to find that they still had my account information from decades ago. Amazing.

I have the playfield stripped down and am cleaning it a little at a time. I've got to go completely through the score wheels and steppers and it should be good to go. I had new artwork made by a local vinyl sign place to replace the aging artwork on the playfield "slot machine" wheels.

Williams Klondike - 1 (1).jpg

Not many of us around that can still read a ladder diagram that's six feet long...

Dan
 
Last edited:
I only owned and worked on 1 EM game in my time. I have more experience with the later games from the 90's. Still have 3 of them.
 
Fronts have been replaced with Bilsteins

Are you able to tell the part #of the front Bilstein struts? Sometime ago I've done a thorough search, only Sachs makes a 400E/420E-specific strut (115-069). Bilstein doesn't offer any (anymore, if it ever did)
 
Are you able to tell the part #of the front Bilstein struts? Sometime ago I've done a thorough search, only Sachs makes a 400E/420E-specific strut (115-069). Bilstein doesn't offer any (anymore, if it ever did)

It's a V36-0185 Bilstein.

1995 E420 05102020 - 1.jpg

Found a link to one here. What's interesting is that it's been replaced with a 22-001856, who's application list does not include the E420. I wonder what the deal is?

Interesting. Thanks for pointing this out!

Dan
 
I only owned and worked on 1 EM game in my time. I have more experience with the later games from the 90's. Still have 3 of them.

I'm an electromechanical guy all day long. I love working on these. Most people see a six foot long schematic and run away screaming as if their hair were on fire. That and the early electronic games were a real PITA to work on, now they're much easier and there are third party options for repairs. No such thing back in the day.

I had a couple of Gottlieb wedge heads in my house in Indiana, along with a Rowe CD jukebox I got for $100 and a shuffle alley I never restored.

Amusement devices - 1.jpg Amusement devices - 2.jpg Amusement devices - 3.jpg Amusement devices - 4.jpg Amusement devices - 5.jpg Amusement devices - 6.jpg

The guy who owned the CD jukebox said it didn't work and wouldn't load CDs. What he didn't realize was that if you put a bad CD in the rack and the machine tries to play it, when it gets a certain number of errors on a CD it locks out that position. He didn't know anything about them, just figured it was going bad. I got it home, did a master reset on it and all was well. Gotta love it!

Dan
 
Got a hold of the pinball parts guys in Poughkeepsie, NY to find that they still had my account information from decades ago. Amazing.
Dan

Last time I remember seeing a reference to Poughkeepsie, NY in any media, was in the movie "The French Connection".

Anyway, just trivia, but Poughkeepsie, (on the east bank of the Hudson River), is 5 miles from our house, we live near the west bank, and south of the Mid-Hudson Bridge.

I enjoy reading your narratives, this E420 seems to be a worthy car to sort out properly... good luck...O
 
Are you able to tell the part #of the front Bilstein struts? Sometime ago I've done a thorough search, only Sachs makes a 400E/420E-specific strut (115-069). Bilstein doesn't offer any (anymore, if it ever did)

So this mystery seems to deepen:

Going through Sachs application catalog, 115-069 is listed for the Sportline and .036. There's a 115-070 that's listed as well for W124 chassis cars, but the .034 is not in the list.

In other words, they really don't show an application for the 034. There's no front strut listed in their catalog, only rear shocks.

Hmm.

Dan
 
Last time I remember seeing a reference to Poughkeepsie, NY in any media, was in the movie "The French Connection".

Anyway, just trivia, but Poughkeepsie, (on the east bank of the Hudson River), is 5 miles from our house, we live near the west bank, and south of the Mid-Hudson Bridge.

I enjoy reading your narratives, this E420 seems to be a worthy car to sort out properly... good luck...O

Poughkeeps is the home of a pinball parts supplier that is probably one of the oldest in the nation. Steve Young's Pinball Resource has been around since the 1980s when I first started buying parts from him. He's still around, very much a bit of a Luddite, but definitely knows his stuff and has a lot of good NOS parts. He works strictly on the honor system. You send him an order, he sends parts, you send him a check. Good guy, still had my contact information from decades ago when I looked him up a few months ago.

Dan
 
The 'Target' pin looks to be a really fun game!

I love the Gottlieb wedge heads. They're not terribly popular because they're single player games, as the operators preferred multiplayer games for more revenue. Target Pool was a good one.

Dan
 
Last edited:
So this mystery seems to deepen:

Going through Sachs application catalog, 115-069 is listed for the Sportline and .036. There's a 115-070 that's listed as well for W124 chassis cars, but the .034 is not in the list.

In other words, they really don't show an application for the 034. There's no front strut listed in their catalog, only rear shocks.

Hmm.

Dan

That's correct. But if you search ZF parts catalog via MB part A1243206330, it'll bring up 115-069. No other Sachs part links to this part #. Apparently, all online stores that show 115-070 as a match from 400E are wrong. I just replaced 115-070 with a Mercedes unit A1243206330. A1243206330, by hand, compresses a lot more easily vs 115-070, which required a lot more effort. I think the logic across various forums was that, although 115-070 is for 300E/E320 Sprotline, because 400E/E420 has a heavier engine, it would act like "regular" 400E/E420 strut in such application.
 
Also keep in mind that *most* aftermarket mfr's (Bilstein, Sachs) only offered 2 or 3 different versions for the 124 chassis... Comfort, HD, and Sport (names may vary). Meanwhile, MB had a dozen or two unique part numbers with specific applications. Aftermarket catalogs may or may not show proper interchange/fitments, since they are trying to do a "one fits many" thing...

:3gears:
 
That's correct. But if you search ZF parts catalog via MB part A1243206330, it'll bring up 115-069. No other Sachs part links to this part #. Apparently, all online stores that show 115-070 as a match from 400E are wrong. I just replaced 115-070 with a Mercedes unit A1243206330. A1243206330, by hand, compresses a lot more easily vs 115-070, which required a lot more effort. I think the logic across various forums was that, although 115-070 is for 300E/E320 Sprotline, because 400E/E420 has a heavier engine, it would act like "regular" 400E/E420 strut in such application.

Thanks for that background.

I found equally odd application data for the rear shocks as well. It would appear that the 316-944 is the correct for the rear. Do you know if this is the case?

Using the Mercedes part numbers the Sachs equivalent is 1243202031 or 1243262800 both point to 316-944. However, I've noticed that some aftermarket suppliers list the 316-945 as the correct shock for the 034.

This is confusing...you can't really compare the two different shocks as they don't appear to provide any sort of useful specifications.

Dan
 
Last edited:
Xentry lists A1243262800 for rear dampers for 400E. Searching ZF catalog with this part number brings only 2 SKUs, and both are no longer available. So de jure, Sachs doesn't list any direct matches that are available. However, I've reverse-searched Xentry with A1243262800, and it loops back to multiple W124 models - like all/almost all of them - which means that rear dampers are identical across most/all W124, unless self-leveling set up. This should mean that any aftermarket "standard suspension" dampers that are good for 300E/E320 should be a match for 400E/E420.

Bilstein catalog lists 24-015189 as a match for 400E/E420, and the same part # for E300/E320

Sadly, the factory shocks aren't that much more expensive, but for some weird reason they don't include the mounting hardware so you have to pay $15-$20 more per shock to get the mounting hardware. That increases the price a bit overall.

Dan
 
Remember that @Klink has mentioned in the past (IIRC) that OE shocks & struts are one of the more over-replaced items on the 124. If not leaking, damaged, or fail a test when removed... they are probably fine. Bad part is you really need to remove them from the vehicle and cycle them through range of travel by hand.

:bananadeath:
 
On the upside, MB strut is pinched to a steering knuckle via a beefier M14 bolt that is torqued to 200Nm. Sachs 115-070 came with an M12, torqued at 110Nm. I don't know for sure, but assume there's got to be some benefit.
 
Minor tinkering today...

Noticed that there was a spot of oil on the ground under my new belly pan. Hmm.

Took off the pan and got another half turn or so out of the oil drain plug. Guess I didn't crank down on it hard enough when I installed the new one last weekend. It's been a long time since I've removed or installed a oil drain plug, didn't want to strip it.

Cleaned up my nice new pan and reinstalled it.

Checked to make sure all I needed from Drew's donor car was the "funnel" on the driver's side for the cooling tube for the engine mount. Yup, everything was there up to the funnel piece.

Went to the trunk to address the fussy antenna. From what I saw it appears I do have a replacement Hirschmann, as I don't think the original was the type with the external circuit board. I'm sure @gsxr will clarify this for me.

1995 420E 05122020 - 3.jpg

Popped the antenna out and opened up the circuit board section, which is easy enough to remove from the antenna assembly if you know how. Here's what I found:

1995 420E 05122020 - 5.jpg 1995 420E 05122020 - 6.jpg

Cleaned it up form what appeared to be water incursion from the top. The first power transistor and the blade connectors were pretty grungy. Looks like there's a diode and a surface mount device of some sort, probably a diode as well, on the back side of the board are both toast. I suspect the power transistor is bad as well.

The diode and power transistor probably wouldn't be difficult to source, but there's really no way to identify the surface mount device. Has anyone ever attempted to repair one of these? I've got a buddy who does SMD stuff who could replace the surface mount device, but I have no way of knowing what it is.

Everything else looked good. I didn't try powering the motor, but I'm betting it's fine. It's frustrating to know that for maybe $5 worth of components I could probably get this thing working reliably again...there is some sort of IC in the center of the board, but I'm betting it's OK.

Oh, well.

Buttoned everything up and put my NOS antenna grommet on. Fit perfectly. Now if I just had a reliably working antenna...

Checked the convenience locking feature tonight to make sure it worked. Dropped the windows, opened the sunroof, then turned the key in the lock and held it. Sure enough, the windows and sunroof all closed. Nice!

I've got to toss the DAS back on the car to see if the ASR switch on the accelerator is still throwing codes. If not, I'm not changing it. Then I can close up the kick panel below the instrument panel and everything will be back together.

Friday I get to drive to the tax collector to get my title, registration and plate. Looking forward to that. Maybe this weekend I'll take the headliner out to have it recovered...

Dan
 
Those SMDs look tough to replace. Can you just get another circuit board? K6jrf makes references to guys that know Hirschmanns :


Hirschmann Repair Parts Sources:

The following sources can either supply parts for the DIYer or fix the Hirschmann if you are not capable. Walter Odemer and Gary Guear can supply new parts for the DIYer. George Murphy may have some old parts laying around or offer a replacement power antenna for a reasonable price. Three great sources for repair parts.

* Walter Odemer odemer@sbcglobal.net. Direct phone #: 818 846-2819 for parts and masts. He also repairs them if you can't. He has parts and expertise for all Hirschmann antennas. I obtained the "Front", "Back" and small "Roller" gear.

* George Murphy of Performance Analysis Co. Check out PAC's web page here and their many unique products. Direct phone: 865-482-9175. He says why bother with fixing the OE antenna motor. He has NEW Hirschmann motors w/mast for $79 plus s/h. He was kind enough to send me a complete Front + Back + Clutch for my Auta 6000EL. His email: perfanalysis@comcast.com

* Gary Guear at GLG Direct. Phone: 770-781-5658. Email: glgdirect@comcast.net As of 1/11/17, it appears that his ebay operation has ceased.

* AntennaMastsRus at 920-686-0644 Web page shows here. They appear to have a full line of replacement masts to repair your Hirschmann antenna for reasonable prices. Also have hard-to-find upper and lower seals plus antenna tube parts.

Hirschmann Repair Parts in Europe:
Thanks to Graham in the UK, he has sent me a site that has repair parts for your Hirschmann. Check out the eBay site here.

Repair of the Hirschmann antenna is very straight-forward and almost "easy"! Parts can be purchased for $30 so considering that a new Hirschmann is apx $600, it's a very worthwhile repair.
 
Dang, I forgot about that old guy from my W140 days. Lots of good information from someone who clearly has a lot of time on their hands. I forgot about Odemer, too.

K6JRF is also referencing repairs of the older electromechanical Hirschmann, not the later electronically controlled one like mine. I'm not holding my breath on this one. We'll see, I reached out to Walter Odemer. Haven't communicated with them in years.

Thanks!

Dan
 
I have a bunch of the circuit board boxes that are dead. I'd love to know how to repair them! Are the transistors & diodes replaceable without major effort? Hopefully there would not be a need to replace the bitty stuff (surface mount?) on the back side.

BTW, Dan, I replied to your email. That antenna in your photo is likely original. Check for a date code on the plastic box which houses the circuit board. Oh, and you can manually run the antenna mechanism by applying ±12v to the 2 terminals... that will let you test the mechanical bits, and the motor. Still need a picture of the mast tip also.

:shocking:

Yeah, I saw your email. I'm in for the night, I'll get a picture of the mast in the morning long before you're up and send it.

I knew I could run the motor directly, but I didn't feel like dragging a power supply out at the time. I wasn't in "major repair/troubleshooting" mode this evening as work was a real b*tch today due to a major phishing attack we had yesterday.

I can replace the transistors and diodes no problem. I've got a buddy who is a retired USAF avionics guy who can do the SMD if necessary, but we would have to identify what it is, either a resistor or diode. From the looks of the board in my antenna, there's clearly thermal stress around the big diode and some corrosion around the one transistor. I'm guessing maybe something stuck "on" and just caused the diode to overheat from too much current. One terminal on the diode appears to have heated up enough to melt the solder at the pad. The board is conformally coated, but that's not an impediment to replacing parts on it.

All that junk to control a lousy intermittent duty fractional horsepower DC motor. Grossly over engineered.

Dan
 
Got the mast photo - thanks! It's original / stock for that antenna. You'll need to fully extend it and see if it's serviceable.

How can an overengineered board fail so frequently? Components running to close to their rated limits perhaps, without enough headroom? I wonder if Hirschmann didn't compensate for increased current draw from the motor as the lubricant dried up over many years, and the mast lacked lubrication.

:shocking:
 
Got the mast photo - thanks! It's original / stock for that antenna. You'll need to fully extend it and see if it's serviceable.

How can an overengineered board fail so frequently? Components running to close to their rated limits perhaps, without enough headroom? I wonder if Hirschmann didn't compensate for increased current draw from the motor as the lubricant dried up over many years, and the mast lacked lubrication.

That and the fact that the opening for the connector is on the top, where water will migrate into the case when the mast grommet fails. Never understood that one... :shock:

Dan
 
That and the fact that the opening for the connector is on the top, where water will migrate into the case when the mast grommet fails. Never understood that one... :shock:

Dan
I mean technically you bought a German car right? So the (wrong) assumption there is that the owner will ALWAYS be on top of ALL maintenance, early and often. The meticulous owner should be making "replace antenna mast grommet" a regular scheduled line item in his list of maintenance duties - preferably no less frequent than once every 2 years. 🤣
 
So the (wrong) assumption there is that the owner will ALWAYS be on top of ALL maintenance

Apparently, that is indeed the mindset. I've read multiple answers on Quora from Americans that worked in engineering with Germans/In Germany, that this is the German mentality. According to such a mentality, the fact that water destroyed your antenna board is YOUR fault, not engineer's 😁

Here is one example
 

Who has viewed this thread (Total: 2) View details

Who has watched this thread (Total: 1) View details

Back
Top