• Hi Guest !

    Welcome to the 500Eboard forum.

    Since its founding in late 2008, 500Eboard has become the leading resource on the Internet for all things related to the Mercedes-Benz 500E and E500. In recent years, we have also expanded to include the 400E and E420 models, which are directly related to the 500E/E500.

    We invite you to browse and take advantage of the information and resources here on the site. If you find helpful information, please register for full membership, and you'll find even more resources available. Feel free to ask questions, and make liberal use of the "Search" function to find answers.

    We hope you will become an active contributor to the community!

    Sincerely,
    500Eboard Management

OWNER a777fan (E420)

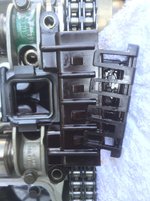
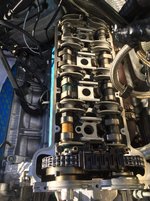
The upper / center chain rail guides look fine. However! They can look perfect, until you try to remove them... that's when you find out if they are OK or not. The plastic "fingers" should flex easily and allow removal intact. Usually what happens is, the fingers snap off because the plastic is fossilized. The fingered clips are cheap ($10 each or something?) and I would replace them while you're in there. Generally no need to replace the main plastic piece the fingers clip on to. Be careful, if the top fingers snap off, the 2 bottom fingers can break and fall into the engine... extraction can be a chore. It's probably difficult to see, but use a flashlight and eyeball the inner guides below the intake adjusters, make sure the tops & bottoms are still present.

Your engine looks unusually clean inside, btw. The PO's must have either used synthetic, or changed dino religiously. Given the complete lack of the typical brown varnish, I'm suspecting synthetic. Either way, that is a nice surprise!

:triumphant:

Thanks Dave, I think I have resigned myself to replacing them, even if that means waiting for more parts :/

And yes! I was really surprised by the cleanliness inside. The original PO did use synthetic right from the get-go, but there were quite a few years in the 00’s where I have no records. I guess they kept up the regimen! I’m pretty happy with the finding. :)


Sent from my iPhone using Tapatalk
 
My rebuilt ETA showed up today! Used Don at RFC electronics, and can’t say enough about him. Great service, quick turn around and good pricing.

He’s quite thorough with the rebuild as well, taking each one on a test drive before shipping it back.

proxy.php


proxy.php


Woot!


Sent from my iPhone using Tapatalk
 
Can you share the good pricing with us and what kind of warranty you got?

Sure Terry, I don’t think that would be breaking any rules. The rebuild was $279. Here is a snippet of our convo where Don talks about what is included:

“Good Morning,

We open up the unit to make sure there are no fatal flaws (cannot rebuild)

Then we began the clean up of the unit cosmetically

Remove /replace the damaged harness

Using the test stands, we check/repair/replace the following as needed:

Micro switches
Printed circuit board
Potentiometers
clutch mechanism
DC motor
All seven electrical circuits

After repair-- unit is mounted on a vehicle and taken for a test drive

All OK--unit is packaged carefully and shipped to customer”

Don also included a new OE ETA gasket, which I thought was a nice touch.

He works exclusively through ebay, handle ‘at-hiker1’, which i think makes things a bit more complicated, but not prohibitive. I reached out to him via ebay email, we talked about what I needed, and he then posted a specific auction with a buy-it-now price. I then shipped off the unit via USPS flat rate medium box. Shipped the unit on Saturday, it was back on my table friday. The rebuild comes with a 3 year warranty, although I do not have the specifics on what exactly that would cover.

Don also will sell you a refurbed unit outright if he happens to have one in stock. The price difference for my non-ASR eta was $100.

I don’t know if the prices are similar for you ASR guys, or if there is an upcharge. Don will respond very quickly to any queries!

Dan (LWB250 here) has also used his services.


Sent from my iPhone using Tapatalk
 
Ok. So after many attempts with the MB classic center, I am thinking about giving up on trying to source replacement zinc coated cap bolts for the intake re-assembly. All of the EPC PN seem to have been superseded by others which are different bolt types and even materials.

Anyhoo. Finding zinc coated metric thread cap bolts in small qtys is a bit tough. I went to my local fastener supply today, and while he didn’t have zinc coated, he did have stainless.

I’m a bit worried about galvanic corrosion, so did some research this morning that leads me to believe that I can use stainless fasteners into aluminum with little risk, as long as the stainless is not Martensitic 410 type. I have attached some info from fastenal for reference.

https://www.fastenal.com/content/feds/pdf/Article%20-%20Corrosion.pdf

Has anyone used stainless fasteners into an M119 head? Is so, any issues to report?

EDIT: here is another nerdy fun link about SS.

http://www.ssina.com/download_a_file/fasteners.pdf

EDIT 2:

This is turning into a fun little adventure. I didn't realize the torque specs for the manifold were so high! 28Nm from the intake to the heads, and then 25Nm between the top and bottom manifolds. Sheesh.

Unfortunately the A2-70 stainless bolts I picked up today aren't going to cut it. According to this website, in M8 form, which these bolts are, their max torque strength is only about 22Nm.

http://www.volksbolts.com/faq/basics.htm

The original fasteners in these locations are 8.8 grade, which has about 18% more tensile strength than A2-70 stainless. Its a bummer, cause these guys are beauties!
 
Last edited:
Testing out the spark plug wire resistances:


  1. 1.92 kohm
  2. 1.92 kohm
  3. 1.84 kohm
  4. 1.74 kohm
  5. 6.77 kohm
  6. 3.15 kohm
  7. 1.75 kohm
  8. 1.86 kohm

5 and 6 seem a bit high, no?
 
Do some research on stainless fasteners and galling... that would be my other concern. Anti-seize may help, but you'd need to reduce torque spec slightly, assuming you can get a torque wrench on all the fasteners (not possible on some in odd positions).

And yes, #5 and #6 plug boots (the orange plastic thingys) are out of spec. Normal is 2000 ohms, ±20% or so. You can deal with this later if you don't have time now, but eventually it would be prudent to replace all the orange boots (or possibly the entire wire set - which is a separate can of worms now that quality stuff is harder to locate.)

:shocking:
 
Thanks dave.

I’ve decided to clean up the existing bolts as best I can and re-use them. I will have to use one of the classic provided fasteners to replace the one mani bolt I stripped. Luckily that bolt actually looks reasonably similar to the ones that came out.

I’ll add plug wires to the list ... :/


Sent from my iPhone using Tapatalk

Put the new bolt where it will not stick out visibly.
 
mb torque spec for the ETA to manifold is twenty five NM??

That seems waaaay to high for the m-six bolts that are in there
 
mb torque spec for the ETA to manifold is twenty five NM?? That seems waaaay to high for the m-six bolts that are in there
I agree 100%. And, I think this might be an error in the FSM. From memory, pretty sure I torqued these to 10Nm, which is more common for an M6 bolt. Note that technically MB wants you to use new bolts with micro-encapsulated threadlock, but you could use either blue LocTite or probably anaerobic on the threads with good success.

:banana2:
 
I agree 100%. And, I think this might be an error in the FSM. From memory, pretty sure I torqued these to 10Nm, which is more common for an M6 bolt. Note that technically MB wants you to use new bolts with micro-encapsulated threadlock, but you could use either blue LocTite or probably anaerobic on the threads with good success.

Excellent. I’m glad I stopped when I did then. I ended up dabbing some RED threadlocker on there, since its the high temp stuff. Hope I don’t need a jackhammer to get them outta there if that time ever comes.


Sent from my iPhone using Tapatalk
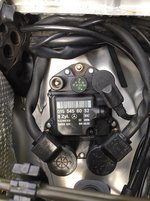
 
It was a pretty productive weekend out in the shop.

A quick recap:

Kept spreading out the thermal paste I already had on there (thx nocfn and jc220) and finally got full coverage

241.jpg

Installed in a cleaned out fender well

242.jpg

Then went about addressing the issues surrounding the replacement hardware from MB for the intake. Ended up just chasing all the threads from the existing hardware out and re-using it. All except the one bolt (and its twin from the other side) that i stripped out

Manifold to heads hardware cleaned up:

243.jpg

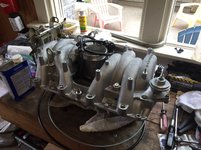
Then attacked the manifold re-assembly

244.jpg

245.jpg

246.jpg

247.jpg

248.jpg

I call this one ‘the tugboat’
249.jpg

The new bolt and its twin:
250.jpg

251.jpg

Eyelets back on:
252.jpg

And viola!
253.jpg

Throttle linkage in action:
[video=youtube;bkI6ZBz1CY4]

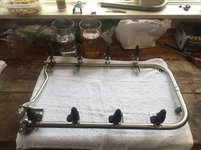
Injectors re-assembled and back in the fuel rail:

254.jpg

Still need a new pintle for 7:
255.jpg

Metal oiler tubes cleaned with new gaskets installed and read to go:
256.jpg

Managed to NOT break either side of the timing chain rails!!!

257.jpg

258.jpg

259.jpg

Completed pics:

260.jpg

261.jpg

Cleaned off the valve covers (no pics apparently).

Cleaned up the valve cover bolts and installed new copper crush washers:
262.jpg

Wrapped up the day by replacing the spark plugs. (Thx again gsxr!)
Deutschland goodness!
263.jpg

This is what WAS installed:
264.jpg

Resistor plugs!!!!! Odd I didn’t have any issues with them. (Or did i?)

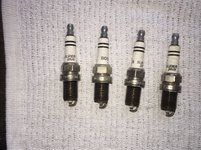
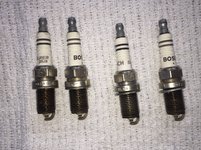
The old ones came out looking ok.

1-4
265.jpg

5-8
266.jpg

Updated the list:

  1. Re-install valve covers w/ new gaskets
  2. Replace all other vacuum lines and connections
  3. Install intake assembly w/ new intake mani gaskets
  4. Flush Block
  5. Replace broken pintle cap on injector #7.
  6. Re-install spark plug cable tray
  7. Investigate cam magnet leaking, re-install w/ anerobic and let dry
  8. Re-install ignition system components, insulators, rotors, caps etc, trim cover.
  9. Re-install spark plug wires
  10. Re-install fuel rail
  11. Install new thermostat 500eboard HOW-TO
  12. Install new coolant expansion tank and level sensor
  13. Install new cooling hoses
  14. Fill block & expansion tank with coolant per GSXR procedure
  15. Re-install engine upper wiring harness
  16. Re-install engine trim, airbox, intake tubes etc.


Sent from my iPhone using Tapatalk
 
Last edited by a moderator:
Just figured out that the spark plug wires are completely un-assembleable.

Took five and six apart to test out the resistor alone. Six passed, and then passed again when I reassembled it.. Approx one point seven six kilo ohms... Five did not. The resistor alone appears to be about seven kilo ohms.
 
Just figured out that you can completely unassembled the spark plug wires.

Took 5 and 6 apart to test out the resistor alone. 6 passed, and then passed again when I reassembled it..(approximately 1.76kohms) 5 did not. The resistor alone appears to be about 7 kohms.

I guess there might have been some gunk in the wire resistor connection on 5 that was removed when I disassembled?
 
Last edited:
Chased out the intake bolt holes in the head tonight.

proxy.php


Ran the tap in by hand at first then the rest of the way in and out with the socket. This is something I wanted to do since the bolts came out of the head looking so gross.

I also started to replace some of the vacuum lines tonight. Broke out some of the fiberglass heat insulation.

proxy.php


proxy.php


Its pretty nice stuff. I’ll probably end up having to recut that line, as its a little short on the engine side for the egr and intake connections.

Here is the product:

proxy.php


Amazon Link


Sent from my iPhone using Tapatalk
 
Pintle caps arrived today...

proxy.php


Really too bad you can’t just buy one! Let me know if you need any!


Sent from my iPhone using Tapatalk
 
A bit more progress tonight.

Gerry’s ‘guilt’ trip got the best of me, and I ordered new upper rails. Got them all installed.

proxy.php


proxy.php


This one acted like it almost KNEW gerry was talking about it!

proxy.php


Moved to installing the new pintle cap or ‘smurf hat’ as gsxr has coined! I really like that btw.

The new ones aren’t exactly stock. I had to drill out the injector port orifice, as the molded hole is too small.

All drilled out

proxy.php


Some dimensional comparisons between OE and ebay...

proxy.php


proxy.php


proxy.php


proxy.php


proxy.php


proxy.php


You can see that I had to bore the orifice out by about a mm. The cap is also taller, although it still locks into place on the injector properly. This means the oring gets compressed.

proxy.php


proxy.php


With the new cap, the o-ring has zero wiggle room.

Any thoughts on whether or not this is going to work? The overall jiggery nature has me feeling less than enthused.

Added the thermal wrap to the manifold vaccuum lines.

proxy.php


proxy.php


Hopefully that helps the durability a bit.

Replaced the drivers side vacuum line and couplings on the transmission which was quite easy. Then removed the line from the ‘bowden box’ on the right hand side. Man that one will be tough to re-install in the tight quarters. Any tips are mucho appreciated as usual.


Sent from my iPhone using Tapatalk
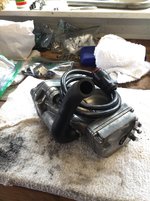
 
Last edited:
Finished up the vacuum lines tonight. The passenger side line on the transmission went a lot smoother than I thought it would.

Removed the exhaust cross member for a little more room.

proxy.php


Got myself a pair of these, which helped immensely.

proxy.php


After a bit of fiddling, got it back into place.

proxy.php


Used the ole lung mittivac to make sure the connector was seated properly. Was able to use the fiberglass shielding along the whole length, and tie it in through the false firewall.

Replaced the last two remaining connectors that popped in from the classic center today:

proxy.php


proxy.php


proxy.php


proxy.php


The new tri-splitter became all stressed out when installing, but it seals much much better than the old one.

I think at this point the only remaining original vacuum items are the connectors on the back end of the tri-splitter.

I’ll have to consult my list, but I think I can move on to re-installing components tomorrow!
 
I haven't read through the last pages properly, so maybe you're on top of this already, but in short there's two injector seal o-ring diameters for our cars, make sure you get the correct one's unless you already did - see my post here:

https://www.500eboard.com/forums/showthread.php?t=4825&page=4&p=151284&viewfull=1#post151284

Beautiful work!


Thanks! I ordered the O-rings from MB based on EPC, so I hope they are correct :)

Where did you source those pintle caps? In above posts you can see the struggle I have had with mine.
 
Does anyone know if the boot on the tranny control cable is available separately? The number on it isn’t pulling anything up...

proxy.php


proxy.php


Sent from my iPhone using Tapatalk
 
Hey a helpful tool is a very long locking hemostat from medical supply. Applies a firm grip without crushing a vacuum hose, saved my bacon on many occasions. Its curved and hets down i to tricky places.
 
  1. Re-install valve covers w/ new gaskets
  2. Replace all other vacuum lines and connections
  3. Install intake assembly w/ new intake mani gaskets
  4. Replace broken pintle cap on injector #7.
  5. Re-install spark plug cable tray
  6. Investigate cam magnet leaking, re-install w/ anerobic and let dry
  7. Re-install spark plug wires
  8. Re-install fuel rail
  9. Install power steering hose and reservoir
  10. Flush Block
  11. Install new thermostat 500eboard HOW-TO
  12. Re-install ignition system components, insulators, rotors, caps etc, trim cover.
  13. Install new coolant expansion tank and level sensor
  14. Install new cooling hoses
  15. Fill block & expansion tank with coolant per GSXR procedure
  16. Re-install engine upper wiring harness
  17. Re-install engine trim, airbox, intake tubes etc.
 
Last edited:
Thanks! I ordered the O-rings from MB based on EPC, so I hope they are correct :)

Where did you source those pintle caps? In above posts you can see the struggle I have had with mine.

The link is in that very post, from the UK. I’m not 100% sure that the pintle caps I got was the exact copy of the original ones, but no drilling was needed. But the ones I got from Mrinjector had a really clicky and nice fit, way better than the ones I got from Ebay US.

If you ordered the o-rings from MB I’m sure they are the correct ones. But if you really struggle to fit them, they might be the wrong diameter. But trust me, you will know... :)
 
Does anyone know if the boot on the tranny control cable is available separately? The number on it isn’t pulling anything up...
No, the boot is not available separately; or at least I've never found a source for it. The number shown is the OEM (Woco) number, not an MB number.

You can leave it as-is, won't hurt anything... my daily-driver 400E has the boot completely gone, been that way since I got the car. Replacing the entire cable assembly is NOT fun with the transmission in the car, especially if you don't have access to a lift to get the car in the air. When you get around to pulling the transmission so you can scrub it with a toothbrush, that would be the time to replace the cable.

:jono:
 
Got to spend the afternoon MB-ing, and made a lot of progress.

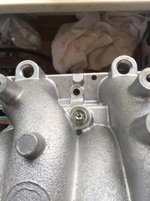
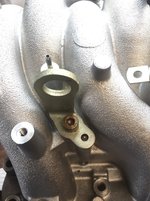
Started off by cleaning up one of the edges of the intake manifold which seemed like the result of a manufacturing oversight.

15.jpg

16.jpg

17.jpg

Put the intake gaskets in

18.jpg

Dropped the manifold in, and spend the rest of the afternoon installing the PCV tubing, connecting the vacuum lines, the throttle and tranny control cable, the spark plug wire tray, the spark plug wires, etc. Its pretty amazing how well everything just snaps back together, and seems like it belongs there.

19.jpg

20.jpg

21.jpg

Installed the cam magnets, and put the distributor plastic shields in place, but have not bolted them down yet.

Installed the spark plug wire covers and finished for the evening with it looking like this:

22.jpg

23.jpg


Sent from my iPhone using Tapatalk
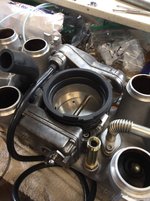
 
Got everything buttoned up today.

Turned the key to 'Run' and let it sit for 90 seconds while the ETA adapted. Heard some clunks and figured I was ready to go.

Used the ole' Klink method of disconnecting the CPS from the EZL, and cranked it over until the oil gauge pegged to 3. (Took longer than I would have expected!). Reconnected the CPS at the EZL, and cranked it over again. It took a little longer than usual, but it finally caught and fired up! It idled high (~1400) even after the air pump kicked off. Ran nice and smooth though! I figured I would let it warm up a bit (since I was also attempting to bleed the cooling system) Let it idle like that, and kept an eye on the coolant temp. Got to almost 60, and I was tired of the high idle, so I shut it down.

Poked around with the linkage for a bit, and thought I might not have it adjusted onto the idle stop. Went to fire it up again, and NO DICE. Crank crank crank, occasional backfire, crank crank crank... :wtf:

Poked around a bit in previous posts, which seemed to implicate the CPS. I checked the resistance and it was around 920. Higher than the numbers I have seen (800-850), but still seemed in the ballpark. Additionally, it seems odd that it would work, then not work, almost instantaneously. To be clear, I turned the car off after it started, it did not die. Now it just refuses to start.

I have a breakout box, but no blink light at the moment, so I can't read the codes. It's been a long weekend of working on this thing, so I am a little frustrated at the moment. Thoughts on next steps appreciated!
 
Sudden death of the CKP (crank sensor) seems unlikely, and you are correct that ±900 ohms is in the ballpark. The high idle may be due to adjustment of the throttle linkages, but shouldn't prevent a re-start.

Cranking with occasional backfire sounds like an ignition issue - pull caps / rotors and inspect for weirdness.

Checking codes would be next on the list, although there may not be anything useful, especially if the codes were not cleared prior to the recent work (you'd just see code diarrhea from the previous several years, useless stuff sending you down bunny trails).

Did you try to start it again after it cooled overnight?

:klink:
 
Sudden death of the CKP (crank sensor)seems unlikely, and you are correct that ±900 ohms is in the ballpark. The high idle may be due to adjustment of the throttle linkages, but shouldn't prevent a re-start.

Cranking with occasional backfire sounds like an ignition issue - pull caps / rotors and inspect for weirdness.

Checking codes would be next on the list, although there may not be anything useful, especially if the codes were not cleared prior to the recent work (you'd just see code diarrhea from the previous several years, useless stuff sending you down bunny trails).

Did you try to start it again after it cooled overnight?

Dave,

No I have not yet attempted a re-start. I will today after work. I was too close to pushing it off a cliff last night to try again. (Completely irrational, but ya know how it goes sometimes!)

I ran across this thread, which has very similar descriptions. (It diverges into an SDS/CarSoft/Scanner thread for a bit, but then circles back with a solution at the end)

https://www.500eboard.com/forums/showthread.php?t=3079&page=2

Perhaps i broke my new EZL vacuum line while installing all the other accessories and routing it? I'll have to see tonight. That would be quite the pain in the rear!
 
The new vac lines are very hard to break (try it!). And, the vac line wouldn't prevent the car from starting... although it could affect idle speed.

I'm still suspicious about the ignition system, due to the backfiring. Remind me again, are the caps / rotors new, and what brand?

:scratchchin:
 
The new vac lines are very hard to break (try it!). And, the vac line wouldn't prevent the car from starting... although it could affect idle speed.

I'm still suspicious about the ignition system, due to the backfiring. Remind me again, are the caps / rotors new, and what brand?

:scratchchin:

I completely agree with your ignition theory, given the backfiring. I just don't know enough about the EZL to know how it plays into the overall system operation. You're notes on that are a big help!

On the ignition components themselves...

Insulators - old, installed clean and dry
Rotors - new, OE replacements (driver and passenger) from the classic center (stripped out one of the bolts on the old passenger side rotor removing it)
Caps - old. Drivers side has a crack at the top most bolt attach point, but it does not go all the way through. Plus it was present prior to the 'rebuild'

What is the easiest way to confirm spark? Pull a plug, ground it and crank the engine over?
 
Stupid question, but... how old are your fuel pumps? Those things seem to just... time out.

For over 3 years, I had a random and inconsistent crank but no start condition on my S55. Threw a CPS at it for kicks as a known failure, no dice. Then one day, I was driving it and if I went too deep into the throttle, it would sputter and backfire. Slow-rolled to my guy who immediately hooked up a fuel pressure gage and told me to try to start the car... Confirmed no pressure. New fuel pump and filter, no more problems.

So if you have a pressure gage, I'd go there next, then fuel pump / relay.

Good luck,

maw

Hey maw!

Both fuel pumps were replaced by the previous owner with OE. I can't remember the exact date, but the PO put less than 20k on the car, so they aren't that old.

Plus with the backfiring, I'm pretty sure it's getting fuel.

I just ran across Christian_K's freak engine meltdown thread. Yipes! :o

No extended cranking for me!! Was there ever a conclusion to that nightmare posted after the teardown or anything?
 
The car fired right up when I got home, and I was able to confirm that the throttle linkage is mis-adjusted :doh:

I guess that is the good news.

The bad news is that it still doesn’t want to start when its hot. Its very very odd. It doesn’t stall. I got it up to 80 deg today where it stabilized (thanks to the new thermostat :)). Its only after I shut the car off that it doesn’t want to start again!

While it was running, I did a little poking around on the various vacuum lines. When i was fiddling with the one at the EZL, I could get the engine to stumble a little bit, which I thought was odd. It also seemed to stumble a little bit on its own here and there while it was just idling.

Once it was off and wouldn’t restart, i pulled the EZL vacuum line off and tried to re-start. No change.

I also cleaned up the positive battery cable and terminal, just in case the LH wasn’t getting the juice it needed once it was warm. No change.

I have a blink code reader on its way, so I’ll be slightly empowered in a few days. Any other obvious tips to try in the meantime?

Oh, I managed to drop one of the throttle linkages down under the intake while I was attempting to adjust it, so it looks like that will have to come out again. :doubledoh:


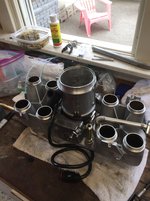
Here are the new rotors, which differ in the coil contact from the old ones...

Are these correct?


Sent from my iPhone using Tapatalk
 

Attachments

  • 37.jpg
    37.jpg
    567.1 KB · Views: 8
  • 36.jpg
    36.jpg
    431.8 KB · Views: 9
Last edited by a moderator:

Who has viewed this thread (Total: 1) View details

Who has watched this thread (Total: 5) View details

Back
Top